What Projects Are Good for a Beginner with a Miter Saw?

Simple projects are good for a beginner with a miter saw, focusing on straight cuts and basic angles. You’ll want to start with things like picture frames, small shelves, or basic wooden boxes. These projects help you get comfortable with the tool’s operation and safety features without complex joinery.
Getting started with a miter saw can feel a bit daunting, but it doesn’t have to be. We found that To ensure you have the right equipment, consider exploring options for the best miter saw for beginners.practicing on straightforward tasks builds confidence quickly. Think about projects that require precise, repeatable cuts. You’ll learn essential skills like measuring accurately and setting angles correctly.
- Start with basic, straight cuts.
- Picture frames are a great first project.
- Small shelves teach accurate measuring.
- Simple boxes help with angle settings.
- Focus on safety and tool familiarity.
Let’s walk through some excellent beginner miter saw projects that will have you cutting like a pro in no time.
Getting Started with Beginner Miter Saw Projects
Starting with a miter saw opens up a world of DIY possibilities. You’ll want to pick projects that build your skills without overwhelming you. Simple, repeatable cuts are your best friend here.
Building Confidence with Simple Cuts
Your first few projects should focus on getting comfortable with the saw. Think about projects that use mostly straight cuts or basic 45-degree angles. This helps you master the tool’s operation.
Practice Cuts and Scrap Wood
Before you even start a project, make some practice cuts. Use scrap wood to get a feel for the saw’s power and precision. This helps you understand how the blade interacts with different wood types (Woodworking Network).
- Set up your saw in a clear, safe area.
- Always wear safety glasses.
- Practice pushing the saw through the wood smoothly.
- Listen to the saw’s motor; don’t force it.
- Try a few 90-degree and 45-degree cuts.
Picture Frames: Your First Miter Saw Project
Picture frames are often recommended as a great starting point. They require precise 45-degree angle cuts, which are fundamental to miter saw use. You’ll quickly learn about accuracy.
You’ll need four pieces of wood, each cut at a 45-degree angle. When joined, they form a perfect 90-degree corner. This project teaches you to measure twice and cut once.
Small Shelves: Mastering Length and Repeatability
Small shelves are another excellent project. They usually involve straightforward 90-degree cuts. The challenge is cutting multiple pieces to the exact same length. This is where your miter saw shines.
You might build a simple floating shelf or a small bookshelf. We found that setting up a stop block on your saw helps ensure identical cuts. This is a very useful technique for any woodworking project.
Basic Wooden Boxes: Angles and Assembly
Once you’re comfortable with straight cuts, try a basic wooden box. This project builds on your frame-making skills. You can make a simple storage box or even a planter.
Boxes can use either 90-degree butt joints or 45-degree miter joints. Using miter joints will give the box a cleaner look. You’ll learn about squaring up your assembly, which is a core skill.
Expanding Your Miter Saw Skills
As your confidence grows, you can move on to slightly more complex tasks. These projects still focus on basic cuts but might involve more pieces or a bit more planning.
Simple Planter Boxes
A planter box is a fantastic project. It’s essentially an open-top box, but often a bit larger. You can practice cutting multiple identical pieces for the sides and bottom. You’ll also think about drainage holes.
This project is very forgiving. Minor imperfections won’t ruin the functionality. We found that making these teaches you about assembling larger components effectively.
Garden Bench or Stool
A simple garden bench or stool uses mostly 90-degree cuts. You’ll cut legs, stretchers, and top pieces. This project introduces you to cutting thicker lumber, which can feel different on the saw.
Many experts say that working with larger pieces helps you develop better control. You’ll learn to manage the material as you cut (This Old House).
Pet Food Stands
A raised pet food stand is a practical and rewarding project. It typically involves a top, bottom, and four side pieces. You might even add some decorative trim, which uses more precise angle cuts.
This project allows for creativity while still relying on fundamental miter saw techniques. You can customize the height and size for your pet.
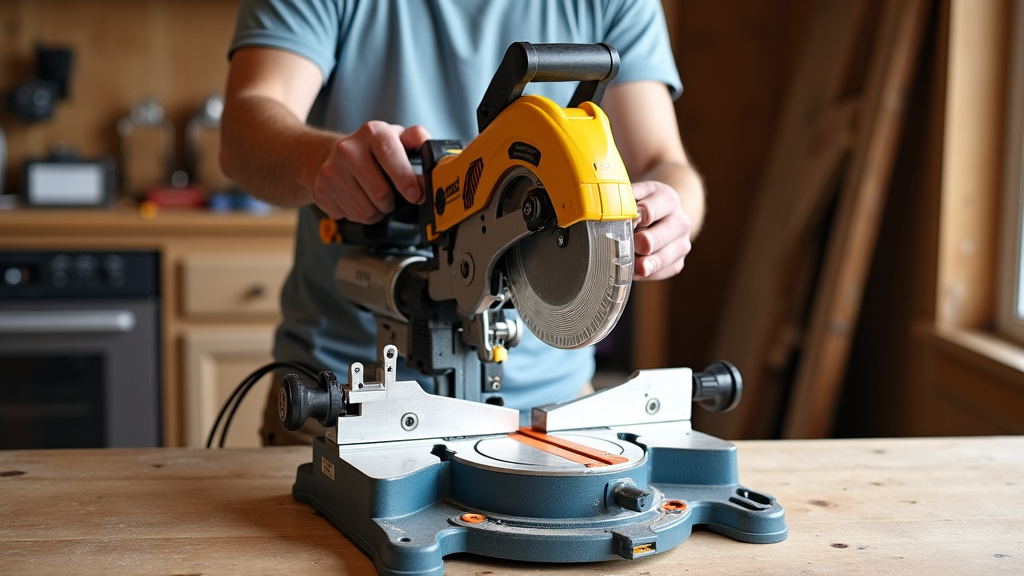
Safety First: Your Miter Saw Checklist
No matter how simple the project, safety should always be your top priority. A miter saw is a powerful tool, and respecting it is key to successful, injury-free woodworking.
Before every cut, take a moment to review your setup. Are you rushed? Are you distracted? We found that a quick mental check can prevent mistakes.
| Safety Check Item | Why It Matters |
|---|---|
| Eye Protection | Prevents sawdust and debris from entering eyes. |
| Hearing Protection | Protects against loud noise damage. |
| Clear Work Area | Avoids tripping hazards and allows free movement. |
| Wood is Clamped Securely | Prevents kickback and ensures accurate cuts. |
| Hands Away From Blade Path | The most critical rule to prevent serious injury. |
| Tool Unplugged When Adjusting | Prevents accidental starts during blade changes or adjustments. |
Essential Safety Practices
Always keep your hands a safe distance from the blade. Many saws have a designated “no-go” zone marked on the base. Pay attention to that.
You should also ensure your wood is properly supported. If it wobbles, your cut will be inaccurate, and it could be dangerous. Use clamps or a stop block for stability.
Checklist for Safe Operation
- Always wear safety glasses and hearing protection.
- Ensure the workpiece is firmly clamped or held against the fence.
- Keep hands at least 6 inches away from the blade.
- Allow the blade to reach full speed before cutting.
- Let the blade stop completely before lifting it from the workpiece.
- Keep your work area clean and free of clutter.
Remember, a safe woodworker is a happy woodworker. You want to enjoy your projects, and safety is the foundation of that enjoyment.
Conclusion
You’ve seen how simple projects can be your stepping stone into the world of miter saw woodworking. By focusing on fundamental cuts and gradually increasing complexity, you’ll build confidence and skill.
Remember, safety is always your first priority. We found that consistently applying safety practices makes every project more enjoyable. Start with those picture frames or small shelves, and you’ll quickly discover the satisfaction of creating with your own hands. So, grab some scrap wood, set up your saw, and make that first cut!
Frequently Asked Questions
What’s the very first thing I should cut with a new miter saw?
Before any project, you should make practice cuts on scrap wood. This helps you get a feel for the saw’s power and how the blade cuts different materials. Focus on simple 90-degree cuts first to build muscle memory.
How do I get accurate repetitive cuts for projects like shelves?
For accurate repetitive cuts, use a stop block. Set up a piece of wood or a clamp at the desired length on your saw’s fence. This ensures every piece you cut will be the exact same length without constant re-measuring.
Can I use a miter saw to cut thick lumber for outdoor projects?
Yes, many miter saws can cut thicker lumber. Always check your saw’s maximum cutting capacity for height and width. You might need to use a sliding miter saw for wider boards, and ensure your blade is appropriate for the material’s thickness.
What kind of wood is best for beginner miter saw projects?
For beginners, we recommend using softer woods like pine or poplar. They are easier to cut and more forgiving if you make a mistake. They are also generally more affordable, which is great for practice.
Beyond picture frames, what’s a good next step for learning angles?
After picture frames, try building a basic wooden box with mitered corners. This project reinforces those 45-degree cuts and introduces you to assembling multiple angled pieces. It’s a great way to advance your understanding of compound angles.