
Can You Cut Crown Molding Flat with a Miter Saw?

Yes, you can cut crown molding flat with a miter saw, but it requires a careful setup to get the angles right. Most experts say this method is possible for certain types of cuts and trim. You just have to understand how to position the piece correctly on your saw.
The key is knowing the specific crown molding cuts you need to make, whether they are inside or outside corners. We found that a compound miter saw is essential for getting the bevel and miter angles correct at the same time. Many professionals use this flat-cutting technique for speed and repeatability once it’s dialed in.
- Yes, cutting crown molding flat on a miter saw is a standard technique.
- This method primarily works well for inside corner cuts.
- You must set both the miter and bevel angles on your saw correctly.
- The molding is laid flat on the saw table, not propped against a fence.
- Always make a test cut on a scrap piece first to verify your setup.
Below, we’ll show you how to set up your saw and measure for perfect, flat cuts on crown molding. Let’s walk through the steps to make this process straightforward and successful.
How to Cut Crown Molding Flat Using a Miter Saw
Yes, this method is entirely possible and is often preferred by experienced DIYers and pros for its efficiency. It allows for precise, repeatable cuts once your saw is set up correctly.
Understanding the “Flat” Cutting Method
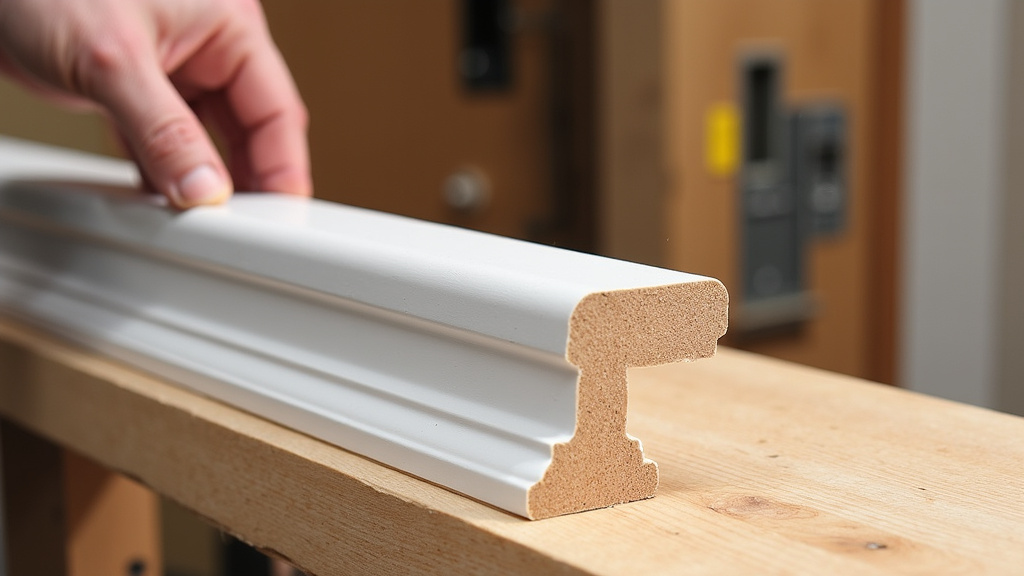
Normally, you might hold crown molding against a fence at an angle, mimicking its position on the wall. The flat method is different. You lay the trim **piece flat** on the saw’s table. Think of it like lying a board down instead of holding it up.
You then use both the **miter and bevel angles** on your saw to create the correct compound cut. This technique is especially useful for inside corners, which are the most common cuts you’ll make. Many experts say this approach reduces setup time significantly once you learn the angles (Family Handyman).
When This Method Works Best (and When It Doesn’t)
Not every cut is ideal for the flat technique. It shines in specific scenarios. We found its primary strength lies in creating matching pairs of cuts for an **inside corner**.
This method is less ideal for outside corners or for fitting molding into irregular spaces. For those, you might need to use the traditional “spring angle” method against the fence. Always consider the specific cut before choosing your technique.
Setting Up Your Miter Saw for Flat Cuts
Proper setup is 90% of the battle here. Your compound miter saw must have adjustable miter and bevel settings. Double-check that your saw’s fence is perfectly **square and clean**. Any debris can throw off your angle.
Calculating the Correct Miter and Bevel Angles
This is the critical math part. The angles you need depend on two things: the corner you’re cutting and the **spring angle** of your molding (usually 38° or 45°). You can find charts online, but here’s a simple starting point for common spring angles.
| Corner Type | For 38° Spring Angle Molding | For 45° Spring Angle Molding |
|---|---|---|
| Inside Corner | Miter: 31.62° / Bevel: 33.85° | Miter: 30° / Bevel: 30° |
| Outside Corner | Miter: 31.62° / Bevel: 33.85° | Miter: 30° / Bevel: 30° |
These are **starting points**. We always recommend verifying with a test cut. The exact number can vary slightly based on your saw and material.
Identifying Your Molding’s Spring Angle
Not sure of your spring angle? Use a protractor or a smartphone app. Place the molding flat on a table and measure the angle from the flat back edge to the face. That’s your spring angle. Getting this right is non-negotiable for accuracy.
Locking In Your Saw Settings
Once you have your numbers, set the miter angle first. Then, tilt the saw blade to set the bevel angle. Use the **preset stops** on your saw if they match. For a precise custom angle, use a digital angle gauge for verification. Lock everything down tight—no wiggle.
Measuring and Marking the Crown Molding
Accuracy starts on the workbench. Measure the **actual wall length**, not the length of the molding piece. Walls are rarely perfectly square. You may need to cut molding slightly shorter than the wall to allow for adjustments.
Marking the Cut Line
Always mark the **waste side** of your cut line. A simple trick is to mark an “X” on the side you’re cutting off. For an inside corner, the molding will lie flat with its top edge toward the saw blade. Ensure your mark aligns perfectly with the saw’s path.
The Importance of a Test Cut
Never skip this. Grab a scrap piece of your actual molding. Make a cut with your calculated settings. Does the angle look right? Does it fit against another test piece? It’s cheap insurance against ruining an expensive length of trim. We found that five minutes here saves an hour of frustration later.
Making the Cut Safely and Cleanly
Safety is paramount. Always wear **eye and ear protection**. Secure the molding firmly against the table and fence with your hand or a clamp. Never hold the wood with your fingers near the blade path. Let the blade come to full speed before cutting.
Feeding the Saw Through the Material
Feed the saw **slowly and steadily**. Don’t force it. Let the sharp blade do the work. A smooth, continuous motion prevents tear-out and gives a cleaner edge. On the return stroke, wait for the blade to stop before lifting the saw head.
Troubleshooting Common Issues
Even with careful setup, you might encounter a gap. Don’t panic. A small gap often means your angle is slightly off. You can try adjusting your bevel angle by a half-degree. Sometimes, a very thin shim behind the molding during the cut can compensate.
Dealing with Walls That Aren’t Square
This is a real-world headache. We found that using a **profile gauge** to trace the wall onto the molding end is invaluable for scribing. For compound angles, you may need to make a “micro-adjustment” to your miter angle until the gap closes. Patience is key.
Final Checklist for Perfect Flat Cuts
Follow this sequence every time to ensure success:
- Confirm your molding’s spring angle.
- Calculate the precise miter and bevel settings.
- Set and lock your saw angles carefully.
- Measure the wall, then mark the molding.
- Make a test cut on scrap wood first.
- Execute the cut slowly and safely on the final piece.
This method becomes second nature. It’s a fantastic way to handle most of the cuts in a room with speed and confidence. Just remember that the initial setup and test cut are where you guarantee a professional-looking result.
Conclusion
Cutting crown molding flat on your miter saw is a proven, efficient technique, especially for inside corners. You now know it hinges on identifying your spring angle and setting precise miter and bevel angles. Remember, the “flat” method shines for repeatability but isn’t ideal for every situation, like outside corners. The most critical steps are your initial setup, verifying your angles, and always making a test cut on scrap wood first. For your next project, we recommend starting with one wall’s inside corners. Practice this flat-cut method on scrap pieces to build your confidence before moving to the final trim.
Frequently Asked Questions
Can I cut crown molding flat with a regular miter saw?
You need a compound miter saw that can adjust both the miter and the bevel angles simultaneously. A standard miter saw that only tilts in one direction or lacks a bevel function will not work for this technique. It’s essential for creating the correct compound angle on the molding.
What is the best technique for cutting crown molding for outside corners?
Many carpenters prefer the traditional “spring angle” method for outside corners. This involves holding the molding against the fence at its installed angle, mimicking the wall. The flat-cut method can sometimes be used, but it requires more complex angle calculations and may be less intuitive for these less-common cuts.
Why are there small gaps in my crown molding joints even after cutting?
Gaps usually mean your angles are slightly off. It often happens if your spring angle measurement was incorrect or if the saw settings drifted. Try adjusting your bevel angle by a half-degree and making another test cut. Ensure your saw’s fence and table are perfectly clean and square before starting.
How do I find the spring angle of my crown molding?
Lay a piece of molding flat on a table. Use a protractor app on your phone or a digital angle gauge to measure the angle between the flat back edge (that touches the wall) and the face of the molding. This measurement is your spring angle, commonly 38° or 45°, and is key to your calculations.
Does cutting crown molding flat waste more material?
It can, primarily during your initial setup and test cuts. You’ll use scrap wood to verify your angles before cutting the good pieces. However, the speed and consistency of the technique often lead to less waste from mistakes during the actual project, saving you time and material overall.
