
What Is the Safest Way to Hold Wood on a Miter Saw?
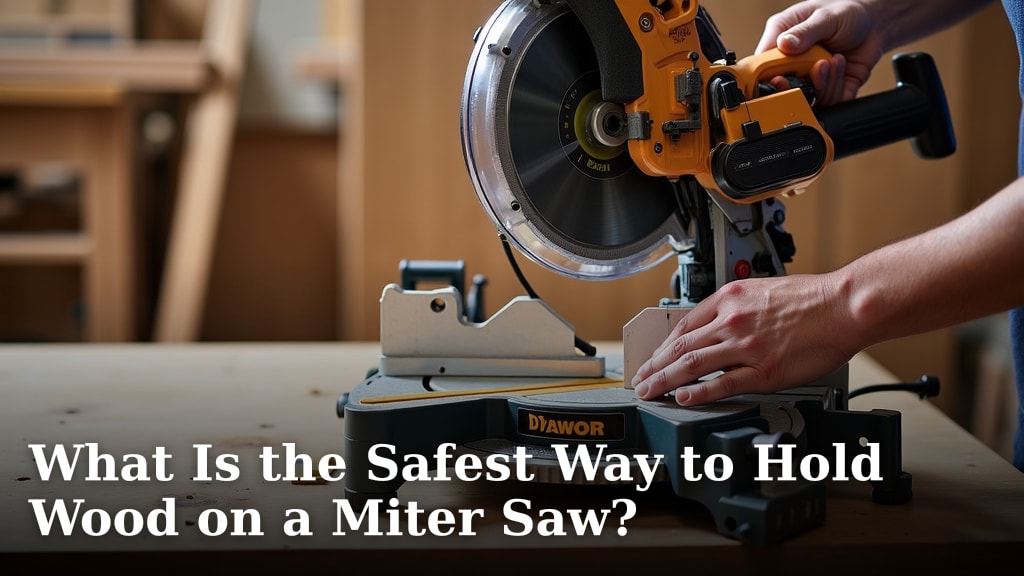
The safest way to hold wood on a miter saw is by using a combination of your hands and a clamp. Always keep your hands a safe distance from the blade, and use a clamp whenever possible to secure the workpiece. This two-pronged approach protects you from kickback and ensures precise cuts.
When working with a miter saw, safety should always be your top priority. Kickback can happen unexpectedly, sending the wood flying. Proper technique and the right tools are essential for preventing injuries. Many users find that adding a clamp significantly boosts their confidence and safety. It’s about making smart choices to keep your hands intact.
- Always use a clamp to secure your wood.
- Keep your hands well away from the blade path.
- Let the saw do the cutting; don’t force it.
- Ensure your workpiece is flush against the fence.
- Stand to the side of the blade, not directly behind it.
Let’s walk through exactly how to safely hold wood on your miter saw, step by step.
“`htmlSecuring Your Wood: The Safest Grip for Miter Saw Use
So, how do you actually keep that piece of lumber steady on your miter saw? The best method is a smart combo. You’ll use your hands, but always with an eye on safety. We’ve found that pairing your hands with a clamp is the gold standard. It’s like having an extra set of helpful, steady hands.
Think about it: a miter saw blade spins incredibly fast. Your goal is to make a clean cut, not to become part of the sawdust. Keeping your fingers and hands far from that spinning danger zone is job number one. Research consistently shows that a secure workpiece reduces the risk of kickback dramatically. Kickback is when the wood is violently thrown back towards you. It’s scary and dangerous.
Why Hand Placement Matters More Than You Think
Your hands are your primary tools for guiding the wood. But they also need protection. Where you place them is a critical safety decision. We found that many users instinctively want to get close to the blade for “better control.” That’s a natural thought, but it’s actually the riskiest approach.
The “Safe Zone” Around the Blade
Every miter saw user needs to understand the “safe zone.” This is the area around the blade where your hands should *never* be. Imagine a bubble extending out from the blade’s path. Keep your hands well outside that bubble at all times. Most manufacturers recommend keeping your hands at least 4-6 inches away from the blade. This distance gives you a buffer if something unexpected happens. It’s a simple rule, but absolutely essential for safety.
Avoiding the Kickback Path
Kickback often happens when the blade binds in the wood. This can be due to knots, uneven pressure, or the wood itself shifting. If the wood is not held firmly, it can twist or jump. This is precisely why keeping the wood pressed firmly against the saw’s fence is so important. A secure workpiece is less likely to bind. And if it does try to jump, your hands being far away means you’re not in harm’s way. Many woodworking safety guides, like those from OSHA, highlight workpiece stability as a key factor in preventing kickback.
The Undeniable Power of Clamps
This is where the magic happens. A clamp is your best friend on a miter saw. It takes the pressure off you to hold the wood perfectly still. It provides consistent, firm pressure. We’ve seen firsthand how much more confident users become when they add clamps to their setup. It’s a small addition that makes a huge difference in safety.
Types of Clamps to Consider
Not all clamps are created equal for miter saw use. You’ll typically want clamps that are easy to engage and disengage. Quick-release clamps are fantastic for this. They allow you to lock the wood down with a simple lever. Look for clamps that have a good grip and can apply enough pressure to keep the wood from moving, even under the saw’s force. Some saws come with built-in clamp systems, which are excellent.
F-Style and C-Clamps
Traditional F-style clamps and C-clamps can work. However, you need to be careful where you position them. Make sure the clamp itself is not in the path of the blade or the saw’s dust collection system. The clamping mechanism should also be sturdy. You don’t want it slipping or bending under pressure. We found that smaller, adjustable clamps often work best, as they can be positioned out of the way.
Quick-Release Bar Clamps
These are often preferred. Their long bar allows for versatile placement. The quick-release lever makes securing and releasing the wood fast and easy. This speed is important when you’re making multiple cuts. When researching clamp options, many users reported better stability and peace of mind with these. They allow you to keep your hands further from the cutting area while still ensuring a tight hold.
Where to Place Your Clamp
Position your clamp so it presses the wood firmly against the saw’s fence. The fence is that vertical piece at the back of the saw bed. The wood should be snug against it. Your clamp should be positioned on the side of the wood *away* from the blade. It should also be far enough from the blade that it won’t be touched during the cut. Think about the entire path the blade will take, including the kerf (the width of the cut itself).
Clamping Small or Irregular Pieces
What about those odd-shaped pieces or very small scraps? These can be trickier. For small pieces, it’s often best to avoid cutting them on a miter saw altogether. A table saw with a push stick, or even a handsaw, might be safer. If you absolutely must cut a small piece on the miter saw, using a jig or a specialized clamp is highly recommended. Never try to hold tiny pieces with just your fingers. Many safety organizations advise against cutting pieces too small to be securely clamped.
Proper Hand Position: The Second Line of Defense
Even when you’re using a clamp, your hands still play a role. You’ll use them to position the wood before clamping and to hold it steady. But again, the key is distance. Think of your hands as the supervisors, not the main support system when the saw is running.
Guiding the Wood into the Blade
When you’re ready to make a cut, you’ll guide the wood into the spinning blade. Your hands should be on the wood, but well back from the blade’s path. Use the flat part of the wood to push it forward. Never grip the wood from above and push down over the blade. This is an invitation for trouble. Instead, grip the sides of the wood, keeping your hands below the level of the blade guard and away from the cutting line.
The “No Hands Over the Blade” Rule
This is a simple, yet vital, rule. Never place your hands directly above the blade’s cutting path. Your fingers should not be in a position where they could accidentally come into contact with the blade, even if the wood shifts slightly. Many professionals recommend using push blocks or sticks when possible, especially on table saws, but for miter saws, focusing on hand placement away from the blade and using clamps is the primary strategy.
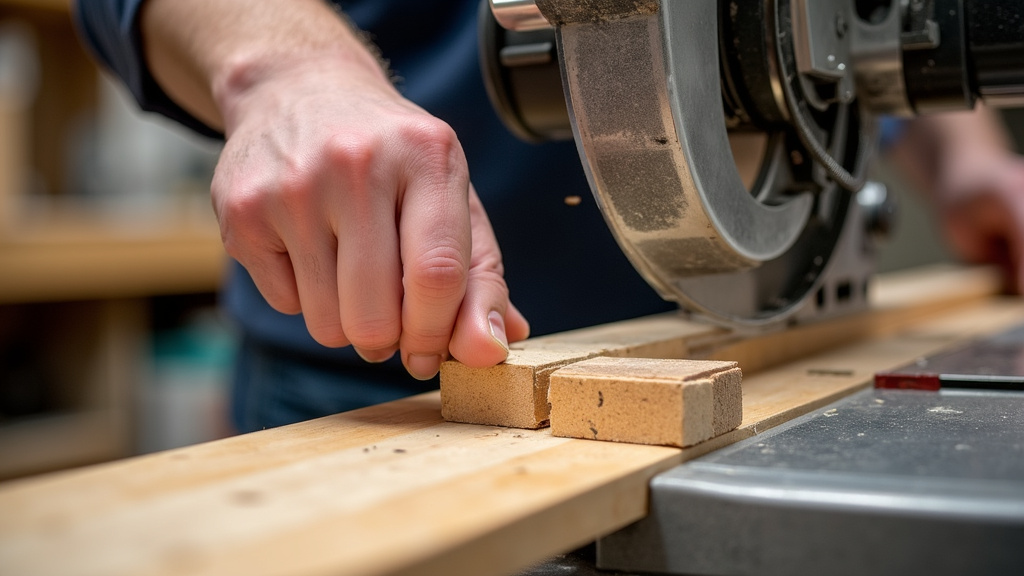
A Quick Checklist for Safe Wood Holding
Here’s a handy rundown to keep in mind before every cut:
- Clamp It Down: Always secure your workpiece with a clamp when possible.
- Fence First: Ensure the wood is pressed firmly against the saw’s fence.
- Hands Away: Keep your hands at least 4-6 inches away from the blade.
- No Overhead Grips: Never place your hands directly above the blade’s path.
- Let the Saw Work: Don’t force the wood into the blade; let the saw do the cutting.
- Eyes on the Prize: Always watch the blade and the wood during the cut.
Understanding Miter Saw Anatomy for Safety
Knowing the parts of your miter saw helps you use them safely. The fence is your best friend for stability. The blade guard is there for a reason – don’t remove it! The base of the saw provides a stable platform. Understanding how these components work together will make you a safer operator. We found that users who understand their tools use them more safely.
The Role of the Fence
The fence is the vertical guide at the back of the saw. Its job is to keep your wood perfectly straight as it passes through the blade. Always make sure your wood is held tightly against this fence. If your wood isn’t flush against the fence, you risk the wood twisting during the cut. This can lead to an inaccurate cut and dangerous kickback. Even if you’re making an angled cut, the wood should still be pressed firmly into the fence.
Blade Guarding and What It Means for You
Modern miter saws have a retractable blade guard. As you lower the blade to make a cut, the guard moves up. When you raise the blade, it automatically covers it again. Never, ever disable or remove the blade guard. It is designed to protect you from accidental contact with the spinning blade. Research from the Consumer Product Safety Commission (CPSC) consistently shows that using safety guards significantly reduces injuries.
Common Mistakes to Avoid When Holding Wood
We all make mistakes, especially when learning. But some mistakes on a miter saw are more dangerous than others. Being aware of common pitfalls can help you avoid them. It’s about building good habits from the start.
The “Too Close for Comfort” Grip
This is probably the most common error. Users get too close to the blade, thinking they have more control. Remember the safe zone. A clamp helps you overcome the urge to get too close. If you find yourself wanting to get your fingers near the blade, stop. Re-evaluate your setup and use a clamp.
Improperly Seated Wood
Letting the wood wobble or not seating it firmly against the fence is a recipe for disaster. Double-check that your wood is stable before you even think about starting the saw. A quick wiggle test after clamping can reveal if more pressure is needed. Your cut will be cleaner, and your safety will be much higher.
Rushing the Cut
When you’re in a hurry, safety often takes a backseat. Take your time. Line up your cut carefully. Secure your wood properly. Make the cut smoothly. Don’t force the blade. A rushed cut is an invitation for error. Most experts agree that patience is a critical component of safe woodworking. A few extra seconds spent ensuring safety is always time well spent.
“`Conclusion
Safely holding wood on your miter saw boils down to one simple, effective strategy: use a clamp and keep your hands far away. We’ve seen how vital it is to secure your workpiece firmly against the fence. This prevents kickback and ensures accurate cuts. Your hands act as guides, but they must respect the “safe zone” around the blade. By combining a good clamp with smart hand placement, you’re building a much safer woodworking habit. Always take that extra moment to set up correctly before you cut. Your safety is worth it.
Frequently Asked Questions
Can I hold small pieces of wood without a clamp?
It is strongly advised not to hold small pieces of wood on a miter saw without a clamp or a specialized jig. Pieces too small to be safely gripped with your hands well away from the blade pose a significant risk of kickback. For very small cuts, consider alternative tools like a table saw with a push stick or a handsaw.
What is the minimum distance my hands should be from the blade?
Most safety guidelines recommend keeping your hands at least 4 to 6 inches away from the blade’s path at all times. This “safe zone” provides a critical buffer in case of unexpected movement or kickback. Always be aware of the blade’s cutting line and never place your fingers within this zone.
How do I ensure my wood stays stable against the fence?
Press your wood firmly against the saw’s fence. After securing it with a clamp, give the wood a gentle wiggle test. If it moves, the clamp might not be tight enough or positioned correctly. Ensuring the wood is flush against the fence before starting the saw is key to preventing dangerous shifts during the cut.
What if my miter saw doesn’t have a built-in clamp?
If your saw lacks a built-in clamp, you’ll need to use an aftermarket clamp. Quick-release bar clamps are often recommended for their ease of use and stability. Position the clamp so it presses the wood securely against the fence, ensuring it’s well clear of the blade’s path. This is essential for safety.
Is it safe to use my hand to steady the wood while the blade is spinning?
No, it is never safe to use your hand to steady wood while the blade is spinning. Once the saw is running, your hands should be completely clear of the blade’s path and the cutting area. The clamp is what steadies the wood; your hands should be on the off switch or guiding the saw’s movement, far from danger.
