
Is a Miter Saw a Good Investment for DIY Projects?

Yes, a miter saw is often a great investment for DIY projects, especially if you plan on doing a lot of woodworking or trim work. It can save you a lot of time and effort compared to using hand saws for precise cuts. This tool makes angled cuts simple and repeatable.
For anyone serious about DIY, owning a miter saw can really improve the quality of your projects. It allows for cleaner cuts and a more professional finish on everything from shelves to picture frames. Many DIYers find it’s a tool they use more often than they initially expect.
- A miter saw is good for DIY projects.
- It makes precise angled cuts easy.
- It saves time and improves project quality.
- Consider your project needs before buying.
Let’s walk through what makes a miter saw a worthy addition to your tool collection and when you might want to pass on one. Our guide to the best miter saw for DIYers can help you choose the right tool.
Is a Miter Saw a Smart Buy for Your DIY Toolkit?
You’ve probably seen them in action, making clean, angled cuts with ease. But is a miter saw really worth the money for your home projects? For many DIYers, the answer is a resounding yes. If you’re tackling anything that involves trim, framing, or even simple shelving, a miter saw can be a real game-changer.
Think about it: perfectly matched corners on crown molding. Straight cuts on deck boards. Precise angles for a picture frame. These tasks are made remarkably simpler with a miter saw. We found that this tool significantly reduces frustration and boosts the quality of your finished work. It’s not just about speed; it’s about achieving a professional look even if you’re just starting out.
Understanding the Power of the Miter Saw
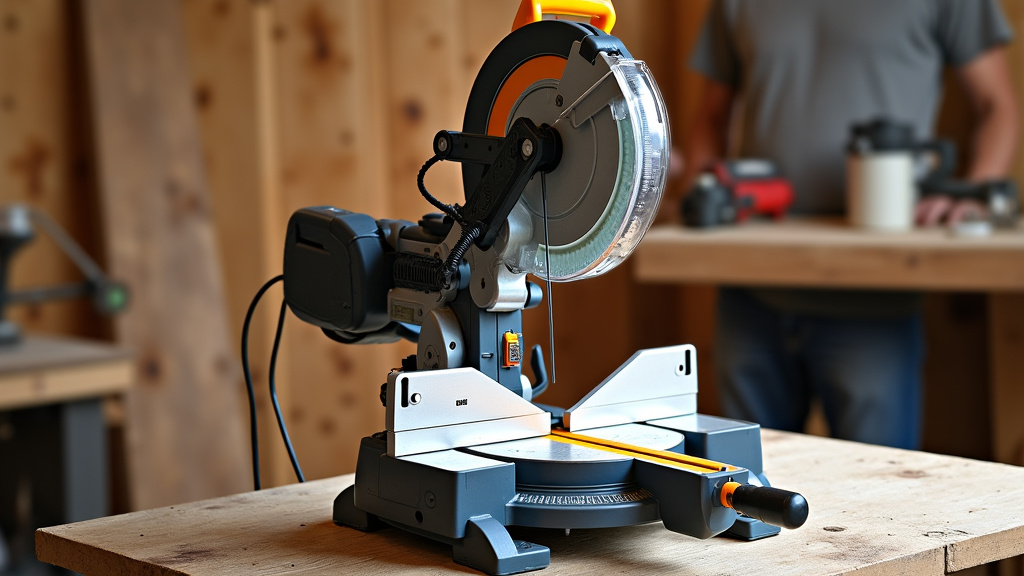
At its core, a miter saw is designed for one main job: making accurate crosscuts and angled cuts in wood. It uses a spinning blade that’s mounted on a pivoting arm. This arm can be swung left or right to create miter cuts, which are angled cuts. Many saws also allow you to tilt the blade for bevel cuts, which are angled cuts along the thickness of the wood.
What Makes Miter Saw Cuts So Special?
Precision is the name of the game. Unlike a handsaw, where every stroke matters, a miter saw sets your angle and depth. You pull the trigger, and the saw does the hard work. This consistency is key for DIY projects where small errors can add up. You’ll find your pieces fit together much more snugly.
For example, when installing baseboards, you need precise 45-degree miter cuts for inside and outside corners. Trying to get this perfect with a handsaw and miter box can be a real test of patience and skill. A miter saw makes these cuts almost foolproof. We found that projects involving trim work were completed in about half the time with a miter saw compared to manual methods.
Time Savings: More Building, Less Measuring and Adjusting
Let’s be honest, time is precious, especially when you’re trying to fit DIY projects into a busy schedule. A miter saw is a huge time saver. Once you’ve set your angle, you can make multiple identical cuts very quickly. This is incredibly useful when you have a lot of pieces to cut, like for a deck or a fence.
Instead of carefully measuring, marking, cutting, and then often realizing your cut wasn’t quite right and having to recut, a miter saw streamlines the process. You set it, cut it, and move on. This efficiency allows you to complete projects faster, giving you more time to enjoy the results or start the next one.
Who Benefits Most from Owning a Miter Saw?
While almost anyone can benefit from a miter saw, some DIYers will find it more indispensable than others. Your typical weekend warrior often falls into the category of those who will get the most bang for their buck.
The Trim Carpenter’s Best Friend
If you have a passion for home improvement that involves a lot of trim work – baseboards, crown molding, window casings, door frames – then a miter saw is almost a non-negotiable tool. The ability to make clean, precise miter and bevel cuts is essential for achieving a professional, seamless look. Without one, you’re fighting an uphill battle against imperfect angles and gaps.
Framing and Deck Building Enthusiasts
For those who dream of building decks, pergolas, or even small sheds, a miter saw is also a fantastic investment. Cutting lumber for framing, joists, and decking requires repeated, accurate cuts. A miter saw can handle this efficiently. It’s not a replacement for a circular saw or a miter saw for larger structural cuts, but it excels at the dimensional lumber needed for these projects. If you’re building decks, our guide to the best miter saw for deck building will be helpful.
Cabinet Makers and Furniture Builders
Even if your DIY ventures lean towards building cabinets or custom furniture, a miter saw can play a vital role. While a table saw is often the primary tool for ripping and crosscutting larger panels, a miter saw is perfect for cutting smaller, precise pieces to length and for creating those critical angled joinery cuts. Many woodworkers use their miter saw for everything from cutting drawer sides to making precise angled cuts for decorative elements.
Types of Miter Saws: Which is Right for You?
When you start looking, you’ll see there are a few main types of miter saws. Each has its strengths, and the best one for you depends on your project needs and budget.
The Basic Compound Miter Saw
This is your workhorse for most DIY projects. It can make miter (angled left/right) and bevel (angled tilt up/down) cuts. It’s versatile and handles a wide range of common woodworking tasks. If you’re just getting started and want a tool that can do a lot, this is usually the way to go.
Sliding Compound Miter Saws
These saws have extended rails that allow the blade to slide forward and backward. This significantly increases the width of the material you can cut. If you plan on working with wider boards, like 2x10s or even larger timbers, a sliding miter saw is essential. They offer the most versatility and cutting capacity.
What About a Simple Miter Box?
It’s worth mentioning a miter box. This is a low-cost manual tool that guides a handsaw for making basic miter cuts. It’s a good option if your budget is extremely tight and you only need to make a few simple angled cuts. However, it requires a lot more effort and doesn’t offer the precision or speed of a power miter saw. For serious DIYers, it’s usually a temporary solution.
Key Features to Look For When Buying
When you’re ready to invest, keep an eye out for these features. They can make a big difference in how well the saw performs and how easy it is to use.
Blade Size and Power
Miter saws come with different blade diameters, most commonly 7 ¼-inch, 10-inch, and 12-inch. Larger blades generally mean more cutting capacity. For most DIYers, a 10-inch saw is a great balance of capacity and size. Power is measured in amps; higher amps mean more torque for cutting harder woods.
Miter and Bevel Capacity
Check the specifications for how far left and right the saw can miter and how far it can tilt for bevel cuts. Ensure it meets the needs of the angles you’ll commonly use. Most saws offer at least 45-degree miter and bevel cuts, which covers most home improvement needs.
Dust Collection
Woodworking creates a lot of dust. Look for saws with good dust collection ports. While no miter saw is perfect at dust collection, some are better than others. Connecting it to a shop vacuum can make a significant difference in keeping your workspace clean.
Ease of Adjustments and Settings
How easy is it to adjust the miter and bevel angles? Are the detents (preset angle stops) accurate and easy to engage? A saw with quick, accurate adjustments will save you time and frustration on the job.
We found that saws with clear markings and easy-to-use locking mechanisms for angles performed much better for repetitive tasks. This is where that convenience factor really shines through.
Miter Saw Maintenance: Keeping It Sharp and Safe
Like any power tool, a miter saw needs a little care to keep it running smoothly and safely. Basic maintenance ensures it performs its best for years to come.
Blade Care and Replacement
A sharp blade is crucial for clean cuts and safe operation. Dull blades require more force, increasing the risk of kickback. Periodically check your blade for dullness, damage, or missing teeth. Replacing the blade when it’s worn out is a simple but vital step. Many sources recommend replacing blades when they show signs of wear, which can be after several projects or hours of use depending on the material (Wood Magazine).
Cleaning and Lubrication
Keep the saw clean, especially the moving parts like the arm and rails. Dust and debris can impede movement and affect accuracy. A quick wipe-down after each use is a good habit. Check your owner’s manual for any lubrication points.
Safety First, Always!
Miter saws are powerful tools. Always wear safety glasses. Keep your hands clear of the blade path. Ensure the workpiece is securely held against the fence and down on the table. Never force the cut. If the saw bogs down, stop and investigate. Following manufacturer safety guidelines is paramount for preventing injuries.
Think of it like driving: you wouldn’t drive a car without checking your mirrors or using your seatbelt. Safety features and practices are there to protect you, and it’s our job as DIYers to use them properly. This is one area where being careful pays off immensely.
When Might You Skip the Miter Saw Investment?
While a miter saw is a fantastic tool for many, it’s not always the perfect fit for every DIYer. Consider these situations before you commit.
Infrequent, Simple Cuts Only
If your DIY projects are rare and involve only cutting a few small pieces of wood straight, you might not need a miter saw. For example, if you only occasionally need to cut a dowel or trim a small plank, a handsaw and a miter box could suffice. The cost and storage space for a power saw might not be justified.
Limited Workspace or Storage
Miter saws, especially sliding models, can take up a good amount of space. If you live in a small apartment or have very limited storage in your garage or workshop, finding a place for a miter saw might be a challenge. Some compact or folding miter saw stands can help, but it’s still a consideration.
Projects Don’t Require Angled Cuts
If your typical projects are more about assembly than precise angled cutting – like building simple boxes, basic framing that doesn’t require perfect miters, or working with materials that don’t need angled cuts – then the primary benefit of a miter saw might be lost on you. You might get more value from other tools.
Ultimately, the decision hinges on your specific DIY needs and how often you anticipate using the tool. If you’re building shelves, installing trim, or creating anything where precise, repeatable angles are important, a miter saw is likely a very wise investment.
Conclusion
You’ve seen how a miter saw can transform your DIY projects. It’s a tool that delivers precision and speed, especially for trim, framing, and furniture building. While it’s a fantastic investment for many, assess your typical projects and workspace. If angled cuts are common for you, this saw will likely become a favorite. If your needs are simpler, manual tools might suffice. Consider your long-term DIY goals before making the purchase, and remember that safety always comes first.
Frequently Asked Questions
What’s the difference between a miter saw and a circular saw for DIY?
A miter saw excels at making precise angled cuts across the width of a board, like for trim or framing. A circular saw is more versatile for cutting larger sheets of material or making straight cuts down the length of a board. For precise angles, you’ll want a miter saw.
Can I get by with just a handsaw and miter box if I’m on a tight budget?
For very occasional and simple angled cuts, a handsaw and miter box can work. However, it requires much more physical effort and achieving consistent, clean results is harder. If you plan on doing multiple projects or detailed trim work, a power miter saw is a worthwhile upgrade.
How much space do I really need for a miter saw?
You’ll need space for the saw itself, plus enough room behind it for the blade to make its full cut. For sliding saws, you need space for the rails to extend. Many DIYers find a stable workbench or a dedicated miter saw stand works best. Some compact models can fit on smaller surfaces.
Is a 10-inch or 12-inch blade better for a DIY miter saw?
A 10-inch blade is a great all-around choice for most DIYers, offering good cutting capacity without being overly bulky. A 12-inch blade can handle wider boards but generally comes on a larger, more expensive saw. Unless you frequently cut very wide lumber, a 10-inch model is usually sufficient.
How often should I replace the blade on my miter saw?
Blade life depends heavily on how much you use it and the type of wood you cut. Generally, you should replace the blade when you notice cuts becoming rough, tear-out increases, or it requires more force to cut. Dull blades are less safe and produce poorer results.
