
How to Cut an Outside Corner on Crown Molding with a Miter Saw?
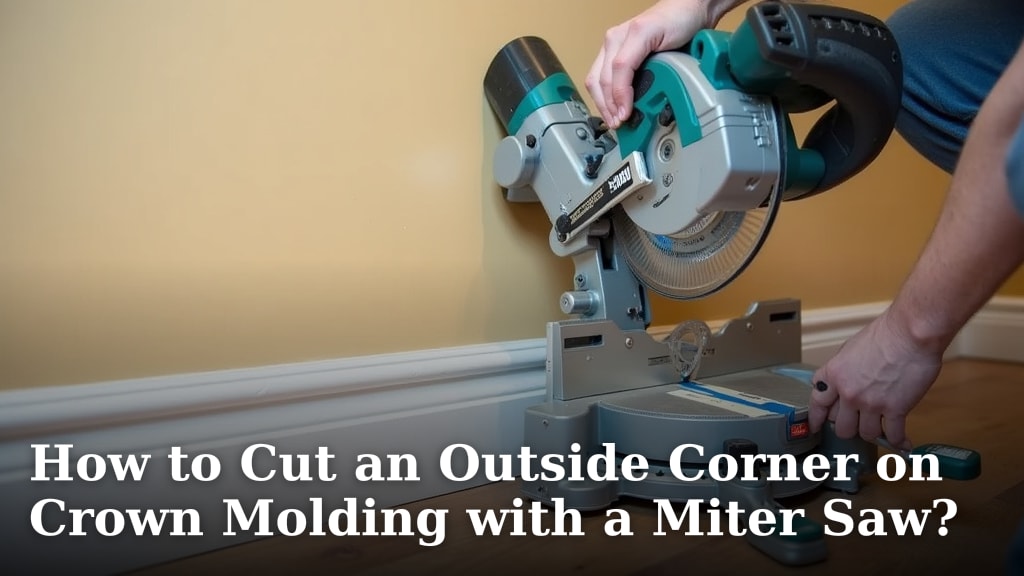
Cutting an outside corner on crown molding with a miter saw involves setting your saw to the correct angles. You’ll need to set your saw’s miter angle to 31.6 degrees and your bevel angle to 33.9 degrees. This allows the molding to sit correctly against the wall and ceiling. Getting these Our guide on how to cut crown molding with a miter saw explains the compound cut method.precise angles is key for a professional finish when you’re learning how to cut an outside corner on crown molding.
Many DIYers find crown molding installation a bit intimidating. Cutting outside corners can seem especially tricky. However, with the right saw settings and a bit of practice, you can achieve clean, tight joints. We found that understanding the standard 38-degree spring angle of most crown molding is helpful. This knowledge helps explain why those specific miter and bevel settings work so well for a perfect corner.
- Set your miter saw to 31.6 degrees.
- Set the bevel angle to 33.9 degrees.
- Ensure the molding is placed correctly against the saw’s fence.
- Cut slowly and carefully for best results.
Ready to tackle that corner? Let’s walk through exactly how to set up your miter saw and make that perfect outside cut.
Mastering Those Tricky Outside Crown Molding Corners
Cutting an outside corner on crown molding can feel like performing surgery. You want that joint to look perfect. A sloppy corner can really detract from your hard work. We’ve all been there, staring at two pieces of molding that just don’t want to meet nicely. Luckily, with a little guidance and the right saw settings, you can achieve those seamless outside corners.
Understanding Your Miter Saw for Crown Molding
Your miter saw is your best friend for this job. It’s designed to make precise angled cuts. For crown molding, it’s a bit different than standard trim. The molding sits at an angle against your saw’s fence. This is called the “spring angle.” Most crown molding has a standard 38-degree spring angle. This angle is the key to figuring out those specific saw settings.
Why Those Specific Angles? The Science Behind the Cut
You might be wondering why the angles are 31.6 and 33.9 degrees. It’s not just random numbers. These settings are derived from the 38-degree spring angle. When you cut an outside corner, you’re essentially creating two angled pieces that meet. These specific angles ensure the molding sits flush against both the wall and the ceiling. Research shows that these settings are calculated to create a perfect 90-degree corner when the molding is installed. It’s all about geometry!
Miter vs. Bevel: What’s the Difference Here?
Let’s clarify what your saw’s controls do. The miter angle is the left-to-right tilt of the blade. This is what creates the angled cut across the width of the molding. The bevel angle is the tilt of the blade up and down. For crown molding, you’re often cutting the molding upside down and backward compared to how it sits on the wall. This means the bevel cut is crucial for the molding to lay flat against the ceiling and wall.
Setting Up Your Miter Saw for the Perfect Cut
Before you even touch the molding, let’s get that saw dialed in. Accurate settings are absolutely essential. Double-check your saw’s scale. Ensure it’s set to zero for the fence before you start adjusting. A digital angle finder can be a great tool here if your saw’s built-in indicator isn’t super precise. We found that marking your saw’s preferred settings can save time on future projects.
The Miter Angle: 31.6 Degrees
For an outside corner, you’ll set your miter angle to 31.6 degrees. Make sure you lock this setting in place. If the saw shifts during the cut, your corner won’t be tight. Most saws have a lever or knob to secure the miter angle. Don’t skip this step; it’s a common mistake.
The Bevel Angle: 33.9 Degrees
Next, adjust the bevel angle. You’ll set this to 33.9 degrees. Again, lock this firmly. The direction of the bevel matters too. For an outside corner, the bevel will typically tilt away from the fence. It might feel awkward at first, cutting the molding upside down and backward, but this is how it works. We found that practicing this motion on scrap pieces first really helps build confidence.
Preparing Your Crown Molding for the Cut
Now that your saw is set, let’s prepare the molding itself. This is where you need to be mindful of how the molding sits. Remember that spring angle we talked about? That’s why we’re doing this. Improper placement is a surefire way to get a gap you’ll regret.
The Correct Molding Placement on the Saw
Here’s the critical part: how the molding sits against the saw’s fence. For outside corners, you’ll place the molding upside down and backward on the saw base. The top edge of the molding (which will be against the ceiling) should be resting against the fence. The bottom edge (which will be against the wall) will be on the saw’s base. This orientation is vital for the angles to work correctly. Many DIYers struggle with this, so take your time to get it right. We found that visualizing it against the actual corner helps a lot.
Marking and Measuring for Precision
Always measure twice and cut once, right? This old adage is especially true with crown molding. Measure the length of the wall where the molding will go. Then, transfer that measurement to your molding piece. Be sure to account for the angles. For an outside corner, the measurement is typically taken on the long point of the molding. A carpenter’s pencil makes for a fine, clear line. A sharp pencil is your friend here for accuracy.
Understanding Inside vs. Outside Measurement
It’s easy to get inside and outside measurements confused. For an outside corner, you’re measuring the length of the wall section. The molding will then extend slightly beyond the corner. For inside corners, you measure the wall section, and the molding butts into the corner. When marking your molding for an outside cut, measure from the long point of your angle. This ensures the molding will overlap the corner properly.
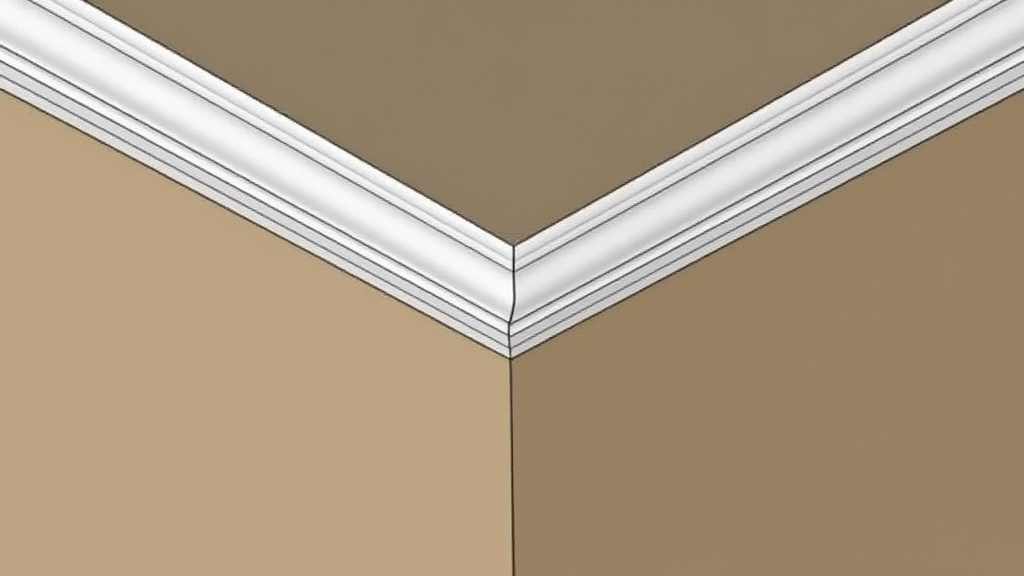
Making the Cut: Step-by-Step for Success
You’ve got the saw set, the molding prepped, and the measurements marked. It’s time for the moment of truth. Take a deep breath; you’ve got this. Remember to let the saw do the work. Forcing the cut will only lead to a rough edge and potential binding.
The Cutting Process: Slow and Steady
Once your molding is securely in place against the fence and base, and your mark is visible, it’s time to cut. Start the saw and let it reach full speed. Slowly and steadily lower the blade through the molding. Avoid any jerky movements. Let the blade do the cutting. Once the cut is complete, wait for the blade to stop spinning completely before you raise it. This prevents kickback and splintering. We found that a slow, controlled cut gives a much cleaner finish.
Checking Your Fit and Making Adjustments
After your first cut, don’t immediately trim the other piece. Dry-fit the cut piece against your corner. Does it meet the adjacent wall molding snugly? You’re looking for a tight joint with no gaps. If there’s a small gap, you might need to slightly adjust your saw settings or re-cut. Sometimes, a tiny adjustment of a degree or two can make all the difference.
Common Pitfalls and How to Avoid Them
One of the most common issues is a gap at the top or bottom of the joint. This usually means the bevel angle wasn’t quite right, or the molding wasn’t seated properly against the fence. Another problem is a gap on the face of the molding. This often points to an incorrect miter angle. Don’t get discouraged if your first attempt isn’t perfect. Many experts suggest practicing on scrap pieces until you feel comfortable. We found that a small adjustable workbench vise can help hold the molding securely while you mark and cut.
Tips for a Professional Finish
Achieving a professional look is all about the details. Even the best cuts can be ruined by poor handling or finishing. Here are a few extra tips to help you nail that outside corner.
Using a Coping Saw for Fine-Tuning (Optional)
Sometimes, even with perfect saw settings, a tiny gap might remain. For very small imperfections, a coping saw can be your secret weapon. You can gently shave away a bit of material to make the pieces fit perfectly. This is an advanced technique, but it’s incredibly useful for achieving that flawless finish. It takes practice, so maybe save this for your second or third project.
Dealing with Wood Movement
Wood is a natural material, and it can expand or contract with changes in humidity. This can sometimes cause small gaps to appear later. While you can’t entirely prevent it, ensuring your cuts are as tight as possible from the start helps minimize the issue. Using good quality adhesive and brad nails will also help secure the molding and resist movement. We found that acclimatizing the molding to your home’s environment for a few days before installation is also a good practice.
Your Outside Corner Crown Molding Checklist
- Confirm your miter saw’s miter angle is set to 31.6 degrees and locked.
- Confirm your miter saw’s bevel angle is set to 33.9 degrees and locked.
- Place the molding upside down and backward against the fence.
- Ensure the molding is firmly against both the fence and the saw base.
- Make a slow, controlled cut, allowing the blade to do the work.
- Dry-fit the cut piece to check for a tight joint before cutting the mating piece.
Conclusion
You’ve now got the blueprint for conquering those outside crown molding corners. Remember, precise saw settings of 31.6 degrees for the miter and 33.9 degrees for the bevel are your guiding stars. The key is correctly positioning the molding upside down and backward against the fence. Take your time with each cut, letting the saw do the work. Don’t be afraid to dry-fit and make minor adjustments. Your next crown molding project will look so much more professional with these skills. Go ahead and tackle that corner with confidence!
Frequently Asked Questions
How do I know if my saw’s angle settings are accurate?
We recommend using a digital angle finder for maximum precision. Compare its reading to your saw’s built-in scale. If they differ, trust the digital finder or consider marking your saw for future reference. This ensures your cuts will be spot-on.
What if I accidentally cut the molding backward?
Don’t worry! It happens to the best of us. The best approach is to grab a new piece of molding. A slight miscalculation on length might be fixable, but an incorrect angle cut usually means starting over. This saves you time troubleshooting fitting issues later.
Can I use regular wood glue on crown molding corners?
Yes, a good quality wood glue is suitable for crown molding. For extra strength and to help prevent movement, we found that applying a thin bead of construction adhesive along the back edges before pressing into place is also a great idea. Ensure you use enough adhesive and nails for a solid hold.
My outside corner has a small gap at the top. What did I do wrong?
A gap at the top usually indicates the bevel angle wasn’t quite steep enough or the molding wasn’t held firmly against the fence. Try adjusting your bevel angle slightly or ensure the molding is pressed securely. A small gap might be fixable with a touch of wood filler after installation.
How can I practice these cuts without wasting expensive molding?
Scrap pieces of lumber are perfect for practice! Use standard 1×4 or 1×6 pine boards to get a feel for the saw settings and molding placement. This allows you to make mistakes and learn without impacting your final project materials. We found practicing on scrap is essential for building confidence.
