
How to Adjust Miter Saw Laser Guide Accuracy?

Yes, you can absolutely adjust your miter saw’s laser guide for better accuracy. If your laser line isn’t lining up perfectly with the blade, a simple calibration process will get it back on track. This ensures your cuts are precise every time.
Many woodworkers find that their miter saw laser guide can drift over time. This often happens due to bumps or normal use. Keeping your laser aligned is key for making clean, straight cuts, especially for important projects where precision matters. We’ll show you how to fix it.
- Check your saw’s manual for laser adjustment screws.
- Use a scrap piece of wood to test alignment.
- Make small adjustments, testing after each one.
- Ensure the laser is centered with the blade.
Let’s walk through exactly how to get your miter saw’s laser guide working perfectly again, step by step.
Getting Your Miter Saw Laser Guide Perfectly Aligned
Is your miter saw’s laser guide throwing you off? It’s a common issue, but thankfully, a fixable one! This guide will walk you through the steps to recalibrate your laser so it accurately shows where your blade will cut. Precision is key for any woodworking project, and a misaligned laser can lead to frustrating errors.
Think of your laser guide as your saw’s aiming system. If the aim is off, your shot (or cut, in this case) will be too. Fortunately, most miter saw manufacturers design these lasers with adjustment screws that let you fine-tune their position. We’ll help you find them and use them effectively.
Understanding How Miter Saw Lasers Work
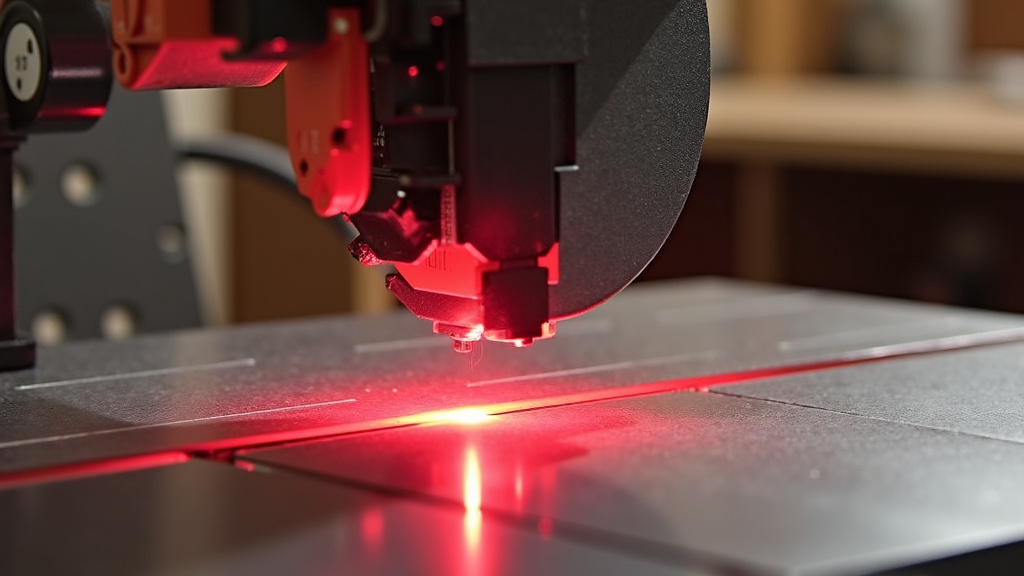
Before we start adjusting, let’s quickly understand the laser’s role. The laser itself is usually a small diode mounted near the blade guard. It projects a thin red line onto your material. This line is intended to show you the exact path the blade will take. It’s a visual aid to help you position your workpiece accurately before making a cut.
The accuracy of this line depends on its alignment with the blade. Ideally, the center of the laser line should perfectly overlap the center of the saw blade’s kerf (the material removed by the blade when cutting). When it doesn’t, it means the laser is pointing slightly to the left or right of where the blade will actually cut.
Why Does a Laser Guide Go Out of Alignment?
Several things can cause your laser guide to lose its precision. One of the most common reasons is simply vibration from use. Over time, the constant shaking can cause the laser assembly to shift slightly. Dropping the saw or even a significant bump can also knock it out of place.
Another factor can be wear and tear on the mounting points. If the laser module isn’t secured as tightly as it once was, it might wiggle a bit. Sometimes, dirt or debris can accumulate around the laser housing, causing it to sit at an odd angle. Whatever the cause, the good news is that it’s almost always correctable.
Preparing for the Calibration Process
Before you grab your tools, let’s get everything ready. You’ll need a few basic items to ensure you can make accurate adjustments and test them effectively. Safety is always the first step in any workshop task, so let’s start there.
Safety First: Always Unplug Your Saw
This might seem obvious, but it bears repeating: always unplug your miter saw before making any adjustments. You don’t want the blade to unexpectedly start spinning while your hands are near the laser or blade assembly. It’s a critical step that prevents serious injury.
Once the saw is unplugged, take a moment to clear the area around the saw. Ensure you have good lighting and plenty of space to work. Remove any sawdust or debris that might be obstructing your view or access to the adjustment points.
Gather Your Tools and Materials
You probably won’t need a whole toolbox, but a few essentials will make the job much easier. You’ll typically need a small screwdriver, often a Phillips head or a small flathead, depending on the screws used on your saw’s laser assembly. Refer to your saw’s manual if you’re unsure of the screw type.
You’ll also need a piece of scrap wood. A relatively smooth, flat piece works best for testing. You might want a pencil for marking and a tape measure for verifying, though we’ll focus on visual alignment first. Some people prefer safety glasses, even with the saw unplugged, as a general workshop habit.
Locating the Laser Adjustment Screws
Now for the detective work! The adjustment screws are your key to realigning the laser. They are usually located on or around the laser housing itself. You might need to remove a small cover to access them, or they might be plainly visible.
Consult Your Miter Saw Manual
Every miter saw model is a bit different. The absolute best resource for finding these screws is your owner’s manual. It will often have a diagram or specific instructions on how to adjust the laser guide. If you can’t find the physical manual, search online for your saw’s model number followed by “manual” or “laser adjustment.”
Many manuals will show you exactly where the screws are and which direction to turn them to move the laser line left or right. For example, it might say, “Turning screw A clockwise will shift the laser line to the right.” This kind of information is gold.
Visual Inspection of the Laser Housing
If the manual isn’t helpful or you can’t find it, you can often find the adjustment screws through careful visual inspection. Look closely at the area where the laser emits its beam. You’re searching for small screws that appear to be part of the laser module’s mounting system. They might look like they can be turned to shift the position of the laser unit.
Sometimes, there are two screws, allowing you to adjust the laser both horizontally and vertically. However, for most miter saw applications, you’ll primarily be concerned with horizontal adjustment to get it perfectly aligned with the blade. Vertical adjustments are less common for basic alignment tasks.
Step-by-Step Calibration Guide
With your tools ready and the adjustment screws located, it’s time to make the adjustments. The key here is to make small, incremental changes and test frequently. Patience is your best friend during this process.
Step 1: Initial Alignment Test
First, plug your saw back in. Turn on the laser guide. Position your scrap piece of wood under the blade. Carefully lower the blade until it is almost touching the wood, but not cutting it. Note where the laser line falls on the wood relative to the blade.
Now, unplug the saw again. This is your baseline. If the laser is wildly off, don’t worry; we’ll correct it. If it’s very close, you’ll only need minor adjustments. What you’re looking for is a clear understanding of whether the laser is to the left or right of the blade.
Step 2: Making Minor Adjustments
Using your screwdriver, make a tiny turn of one of the adjustment screws. For example, turn it just an eighth or a quarter of a turn. If your manual indicated which screw moves the line left or right, use that one. If not, you may have to experiment a little.
After each small adjustment, plug the saw back in, turn on the laser, and lower the blade to the scrap wood again. Observe if the laser line has moved closer to the blade or further away. Repeat this process, making very small adjustments and testing after each one.
It’s helpful to note which direction you’re turning the screw and what effect it has. A small table can help you track this:
| Adjustment | Screw Turned | Direction | Laser Line Moved | Status |
|---|---|---|---|---|
| 1 | A | Clockwise | Left | Closer to blade |
| 2 | A | Counter-clockwise | Right | Too far |
| 3 | B | Clockwise | Right | Perfect! |
Step 3: Fine-Tuning for Precision
Continue making these small adjustments until the laser line is perfectly centered on the blade. You want the center of the red line to appear exactly where the blade will cut. It might take several iterations of adjusting and testing to get it just right. Don’t rush this part; precision now saves frustration later.
Once you believe it’s aligned, perform one final, thorough test. Make a shallow cut into your scrap wood with the laser perfectly lined up. Then, examine the cut. Does the kerf of the cut perfectly match the center of where the laser was pointing? If so, congratulations, you’ve successfully calibrated your laser guide!
Step 4: Securing the Adjustment (If Necessary)
Some laser assemblies have small locking screws or retainers. If yours does, and after you’ve achieved perfect alignment, consider gently tightening them. This helps to prevent the laser from shifting again due to vibration. Be careful not to overtighten and strip the threads or force anything out of alignment.
If there are no obvious locking mechanisms, the friction from the adjustment screws and the housing should be enough. Just be mindful to handle your saw with care to avoid unnecessary bumps or shocks that could knock the laser out of its newly calibrated position.
Troubleshooting Common Laser Issues
What if you can’t find the screws, or the laser just won’t cooperate? Here are a few common scenarios and how to address them.
Laser Won’t Turn On
If your laser guide isn’t powering on at all, the first thing to check is the power source. For battery-powered lasers, ensure the batteries are fresh and correctly installed. For corded lasers, check if the power switch is engaged and that the saw is plugged in.
If the power source is good, the issue might be a loose connection within the saw or a faulty laser module. Sometimes, a wire can come disconnected from the switch or the laser diode itself. If you’re comfortable doing so, you can unplug the saw and carefully inspect the wiring. If you find a loose wire, reconnect it securely. If the laser module appears damaged or the issue persists, it might be time to contact the manufacturer or a qualified repair service.
Laser Line is Dim or Flickering
A dim or flickering laser line usually indicates a power issue or a failing laser diode. Again, start with the batteries or power connection. For battery models, try a new set of high-quality batteries. For corded models, ensure you have a good power source and the cord isn’t damaged.
If the power source is confirmed to be strong, the laser diode itself might be nearing the end of its life. Lasers, like any electronic component, can degrade over time. In this case, the laser module will likely need to be replaced. Check your manual for replacement part numbers or contact the manufacturer.
Laser Line is Not Straight or Clear
If the laser line itself appears fuzzy, wavy, or distorted, it could be due to a dirty lens or a damaged laser diode. First, try cleaning the laser’s output lens with a soft, lint-free cloth and possibly a bit of glass cleaner. Gently wipe away any dust or smudges.
If cleaning doesn’t help, the diode might be damaged, causing the beam to emit improperly. This is similar to the dim or flickering issue, and the laser module may need replacement. Ensure your saw is unplugged before attempting to clean the lens. You want a crisp, clear line for the most accurate cuts.
Maintaining Your Miter Saw Laser Guide
Once you’ve got your laser guide perfectly aligned, you’ll want to keep it that way! Regular maintenance is the best defense against future alignment issues.
- Keep it clean: Regularly wipe down the laser housing and lens to prevent dust buildup.
- Handle with care: Avoid banging or dropping your saw. Store it safely when not in use.
- Check periodically: Make it a habit to check the laser alignment against the blade before starting critical cuts, especially if the saw has been moved.
- Tighten as needed: If you notice the laser becoming loose, gently check and tighten any visible mounting screws.
A little bit of care goes a long way in ensuring your miter saw’s laser guide remains a reliable tool for accurate cuts. Following these steps should have your laser working perfectly in no time!
Conclusion
You’ve now learned that aligning your miter saw’s laser guide is a straightforward process. By understanding how the laser works and following these steps, you can ensure your cuts are accurate every time. Remember to always prioritize safety by unplugging your saw before making adjustments. Small, careful turns of the adjustment screws, combined with frequent testing on scrap wood, are your best bet for perfect alignment. Don’t forget to perform a final check by making a test cut. Keep your laser clean and handle your saw with care to maintain this accuracy.
Your next step is to grab your tools and that manual, and get your laser guide dialed in!
Frequently Asked Questions
Can I adjust the laser on any miter saw?
Most modern miter saws come equipped with adjustable laser guides. You’ll typically find small adjustment screws designed for this purpose. If your saw has a laser, it’s highly probable that you can adjust it.
What if I can’t find the adjustment screws on my miter saw?
If you can’t visually locate the adjustment screws, your best resource is your miter saw’s owner’s manual. It will often show the exact location and function of these screws. If the manual is unavailable, search online for your saw’s model number.
How often should I check my miter saw’s laser alignment?
It’s a good practice to check your laser alignment periodically, especially after transporting the saw or if you notice any slight inaccuracies in your cuts. A quick check before starting an important project can save you a lot of trouble.
My laser line is very dim. Can I fix this?
A dim laser line often points to a power issue, such as weak batteries in a battery-powered model or a loose connection in a corded one. If the power source is good, the laser diode itself might be failing and may need replacement.
Is it okay to make cuts with the laser slightly off?
While a slightly off laser might still let you make a cut, it defeats the purpose of having a guide. For precise woodworking where measurements matter, you’ll want your laser to be perfectly aligned with the blade to ensure your cuts match your markings.
