
What Is the Best Miter Saw Blade for Trim Work?

For outstanding trim work, the best miter saw blade is typically a 10-inch or 12-inch blade with 80 teeth or more and an Alternate Top Bevel (ATB) grind. This combination gives you the cleanest, smoothest cuts on delicate molding and trim pieces, which is exactly what you want for a professional finish.
You see, when you’re working with expensive trim, you need a blade that minimizes tear-out and leaves almost no sanding. Opting for a higher tooth count helps achieve this precision, especially on hardwood and veneered materials where cleanliness is key. It’s all about making your cuts look effortless and flawless.
- The best miter saw blade for trim offers high tooth counts (80+).
- Look for an ATB (Alternate Top Bevel) tooth grind for cleaner cuts.
- Size matters: most trim work benefits from 10-inch or 12-inch blades.
- A good trim blade reduces tear-out and sanding time.
- Precision and smoothness are the main goals for trim work.
Let’s dive into the specifics of why these blade features matter and help you choose the perfect blade for your next trim project, ensuring your work always looks top-notch.
Choosing the Right Miter Saw Blade for Trim Work
Selecting the perfect miter saw blade for trim means focusing on precision. You want a blade that not only cuts cleanly but also minimizes the effort you put into sanding later. Think of it as choosing the right paintbrush for a fine detail job — the wrong one makes a mess, the right one makes it look easy.
Understanding Blade Anatomy: What Really Matters?
To pick an excellent blade, you need to understand its parts. It’s more than just a spinning disc. Each feature plays a role in how your cut looks and feels. We’ll break down the key elements that dictate a blade’s performance, particularly for delicate trim work. It’s like knowing the difference between a sleek sports car and a rugged pickup truck; both are useful, but for very different terrains.
Tooth Count: More is Definitely Better for Trim
When it comes to trim, a higher tooth count is your best friend. Why? More teeth mean each tooth removes a smaller amount of material with every pass. This translates to a smoother, cleaner cut, with less chance of splintering or tearing out wood fibers. Imagine sanding with fine-grit sandpaper versus coarse; the fine grit achieves a much smoother finish. For trim, we’re talking 80 teeth or more for a 10-inch blade, and often 100 teeth or more for a 12-inch blade.
We found that blades with fewer teeth, say 40 or 60, are often better for rougher, faster cuts on framing lumber. But for the visible surfaces of trim, those blades tend to leave a ragged edge. You want a blade that glides through the wood, leaving a surface that barely needs touch-ups. This saves you time and frustration, especially on expensive wood species.
Tooth Grind: The Secret to a Smooth Finish
The shape of each tooth, or its “grind,” also profoundly affects the cut. For trim, you’ll mainly hear about an Alternate Top Bevel (ATB) grind. This means the top of each tooth is beveled, alternating from left to right. This bevel creates a shearing action, much like a knife slicing through butter, rather than a chopping action.
An ATB grind helps to prevent tear-out, especially on veneered plywoods and delicate hardwoods. Some blades might even feature a Hi-ATB (High Alternate Top Bevel), which has an even steeper angle for an even cleaner cut. Other grinds like Flat Top Grind (FTG) are good for ripping wood, but they’ll give you a much rougher crosscut on trim. It’s all about finding the right tool for the job.
Kerf Width: Thin is In (Usually)
Kerf refers to the thickness of the cut the blade makes. You’ll find standard kerf blades (around 1/8 inch or 0.125 inches) and thin kerf blades (typically 3/32 inch or 0.091 inches). For trim, a thin-kerf blade is often a great choice. Why? Because it removes less material, meaning there’s less sawdust and also less strain on your saw’s motor. This can lead to a slightly cleaner cut and a quieter operation.
However, thin kerf blades can sometimes be more prone to deflection or wobbling if they aren’t of high quality. They demand a steady hand and a well-maintained saw. If you’re cutting very thick hardwood trim, a standard kerf might offer more stability, but for most common trim materials, thin kerf blades are excellent.
Blade Diameter: Matching Your Saw and Your Project
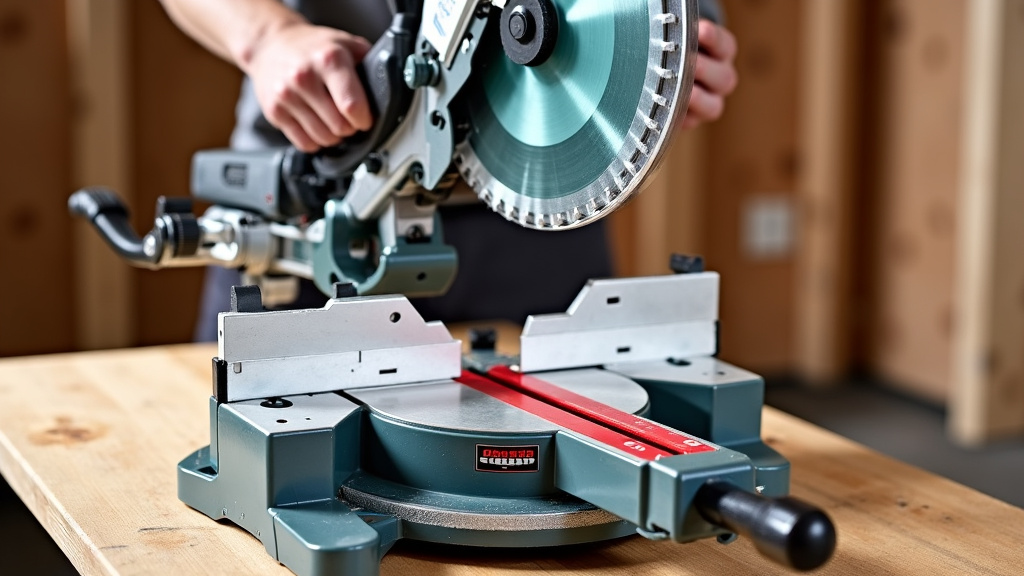
Miter saw blades typically come in a few common diameters: 8, 10, and 12 inches. Your saw will dictate the maximum size you can use. You can’t put a 12-inch blade on a 10-inch saw! But within your saw’s limits, which size is best for trim?
- 10-inch blades: These are very common and suitable for most trim work. They offer a good balance of cutting capacity and precision. Many 10-inch miter saws are homeowner favorites.
- 12-inch blades: If your saw can handle it, a 12-inch blade gives you increased cutting capacity, allowing you to cut wider trim in a single pass. This can be a huge time-saver when working with crown molding or wide baseboards. Think of it as having a little extra reach.
- 8-inch blades: Less common for dedicated trim work, 8-inch saws (often sliding compound miter saws) are compact but might struggle with wider stock.
For most users, a 10-inch or 12-inch blade with a high tooth count will be your go-to for trim. The larger diameter of a 12-inch blade means its teeth travel faster, which can sometimes lead to an even smoother cut, assuming the blade quality is good and your saw can handle the larger size without vibration.
Blade Materials and Coatings: Built to Last and Perform
The material the blade is made from, as well as any coatings, contributes to its durability and performance. You want a blade that stays sharp, resists corrosion, and runs cool. No one wants to buy a new blade for every project, right?
Carbide Tips: The Gold Standard
Most quality saw blades today feature carbide tips. Carbide is much harder than steel and holds its edge longer. Look for C3 or C4 grade carbide tips; these are generally considered high quality. The larger the carbide tip, the more times you can resharpen the blade, extending its life and value. It’s like having a durable set of tires on your car – they last longer and perform better.
Blade Plate and Slots: Stability and Vibration Control
The main body of the blade, called the plate, is usually made from steel. A thick, stable plate is crucial for precision cutting. Thicker plates resist deflection and vibration, leading to straighter, cleaner cuts. Many quality blades also feature expansion slots or laser-cut vents, which help dissipate heat and reduce noise. These slots prevent the blade from warping due to heat buildup during prolonged use, much like expansion joints in a bridge.
Some blades also have anti-vibration technology, often seen as special slots or resin-filled channels. We found that these features make a noticeable difference in reducing blade wobble and improving cut quality, especially on longer cuts. Blade vibration is the enemy of clean trim cuts!
Coatings: Reducing Friction and Buildup
You might notice some blades have special coatings, often a silvery or black finish. These coatings, like non-stick pans, help reduce friction and prevent resin buildup. Lower friction means the blade cuts cooler and more easily, which extends its life and the life of your saw’s motor. Less resin buildup means you spend less time cleaning and more time cutting. Plus, some coatings offer corrosion resistance, a nice bonus for longevity.
Price vs. Performance: Investing in Your Results
It’s tempting to grab the cheapest blade on the shelf, but for trim work, this is usually a false economy. A high-quality blade is an investment that saves you time, reduces material waste, and vastly improves the finish of your project. Think of it this way: spending a little more upfront on a blade can save you hours of sanding or even replacing expensive pieces of trim.
We’ve found that mid-range to high-end blades from reputable brands offer the best value. They stay sharp longer, cut cleaner, and are often made with better materials and more precise manufacturing processes. While you don’t need to break the bank, don’t skimp on this critical component of your miter saw setup.
Understanding Your Needs: A Quick Checklist
Before you make a purchase, take a moment to consider these points. This checklist will help you narrow down your options and ensure you get a blade that perfectly suits your projects.
- What is the maximum blade size your miter saw can accommodate? (e.g., 10-inch, 12-inch)
- What types of trim materials will you be cutting most often? (e.g., pine, oak, MDF, veneered plywood)
- How often will you be using your saw for trim work? (Occasional DIY or regular professional use?)
- Are you prioritizing absolute cut quality above all else, even if it means slower cutting?
- What’s your acceptable level of tear-out and post-cut sanding?
- What is your budget range for a new blade?
Comparing Blade Types for Trim Work
To give you a clearer picture, here’s a quick comparison of what you might expect from different blade configurations when cutting trim. This isn’t exhaustive, but it highlights the core differences.
| Blade Characteristic | Ideal for Trim Work? | Why? |
|---|---|---|
| High Tooth Count (80T+) | Yes, absolutely | Many teeth create very smooth cuts, minimizing tear-out and sanding. |
| ATB (Alternate Top Bevel) Grind | Yes, essential | Shearing action prevents splintering on delicate edges. |
| Thin Kerf | Often, yes | Removes less material, less strain on saw, potentially cleaner cut. Maintain steady hand. |
| Thick Plate / Anti-Vibration | Yes, important | Reduces wobble and deflection for straighter, more accurate cuts. |
| Low Tooth Count (40-60T) | No | Aggressive cutting, but leaves rough edges and significant tear-out on trim. |
| FTG (Flat Top Grind) | No | Best for ripping wood along the grain; creates rough crosscuts on trim. |
You can see from the table that specific features are far more critical than others when your goal is a flawless finish on trim. Don’t compromise on tooth count and ATB grind if you want results you can be proud of.
Conclusion
Choosing the right miter saw blade for trim work truly makes all the difference in your finished project. You now understand why a high tooth count (80+ teeth) and an ATB (Alternate Top Bevel) grind are non-negotiable for smooth, tear-out-free cuts. Investing in a quality blade, typically 10-inch or 12-inch, means less sanding and a more professional result.
Remember, a well-chosen blade isn’t just about cutting faster; it’s about cutting better and saving you time and frustration. Take your saw’s capabilities and your common trim materials into account. With this knowledge, you are now equipped to select a blade that will consistently deliver the flawless finish your trim work deserves.
Frequently Asked Questions
Can I use my regular 40-tooth blade for trim in a pinch?
While you can physically install a 40-tooth blade, we strongly advise against using it for trim work. It will very likely cause significant tear-out, splintering, and leave rough edges. This means you’ll spend much more time sanding, or worse, have to recut expensive trim pieces.
What’s the downside of using a thin kerf blade?
Thin kerf blades are great for reducing material waste and motor strain, but they can be more prone to deflection or wobbling if the blade isn’t high quality or your saw isn’t perfectly stable. For the best results with a thin kerf, ensure your blade is from a reputable brand and your saw is well-maintained.
How often should I sharpen my miter saw blade for trim?
The frequency depends on how often you cut and the types of materials. For trim work, you’ll want to keep your blade exceptionally sharp. If you notice increased tear-out, more effort to push through wood, or dark burn marks, it’s a good sign your blade needs sharpening or replacement.
Does a blade’s coating really matter?
Yes, coatings on blades contribute to their performance and longevity. These non-stick-like finishes reduce friction, allowing the blade to cut cooler and more efficiently. They also help prevent sap and resin buildup, which can dull a blade quickly and lead to poorer cut quality over time.
Is it worth buying a more expensive blade for DIY trim projects?
Absolutely. For DIYers, a quality blade is an investment that pays off in reduced frustration and better results. It saves you from re-doing cuts, excessive sanding, and potential material waste, making your projects more enjoyable and professional-looking.
