How to Cut Deck Boards with a Miter Saw?
To cut deck boards with a miter saw, you will first need to set up your saw safely and accurately. The easiest way to get straight, precise cuts is by measuring twice, marking clearly, and using proper saw technique every time you cut deck boards with a miter saw. Take your time for the best results.
You might be wondering if you can really get those perfect angles and lengths yourself. We found that most DIYers can achieve professional-looking cuts with a bit of practice. Learning to use a miter saw correctly ensures your deck project looks great and lasts for years. It’s not as hard as you think!
- Set up your miter saw safely.
- Measure and mark your cuts with care.
- Choose the right blade for deck boards.
- Use proper cutting techniques.
- Ensure your cuts are square and clean.
Ready to make those deck boards fit together like a dream? Let’s walk through exactly how to master your miter saw for deck board cutting, step by step.
Getting Started: Setting Up Your Miter Saw for Deck Boards
Before you make your first cut, a good setup is key. Proper preparation ensures both safety and accuracy. Think of it as laying the groundwork for a perfect project.
Safety First: Your Miter Saw Setup Checklist
Your miter saw is a powerful tool. Treating it with respect means prioritizing safety. We found that most accidents happen due to rushed setups or forgetting basic precautions.
- Clear your workspace: Make sure there’s nothing around the saw that could get caught or tripped over.
- Secure your saw: Bolt it to a sturdy workbench or use a proper miter saw stand. Wobbling saws are dangerous.
- Check the blade: Is it sharp and the correct type for wood? A dull blade can kick back.
- Wear safety gear: Always use safety glasses, hearing protection, and avoid loose clothing.
- Ensure good lighting: You need to clearly see your mark and the blade.
- Locate the power switch: Know how to quickly turn off the saw if something goes wrong.
Choosing the Right Blade for Deck Boards
The right blade makes a huge difference in cut quality and safety. For deck boards, you want a blade designed for wood cutting. But which one? Our guide on Which Miter Saw Blade To Use can help you select the perfect one for your specific cutting needs.
Blade Tooth Count Matters
A blade’s tooth count affects the smoothness of the cut. More teeth mean a smoother finish, while fewer teeth cut faster but can be rougher.
| Blade Type (Teeth) | Best For | Cut Quality |
|---|---|---|
| 24-32 Teeth | Rough framing, fast cuts | Faster, but rougher edge |
| 40-60 Teeth | General purpose, deck boards | Good balance of speed and smoothness |
| 80+ Teeth | Fine woodworking, very smooth finish | Slower, very smooth edge (overkill for deck boards) |
For deck boards, we recommend a general-purpose blade with 40 to 60 teeth. This provides a good balance between speed and a clean edge, which is perfect for most pressure-treated lumber or composite decking.
Measuring and Marking Your Deck Boards Accurately
Precision in measuring and marking saves a lot of headaches later. Remember the old saying: “Measure twice, cut once.” It’s incredibly true for decking.
Techniques for Perfect Measurements
A tape measure seems simple, but there are tricks to getting consistent results. Little variations add up quickly on a deck.
- Use a reliable tape measure: A flimsy or bent tape can lead to errors.
- Hook the end securely: Make sure the tape’s hook is firmly against the end of your board.
- Read at eye level: Bending or looking at an angle can create parallax errors.
- Keep the tape straight: Don’t let it sag or bow, especially on longer boards.
- Measure from the same end: For multiple identical cuts, always measure from the same starting point on each board. This helps keep things consistent.
Making Clear and Visible Markings
What good is a perfect measurement if you can’t see it? Clear markings are essential for guiding your saw.
We found that a sharp carpenter’s pencil works best for wood. For composite decking, a fine-tip marker can sometimes be clearer. Make a small, precise mark exactly where you want the cut to be.
Then, use a speed square or combination square to draw a straight line across the board. This line will be your cutting guide. Indicate which side of the line is the “waste” side, so you don’t accidentally cut your board too short.
Mastering the Cut: Proper Miter Saw Technique
With your saw set up and your board marked, it’s time for the actual cut. Good technique makes all the difference for clean, safe cuts.
Positioning the Deck Board
How you hold or support the board is important. It needs to be stable and well-supported throughout the cut.
- Support long boards: If your board is longer than your saw’s table, use roller stands or sawhorses. The board should be level with the saw table.
- Keep it flat and firm: The board should sit flat against the saw’s fence and table. No gaps!
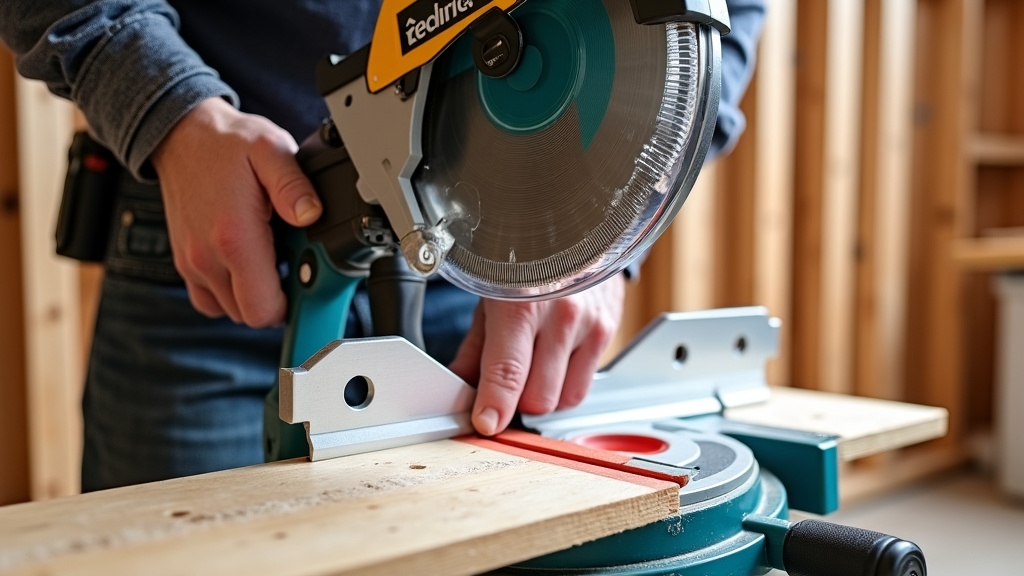
- Hold it securely: Use clamps if possible. If holding by hand, keep your hands at least 6 inches away from the blade path.
Executing the Cut Safely and Smoothly
This is where practice comes in handy. You want a smooth, controlled motion, not a jerky one.
- Power up: Turn on the saw and let the blade reach full speed before engaging the wood.
- Lower the blade slowly: Bring the blade down into the board in a controlled manner. Don’t force it.
- Push through steadily: Maintain steady pressure as the blade cuts through the material.
- Retract slowly: Once the cut is complete, allow the blade to stop spinning before raising it back up.
- Remove off-cut: Wait for the blade to fully stop before moving any cut pieces or scrap.
Many experts say to avoid “plunging” the saw too quickly, as it can cause kickback or rough cuts. A smooth, even pace is always best (National Safety Council).
Achieving Perfect Angles and Bevels
Decking often requires more than just straight cuts. You might need angled cuts for corners or bevels for drainage or decorative edges.
Setting Up for Angle (Miter) Cuts
Miter saws are built for angles. This is where they really shine.
Most miter saws have a protractor scale at the base. You’ll loosen a locking knob, pivot the saw head to the desired angle (like 45 degrees for a corner), and then lock it back down. Always double-check your angle with a separate protractor or speed square before cutting, especially for critical pieces.
Setting Up for Bevel Cuts
Bevel cuts are when the blade tilts, often for drainage on deck edges or custom trim work. Most miter saws allow the blade to tilt to the left, and some can tilt both left and right (compound miter saws). Our detailed guide on How To Tilt A Miter Saw can help you master these precise adjustments for perfect bevel cuts.
Look for the bevel scale on the back or side of your saw. Loosen the bevel lock, tilt the motor assembly to your desired angle, and re-lock it. Again, verify the angle with a gauge. Remember, when making bevel cuts, the saw’s motor housing might get closer to the fence, so ensure you have clearance.
Troubleshooting Common Cutting Issues
Even with the best preparation, you might run into a few snags. Don’t worry, these are usually easy to fix.
Addressing Uneven or Ragged Cuts
If your cuts aren’t perfectly smooth or straight, here are a few things to check:
- Blade sharpness: A dull blade is the number one culprit for rough cuts. Replace it!
- Blade type: Are you using the right tooth count for the material?
- Saw speed: Did you let the blade reach full speed before cutting?
- Feed rate: Are you pushing the saw too fast or too slow through the wood? Aim for a consistent, moderate pace.
- Board movement: Was the board securely held against the fence and table?
Dealing with Blade Burning or Smoke
If you see smoke or burn marks on your cuts, it means too much friction. This can dull your blade faster.
- Blade cleanliness: Resinous wood can build up on the blade, making it sticky. Clean your blade with a specialized cleaner.
- Blade sharpness: Again, a dull blade generates more friction.
- Feed rate: Cutting too slowly can also cause burning, as the blade stays in contact with the wood longer.
A little patience and attention to these details will make your deck board cutting much smoother and more professional-looking.
Conclusion
You now have the knowledge to confidently cut deck boards with your miter saw. Remember, success comes from a safe setup, precise measurements, and a steady hand. Taking your time with each step will prevent frustration and deliver the clean, professional results your deck deserves. Don’t rush the process; patience leads to perfect cuts every time.
With these techniques, you’re ready to create a beautiful, durable deck that you can enjoy for years. Grab your safety gear, double-check your measurements, and get ready to transform your outdoor space!
Frequently Asked Questions
What’s the best way to cut composite deck boards with a miter saw?
When cutting composite deck boards, use a carbide-tipped blade with 60-80 teeth for the cleanest cut. These blades minimize chipping and leave a smoother edge compared to general-purpose wood blades. Make sure to support the board fully to prevent sagging and ensure a straight cut.
How can I prevent splintering when cutting pressure-treated deck boards?
To prevent splintering in pressure-treated lumber, use a sharp blade with a higher tooth count (40-60 teeth). You can also place masking tape over your cut line before marking and cutting; this helps hold the wood fibers down. A slow, steady feed rate through the saw also reduces splintering.
Do I need special safety precautions for cutting deck boards?
Yes, always wear safety glasses to protect your eyes from flying debris. Hearing protection is also essential to prevent damage from the saw’s noise. Avoid loose clothing and jewelry that could get caught in the blade. Ensure your workspace is clear and your saw is stable before you start cutting.
My miter saw leaves burn marks on the deck boards. What’s wrong?
Burn marks usually indicate excessive friction. This can happen if your blade is dull, dirty with sap or resin buildup, or if you’re cutting too slowly. Try cleaning your blade, replacing it if it’s dull, and maintaining a consistent, slightly faster feed rate to reduce burning.
How do I make sure all my deck boards are cut to the exact same length?
For identical lengths, set up a stop block on your miter saw station. This is a piece of wood clamped to your fence at the desired measurement. You can then butt each deck board against this stop for consistent, repeatable cuts without re-measuring every single piece.