How To Tilt A Miter Saw?
On this page (6 sections)
To tilt a miter saw, you typically release the bevel lock, pivot the saw head to the desired angle shown on the bevel scale, and then securely re-engage the lock.
This action creates a bevel cut, allowing you to angle your cuts from the top down, a common requirement in trim work and framing.
- You’ll always start by ensuring your saw is unplugged for safety.
- Locate and loosen the bevel lock handle, usually at the rear or front of the saw head.
- Gently tilt the saw head to your desired angle, referencing the saw’s bevel scale.
- Securely tighten the bevel lock handle before making any cuts.
- A test cut on scrap wood is a smart move to confirm your angle setting.
How To Tilt A Miter Saw?
Tilting a miter saw means angling the saw blade so it cuts at a slant across the thickness of your material, creating what’s known as a bevel cut. This essential adjustment is what allows you to craft angled edges for projects like crown molding, picture frames, or deck railings.
Think of it like tilting your head to see something from a new perspective; your miter saw head does something similar to make a cut that isn’t straight up and down. It’s a simple process once you know where the controls are and what they do.
What is Miter Saw Tilt Anyway?
When we talk about “tilting” a miter saw, we’re referring to its ability to make a bevel angle. This means the blade leans to the left or right, allowing it to slice through wood at an angle other than 90 degrees to the face of your workpiece.
This feature is a game-changer for many woodworking projects. It transforms a simple crosscut into a specialized piece, making your work look polished and professional. Learning this skill really opens up new possibilities for your craftsmanship.
The Difference: Bevel vs. Miter
It’s easy to get these two terms mixed up, but they’re distinct. A miter cut is when you pivot the saw’s table horizontally, cutting across the width of the board at an angle (like for corners of a picture frame). A bevel cut, which involves tilting the saw, angles the blade vertically, across the thickness of the board (like for crown molding against a ceiling).
Many experts say understanding this difference is foundational (Professional Woodworking Association). A compound cut, by the way, combines both a miter and a bevel in one go. Pretty cool, right?
Why Would You Tilt Your Saw?
You’d tilt your saw for many reasons, primarily to create angled edges on your material. Imagine fitting crown molding, which requires bevels to sit flush against the wall and ceiling. Or perhaps you’re building a shadow box or a specific joint in furniture making.
We found that tilting is also crucial for things like roof trusses or other structural elements where angled support is needed. It’s about more than just aesthetics; it’s about structural integrity and precise fit.
Gearing Up: Safety First, Always
Before you even think about adjusting your saw, safety is your best friend. Always wear safety glasses and hearing protection. Gloves are often a good idea too, especially when handling rough lumber.
The most important step? Always unplug your miter saw from its power source before making any adjustments or blade changes. A sudden power surge or accidental bump could lead to serious injury. We found this to be a universal recommendation across all safety guidelines (Occupational Safety and Health Administration).
Your Miter Saw’s Bevel Controls
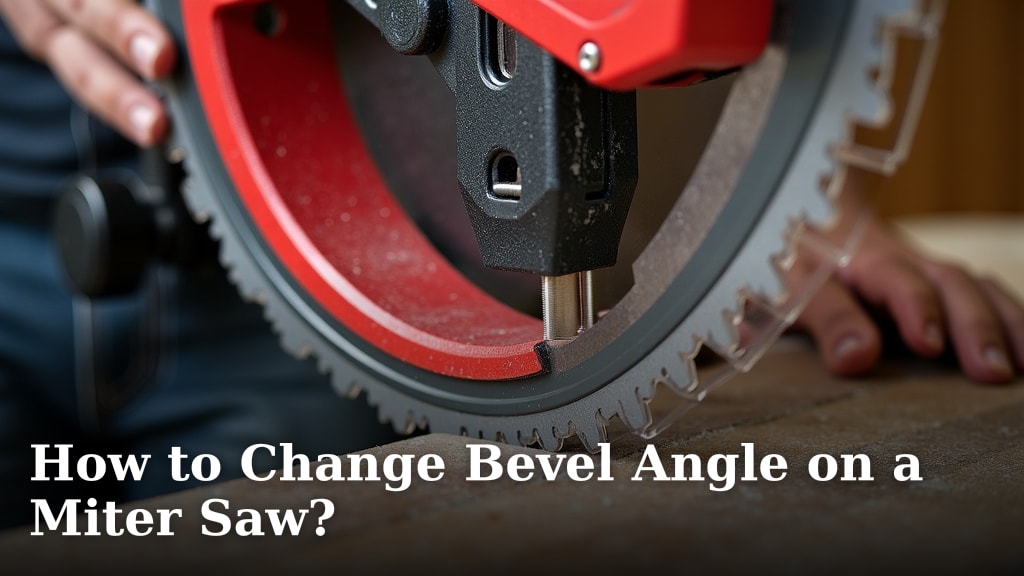
Every miter saw has specific controls for tilting. You’ll find a bevel lock handle or knob, typically at the rear or front of the saw head. This is what you loosen to allow the saw head to move.
There’s also a bevel scale, a printed or etched guide, usually located at the pivot point of the saw head. This scale shows you the degrees of tilt, often ranging from 0 to 45 or even 48 degrees in both left and right directions, sometimes more on specialized models.
Step-by-Step Guide: Tilting Your Miter Saw
Ready to tilt? It’s a straightforward process. Just remember to take your time and double-check your settings. Rushing can lead to inaccurate cuts and potential frustration.
Locating the Bevel Lock
First, ensure the saw is unplugged. Then, look for the main lever or knob that controls the saw’s tilt. It’s often on the backside of the saw or on the front near the fence. You’ll see it’s labeled for “bevel lock” or something similar.
You’ll turn this handle counter-clockwise to loosen it. This frees up the saw head, allowing it to pivot. Don’t worry if it feels a little stiff; they’re designed to hold securely when tightened.
Adjusting the Bevel Angle
With the bevel lock loose, gently tilt the saw head to the left or right. As you move it, you’ll see the pointer on the bevel scale change. Find your desired angle, for example, 30 degrees for a specific trim piece.
Many saws also have positive stops at common angles like 0, 22.5, 30, and 45 degrees. These are little detents that the saw head will click into, making it easier to quickly set standard angles. We found that these stops greatly improve efficiency for repetitive cuts.
Securing Your Setting
Once you’ve got the saw head at the precise angle you need, it’s time to lock it down. Turn the bevel lock handle clockwise until it’s very tight. You don’t want any movement in the saw head once you start cutting.
A loose bevel lock can lead to inaccurate cuts and can even be dangerous. Give the saw head a gentle wiggle to ensure it’s firmly locked in place before you plug in the saw and make your cut.
Calibrating for Accuracy
Even with the most precise saw, it’s a good habit to periodically check your 0-degree bevel. You can use a digital angle gauge or a reliable combination square. Set your saw to 0 degrees, then place the gauge or square against the blade and the saw table.
If it’s off, your saw’s manual will explain how to fine-tune the 0-degree stop. Many experienced woodworkers suggest this check at least monthly or after moving the saw (Woodworking Masterclass forum discussions).
Master These Bevel Cuts
Knowing how to tilt opens up a world of project possibilities. Here are the two main types of cuts you’ll be making with that bevel function.
Single Bevel Cuts
A single bevel cut is just what it sounds like: a cut made by tilting the blade to one specific angle, without any miter adjustment. Imagine cutting a board where only one edge needs to be angled.
This is common for things like baseboards where the top edge needs a slight angle to meet the wall cleanly. Or for simple decorative edges on shelves. It’s the most basic use of your saw’s tilt function.
Compound Miter Cuts
This is where the magic happens! A compound miter cut involves both a miter angle (the saw table pivots) and a bevel angle (the saw head tilts) at the same time. This is often needed for complex angles, like those found in crown molding corners.
It can seem tricky at first, but with practice and understanding your saw’s capabilities, you’ll be making these cuts like a pro. We found that a good understanding of both movements helps immensely.
.responsive-table {
width: 100%;
overflow-x: auto;
}
.responsive-table table {
width: 100%;
border-collapse: collapse;
}
.responsive-table th, .responsive-table td {
border: 1px solid #ddd;
padding: 8px;
text-align: left;
white-space: nowrap; /* Prevents text wrapping in cells */
}
.responsive-table th {
background-color: #f2f2f2;
}
| Cut Type | Saw Adjustment | Common Use | Complexity |
|---|---|---|---|
| Miter Cut | Table pivots horizontally | Picture frames, baseboard corners | Basic |
| Bevel Cut | Saw head tilts vertically | Angled edges, crown molding fit | Intermediate |
| Compound Miter | Both table pivots and head tilts | Complex crown molding, intricate joints | Advanced |
Avoiding Common Tilting Trouble
Even with experience, small errors can creep in. Knowing what to watch out for can save you time, wood, and headaches. Don’t be afraid to slow down and double-check your work.
The Importance of a Test Cut
Never skip a test cut on a piece of scrap wood. Seriously, this step is often overlooked, but it’s your best friend. A small piece of scrap is far cheaper to sacrifice than your carefully measured and expensive workpiece.
Make your test cut, then check it with an angle gauge or against the piece it’s meant to join. If it’s not perfect, you can adjust your saw before cutting your final material. Many experts say this step alone prevents countless mistakes (Fine Woodworking magazine).
Keeping Your Saw in Top Shape
A well-maintained saw performs better and safer. Regular cleaning and checks are part of being a responsible tool owner. This helps ensure your tilt mechanism operates smoothly every time you need it.
Here’s a quick checklist for ensuring your miter saw is ready for tilting:
- Check for dust and debris buildup around the bevel mechanism.
- Ensure all pivot points move freely without excessive force.
- Inspect the bevel scale for clarity and damage.
- Confirm the bevel lock handle tightens securely.
- Lubricate moving parts as recommended by your saw’s manual.
- Always make sure the blade is sharp and clean for precise cuts.
Conclusion
Tilting your miter saw for bevel cuts is a fundamental skill that significantly expands your capabilities as a woodworker. From simple angled edges to complex compound miter joints, mastering this adjustment allows for cleaner, more professional results.
Remember to prioritize safety, understand your saw’s controls, and always perform a test cut. With a bit of practice and attention to detail, you’ll be confidently tilting your saw and creating amazing projects in no time. It’s a straightforward process that makes a world of difference!
What is the maximum tilt angle on most miter saws?
Most miter saws can tilt up to 45 degrees in one direction (either left or right) for bevel cuts. Many models, especially compound miter saws, can tilt up to 45 degrees in both left and right directions, with some even reaching 48 or 50 degrees for specialized needs.
Can all miter saws tilt in both directions?
No, not all miter saws tilt in both directions. Single-bevel miter saws only tilt to one side, usually the left. Dual-bevel miter saws, however, can tilt to both the left and right, which saves you from having to flip your workpiece for opposing angle cuts.
Why is my miter saw not holding its tilt angle?
If your miter saw isn’t holding its tilt angle, the most common reason is that the bevel lock handle isn’t tightened enough. It could also be due to debris preventing a full lock, or the internal locking mechanism might be worn or damaged. Always ensure the lock is fully engaged.
How do I know if my bevel angle is accurate?
You can verify your bevel angle’s accuracy by making a test cut on scrap wood and then checking the cut angle with a reliable digital angle gauge or a precision protractor. You should also check the 0-degree stop periodically using a known square against the blade and table.
Is it safe to cut with the saw tilted at its maximum angle?
Yes, it is generally safe to cut with your miter saw tilted at its maximum angle, provided you follow all safety guidelines. Ensure the bevel lock is secure, the workpiece is clamped firmly, and your hands are clear of the blade path. The saw is designed to operate safely within its specified range of motion.