Can You Cut Metal with a Miter Saw?
On this page (8 sections)
Yes, you can cut metal with a miter saw, but you need the right blade and proper safety precautions. You can’t just use your woodworking blade. Using the wrong blade can be very dangerous and damage your saw.
Most miter saws are built for cutting wood or plastic. When cutting metal, you need to use a specialized metal-cutting blade. This ensures both your safety and a clean cut. You’ll find different blades designed for various types of metal, including ferrous and non-ferrous options.
- Specialized blades are a must for cutting metal safely.
- Never use a standard wood blade for metal.
- Different metal types need different blades.
- Safety gear is always critical when cutting.
You probably have questions about which blade to pick, how to set up your saw, and what to wear. We’ll guide you through everything you need to know for cutting metal safely and effectively with your miter saw.
Cutting Metal with a Miter Saw: What You Need to Know
You’re probably wondering if your existing miter saw, usually reserved for woodworking projects, can tackle metal. The short answer is yes, with the correct setup and safety measures, it’s entirely possible. But it’s not as simple as swapping a blade and hitting the power button.
We’re going to walk you through the essential steps and considerations. You’ll learn how to choose the right blade, set up your saw safely, and protect yourself during the process. This isn’t just about getting the job done; it’s about doing it safely and effectively.
Understanding Your Miter Saw’s Capabilities
Before you even think about buying a metal-cutting blade, take a moment to understand your miter saw. Most miter saws are designed for wood, plastics, and sometimes aluminum with the right blade. For advice, see our guide to cutting plastic safely. They operate at high RPMs (revolutions per minute).
When cutting metal, especially tougher ferrous metals like steel, you generate a lot of heat and sparks. Your saw needs to be able to handle this extra stress. If you have a basic, lightweight wood-cutting saw, it might not be the best choice for frequent or heavy-duty metal work.
High-Speed vs. Low-Speed Saws
Most standard miter saws are high-speed. They’re built for rapid, clean cuts in wood. When cutting metal, these high speeds can melt softer metals or create excessive heat and sparks with harder ones.
For dedicated metal cutting, some professionals use “cold cut” saws. These saws operate at much lower RPMs, which helps reduce heat buildup and produces fewer sparks. A standard miter saw can still cut metal, but you’ll need to be aware of the differences and adjust your technique.
The All-Important Blade: Your Key to Success
This is where your journey into metal cutting truly begins. You cannot, under any circumstances, use a wood-cutting blade for metal. It’s unsafe, ineffective, and will destroy the blade and possibly your saw. Think of it like trying to eat soup with a fork; it’s just not going to work.
Metal cutting blades are specifically designed to handle the hardness and abrasive nature of metal. They come in different types, each suited for particular metals and tasks. Choosing the right blade is the most critical decision you’ll make.
Abrasive Blades for Ferrous Metals
These are often called “chop saw” blades. They look like a very thick grinding wheel. You typically see them on dedicated chop saws, not standard miter saws. They effectively grind through the metal, creating a lot of heat and sparks.
- They are generally more affordable than carbide-tipped blades.
- They wear down quickly and get smaller with each cut.
- Best for cutting steel, rebar, angle iron, and other ferrous metals.
- They produce a lot of heat, sparks, and dust.
- Can leave a rougher cut edge that may need deburring.
If you’re only doing occasional, rough cuts on steel, an abrasive blade might be an option. However, if using on a standard miter saw, ensure your saw’s guard can handle the shower of sparks.
Carbide-Tipped Blades for Metal
These are the workhorses for cutting metal with a miter saw. They look more like traditional wood blades but have special carbide teeth designed for metal. These teeth are much harder and more durable than those on wood blades.
- They create much less heat and fewer sparks than abrasive blades.
- They offer cleaner, more precise cuts.
- They last much longer if used correctly.
- More expensive upfront, but often save money in the long run.
Carbide-tipped blades come in varieties for ferrous metals (steel, iron) and non-ferrous metals (aluminum, copper, brass). You need to pick the right one for your material.
Ferrous Metal Carbide Blades
These blades are designed to cut through steel, stainless steel, and other iron-based alloys. They have a specific tooth count and geometry to withstand the heat and friction. Always check the blade’s packaging to confirm it’s for ferrous metals.
Non-Ferrous Metal Carbide Blades
Aluminum, copper, and brass are softer metals. Blades for these materials have a different tooth angle and hook to prevent the material from melting and gumming up the blade. Using a ferrous blade on aluminum can cause the aluminum to melt and stick, which is very dangerous (NIOSH). For material-specific setup and steps, see cutting aluminum with a miter saw.
Setting Up Your Miter Saw for Metal Cutting
Once you have the right blade, proper setup is essential for safety and a good cut. Don’t rush this part. Your saw needs to be stable, and your workpiece secure.
Blade Installation and Guard Check
First, unplug your saw. This is non-negotiable. Install the metal-cutting blade according to the saw’s instructions, ensuring the teeth are facing the correct direction. Always use the appropriate arbor washer and tightening nut.
Check that your saw’s blade guard functions properly. It should retract smoothly and cover the blade when not cutting. Metal cutting can create flying debris, so a functioning guard is even more critical than with wood.
Securing Your Workpiece
Metal pieces can be flimsy or surprisingly heavy. You absolutely must secure your material firmly. Do not try to freehand a metal cut on a miter saw. We found that experts often stress this point heavily, as even small movements can lead to kickback or bent blades.
- Use your miter saw’s clamp, if it has one.
- Add external clamps to hold the metal securely to the saw’s fence and table.
- Support long pieces of metal with saw horses or roller stands.
A wobbly piece of metal is an accident waiting to happen. It can twist, bind the blade, and cause dangerous kickback, sending metal shards flying.
Essential Safety Gear You Must Wear
Cutting metal, especially with a miter saw, generates hazards specific to the material. Sparks, hot metal debris, and loud noise are all part of the process. Your personal protective equipment (PPE) is your first line of defense.
Here’s a checklist of what you need:
- Full Face Shield: Goggles are not enough. Hot metal shards can fly wide.
- Safety Glasses: Worn under the face shield for double protection.
- Leather Gloves: To protect your hands from heat and sharp edges.
- Long-Sleeved Shirt & Pants: Made from natural fibers like cotton or denim to protect from sparks.
- Hearing Protection: Earplugs or earmuffs. Metal cutting is loud.
- Respirator or Dust Mask: Especially when cutting coated or galvanized metals.
Making the Cut: Technique and Tips
With your saw set up and your safety gear on, you’re ready to cut. The technique for cutting metal is different from wood. You need to be patient and let the blade do the work.
Slow and Steady Pressure
When you begin your cut, apply slow, steady, and even pressure. Don’t force the blade through the metal. Too much pressure can overheat the blade, dull the teeth, or even cause kickback.
Allow the saw to reach full speed before engaging the material. Listen to the saw; if it’s struggling, you might be pushing too hard. It’s often better to take a little longer for a clean, safe cut rather than rushing.
Managing Heat and Sparks
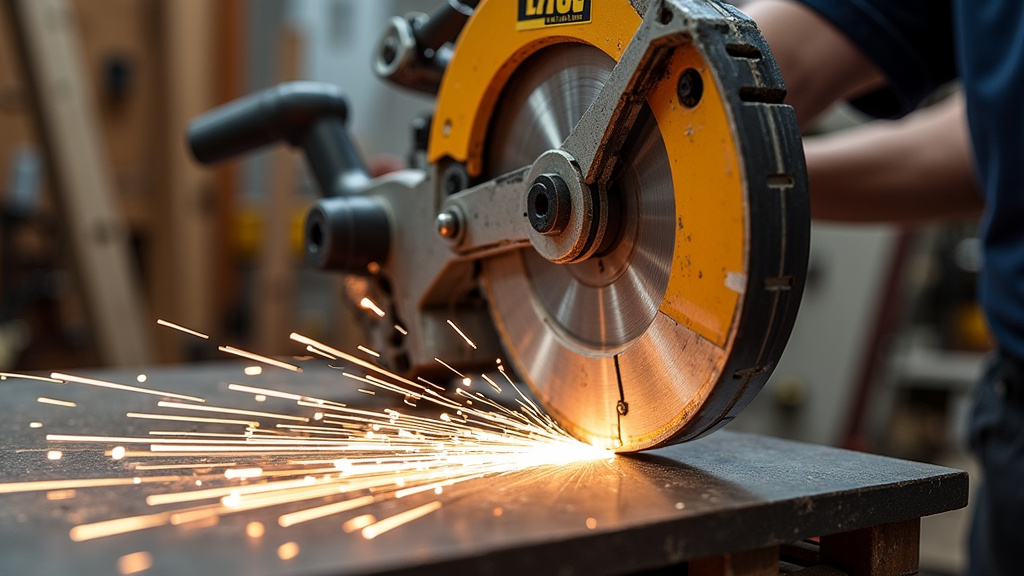
Cutting metal, particularly steel, creates a shower of hot sparks. This is normal. Make sure there are no flammable materials nearby in your workspace. Keep a fire extinguisher handy, just in case (NFPA).
For longer cuts, you might need to pause occasionally to let the blade and workpiece cool down. Some people use cutting fluid, but usually on dedicated cold-cut saws. On a standard miter saw, simply letting it cool is often sufficient.
| Feature | Wood Blade | Metal Carbide Blade | Abrasive Metal Blade |
|---|---|---|---|
| Typical Material | Wood, Plywood, MDF | Steel, Aluminum, Copper | Steel, Rebar, Angle Iron |
| Teeth Type | Many, thin, sharp | Fewer, thick carbide tips | None, abrasive material |
| Sparks Generated | Minimal dust | Few to moderate | Heavy shower |
| Cut Quality | Smooth, clean | Very clean, precise | Rough, needs deburring |
| Heat Generated | Low | Low to moderate | High |
| Lifespan | Long (for wood) | Long (for metal) | Short (wears down) |
Cleaning Up After Metal Cutting
After you’ve finished your cuts, don’t just walk away. Metal cutting leaves behind sharp shards, hot debris, and potentially metal dust. Clean up carefully.
Use a shop vacuum to clear away all debris. Do not use your bare hands to pick up metal pieces. They can be incredibly sharp and still hot. Use gloves and a brush or magnet to gather small pieces.
Inspect your saw for any damage or buildup, especially around the blade and motor vents. Keeping your saw clean will help it last longer and perform better for your next project, whether it’s wood or metal.
Conclusion
You now know that cutting metal with your miter saw is absolutely possible. The key lies in selecting the correct blade for your specific metal type. Remember, a carbide-tipped blade built for metal is not interchangeable with a wood blade.
Always prioritize safety first. Wear all your personal protective equipment. Secure your workpiece firmly and use a slow, steady cutting technique. With the right preparation and caution, you can confidently tackle metal-cutting projects with your miter saw.
Now, go equip yourself properly and get those metal projects done safely and efficiently!
Frequently Asked Questions
Can any miter saw cut metal?
Most standard miter saws can cut metal. However, they operate at higher RPMs than specialized “cold cut” saws. This means you need the right blade and must manage heat and sparks carefully. Heavy-duty metal work might be better suited for a dedicated low-speed saw.
What is the biggest mistake people make when cutting metal with a miter saw?
The biggest mistake is using the wrong blade. Never use a wood-cutting blade for metal. Another common error is not properly securing the workpiece, which can lead to dangerous kickback and injury.
Do I need to lubricate the blade when cutting metal?
For most uses with a standard miter saw and specialized carbide-tipped blades, lubrication isn’t typically required. These blades are designed to cut dry. Applying cutting fluid is more common with dedicated cold-cut saws or when trying to extend blade life in heavy industrial use.
Why do some metal-cutting blades have fewer teeth than wood blades?
Metal-cutting blades often have fewer, larger teeth compared to wood blades. This design allows for more aggressive chip removal, which is crucial for preventing heat buildup and clearing metal shavings. Fewer teeth create less friction and resist binding.
Can I cut rusty metal with a miter saw?
Yes, you can cut rusty metal, but be aware it can dull your blade faster. The rust acts as an abrasive. For safety, ensure the material is still structurally sound and clamp it securely. Expect more sparks and a potentially rougher cut due to the surface imperfections.