How to Change a Miter Saw Blade?
On this page (6 sections)
To change a miter saw blade, you’ll first need to unplug the saw for safety, then secure the blade itself before loosening the arbor nut. Afterward, carefully remove the old blade and install the new one securely. It sounds a bit complicated, but it’s simpler than you think once you know the steps. If it still wobbles after installation, see our guide to common blade wobble causes.
Replacing your miter saw blade doesn’t have to be a scary task, even if you’re new to power tools. We understand that changing a miter saw blade can seem a bit daunting at first. However, knowing how to safely and efficiently swap out your blade is a key skill for anyone using a miter saw, ensuring you get clean cuts and keep your projects on track. Plus, a sharp blade makes all the difference in your woodworking results.
- Unplug for safety.
- Locate the blade lock and arbor nut.
- Loosen and remove the old blade.
- Install the new blade.
- Tighten and reassemble.
Let’s walk through exactly how to change a miter saw blade, step by step, making sure you feel confident and safe throughout the process.
Getting Started: Prepping for Your Blade Change
Before you even think about touching that blade, safety is your top priority. Seriously, this isn’t a step to rush through. You’re working with a powerful tool, and a few moments of caution can prevent a lot of trouble. Let’s make sure everything is secure and ready before we dive in.
Gathering Your Essential Tools
You wouldn’t start a road trip without packing, right? Changing your miter saw blade is similar. Having the right tools on hand makes the process smoother and safer. You’ll avoid frustrating trips back and forth to your toolbox.
- Wrench or Hex Key: Your saw likely came with a specific wrench or hex key for the arbor nut. Find it! If not, a standard adjustable wrench might work, but the original is always best.
- Blade Lock Pin (Built-in Tool): Most miter saws have a button or lever to lock the blade in place. We’ll show you how to use it.
- Safety Glasses: Always. Always wear them. There might be dust or debris, and your eyes are precious.
- Work Gloves (Optional but Recommended): Protect your hands from the sharp blade edges and any metal burrs.
- Wood Block: A small piece of wood can be helpful for propping or securing things.
Prioritizing Safety: The Golden Rules
We can’t stress this enough: safety first! Here are a few non-negotiables before you begin any work on your saw.
- Unplug the Saw: This is huge. Always remove the power cord from the wall outlet. This prevents accidental starts and keeps your fingers safe. Electricity and spinning blades are a bad combination (Occupational Safety and Health Administration).
- Wait for the Blade to Stop: After unplugging, make sure the old blade has completely stopped spinning. Never try to stop it with your hand or any other object.
- Clear Your Workspace: Remove any scraps, sawdust, or other tools around your saw. You want a clean, unobstructed area to work safely.
Removing the Old Blade: Step-by-Step
Okay, your workspace is clean, your tools are ready, and your saw is unplugged. Now, let’s get that old blade off. For Ryobi-specific instructions, see our Ryobi blade removal guide. For DeWalt-specific instructions, see our DeWalt blade removal guide. Don’t worry, it’s usually just a few steps, but each one needs your full attention.
Locating the Blade Lock and Arbor Nut
Every miter saw has a way to hold the blade still while you loosen the nut. This is called the blade lock. It’s often a button or lever on the motor housing. You’ll need to press and hold this while you work on the nut.
- Find the Blade Guard Lever: Most saws have an upper blade guard that you’ll need to lift or retract to access the blade. There’s usually a lever or handle for this.
- Identify the Arbor Nut: This is the nut in the center of the blade that holds it onto the saw’s shaft (the “arbor”). It usually has a hex head or a flat side for your wrench.
- Check Blade Rotation Direction: Look for an arrow on the blade or the saw that indicates the direction of rotation. This tells you which way to turn the arbor nut to loosen it. Generally, the arbor nut loosens in the opposite direction of the blade’s spin. For most miter saws, this means turning the nut clockwise to loosen it. Yes, clockwise! It’s counter-intuitive, but necessary to prevent it from loosening during operation.
Loosening the Arbor Nut
This is where your wrench and the blade lock come into play. It might take a little effort, especially if the blade hasn’t been changed in a while.
Engaging the Blade Lock
With your safety glasses on, lift the blade guard as needed. Rotate the blade by hand until you hear or feel the blade lock pin engage. It’s like finding a sweet spot where it falls into a hole on the blade or a disc behind it. Hold this lock button firmly.
Turning the Nut (Clockwise to Loosen!)
Now, grab your wrench. Remember, for most miter saws, you’ll turn the arbor nut clockwise to loosen it. This is the opposite of many other nuts and bolts, so be mindful. Apply steady, firm pressure. You might hear a “crack” as it breaks free – that’s normal. Once the nut moves, it should loosen easily by hand.
Removing the Outer Flange and Old Blade
Once the arbor nut is loose, you’re almost there. Be careful with the sharp edges!
- Unscrew the Arbor Nut: Finish unscrewing the nut by hand and set it aside in a safe spot so it doesn’t roll away.
- Remove the Outer Flange: Behind the nut, you’ll see a small washer-like disc called the outer flange. Take this off and set it with the nut.
- Carefully Remove the Old Blade: With both hands, gently slide the old blade off the arbor shaft. Keep your fingers away from the teeth. Place the old blade in a safe place, away from your work area. Many people keep the original box for the old blade as safe storage (Cleveland Clinic).
Installing the New Blade: A Fresh Start
You’ve successfully removed the old blade. Now it’s time to put on the new one. This is a great feeling, knowing you’ll soon have perfectly clean cuts again. Pay close attention to the direction of the blade for optimal performance and safety.
Matching the New Blade to Your Saw
Before you even unpackage your new blade, double-check a few things. Does it match the old one? Most importantly, is it the correct size and type for your saw?
- Diameter: Miter saw blades come in standard sizes (e.g., 10-inch, 12-inch). Ensure your new blade matches your saw’s requirements.
- Arbor Hole Size: The center hole of the blade must fit snugly onto your saw’s arbor shaft.
- Tooth Count/Type: While not critical for installation, using the right tooth count (e.g., 60-tooth for fine cuts, 24-tooth for rough cutting) will give you the best results for your project.
Ensuring Correct Blade Orientation
This step is critical! Installing the blade backward won’t damage your saw, but it certainly won’t cut anything well. You’ll just make a lot of noise and burn your wood. Look closely at the blade itself. There’s an arrow on it showing the direction of rotation.
- Match the Blade Arrow to the Saw Arrow: On your saw, there’s usually an arrow embossed near the arbor or on the blade guard. This arrow indicates the direction the blade spins when the saw is running. Your new blade’s rotation arrow must point in the same direction as the saw’s arrow. It should spin down towards the fence.
- “Teeth Point Down” Rule: A good rule of thumb is that when the blade is installed correctly on most miter saws, the bottom of the teeth should be pointing down towards the saw’s bed, ready to cut.
Securing the New Blade
Now, let’s get that new blade seated properly and tightened down. This is essentially the reverse process of removing the old one.
- Slide on the New Blade: Carefully align the new blade’s arbor hole with the saw’s arbor shaft. Slide it on, making sure the blade orientation is correct (arrow matches saw’s arrow).
- Replace the Outer Flange: Put the outer flange back onto the shaft, against the new blade.
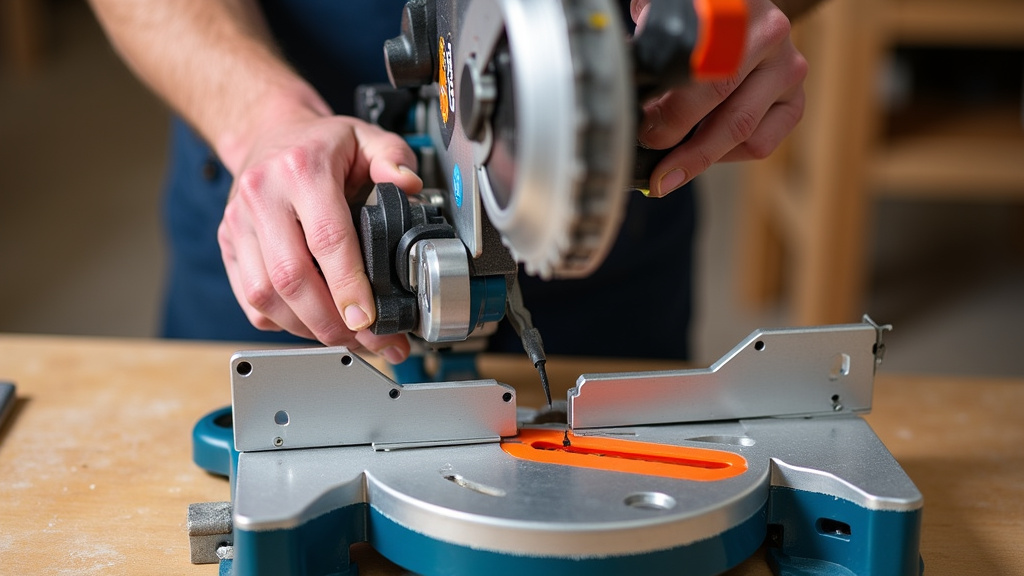
- Hand-Tighten the Arbor Nut: Screw the arbor nut back on by hand. Remember, this time you’ll be turning it counter-clockwise to tighten.
- Tighten with Wrench and Blade Lock: Engage the blade lock button again. Use your wrench to firmly tighten the arbor nut. It needs to be snug, but don’t overtighten it. A little extra snugness is good, but you don’t want to strip the threads.
Final Checks and Testing Your Saw
You’re almost done! Before you start your next woodworking project, it’s wise to perform a few checks to ensure everything is secure and working correctly. A brief test run can save you headaches later.
Reassembling and Initial Checks
Take a moment to look over your saw. Did you forget anything?
- Release the Blade Guard: Ensure the blade guard is free to move and retract properly over the blade. It’s a key safety feature.
- Check for Wiggle: Give the blade a gentle wiggle by hand (with the blade lock disengaged). It should be firmly seated and not wobble.
- Clear Obstructions: Double-check that all tools, nuts, or debris are cleared from the saw and your workspace.
Test Run Safely
Once you’re satisfied with your checks, you can plug the saw back in. But don’t just start cutting right away. A simple test run in the air is a smart move.
- Plug In: Reconnect your miter saw to the power outlet.
- Test Spin: Stand clear of the blade path. Briefly press the trigger to allow the blade to spin up to full speed. Listen for any unusual noises or excessive vibration. It should sound smooth and run without issue.
- Unplug Again (If Needed): If you hear anything strange or see unusual wobbling, unplug the saw immediately and re-examine your installation. It’s much better to catch an issue now than during a cut.
Your Blade Change Checklist
Here’s a quick rundown to make sure you’ve covered all your bases:
- Saw Unplugged?
- Safety Glasses On?
- Old Blade Removed Carefully?
- New Blade Direction Correct?
- Arbor Nut Tightened Firmly?
- Blade Guard Operational?
There you have it! Changing a miter saw blade is a skill that saves you time and ensures consistently great cuts. You’ve just mastered a fundamental part of using your saw safely and effectively. Go make some sawdust!
Conclusion
You’ve now got the knowledge and confidence to tackle changing your miter saw blade. Remember, safety always comes first – unplug that saw! Take your time, follow the steps, and always double-check your work.
Mastering this skill means your projects will benefit from cleaner, more accurate cuts, and your saw will operate at its best. You’ve earned a key skill in your woodworking journey. Keep these practices in mind, and you’ll always be ready for your next project, hassle-free. Go make some impressive cuts!
Frequently Asked Questions
What tools do I need to change a miter saw blade?
You’ll primarily need the wrench or hex key that came with your saw, safety glasses, and potentially work gloves. Most saws also have a built-in blade lock pin. Having a small piece of wood can help too.
Why does the arbor nut tighten clockwise on some saws?
For many miter saws, the arbor nut is designed with reverse threads, meaning you turn it clockwise to loosen and counter-clockwise to tighten. This prevents the nut from loosening during the blade’s high-speed, counter-clockwise rotation, a safety feature.
How do I know which way to install a new miter saw blade?
Look for an arrow printed on the blade itself. This arrow indicates the direction of rotation. You should align it with the rotation arrow typically found on your saw’s motor housing or blade guard. The saw’s teeth will usually point down towards the cutting surface.
What if my new blade wobbles after installation?
If your blade wobbles, immediately unplug the saw. Re-check that the blade is seated correctly on the arbor shaft, the outer flange is in place, and the arbor nut is fully tightened. A wobble indicates improper installation and can be very dangerous.
How often should I change my miter saw blade?
The frequency depends on how often you use your saw and the types of materials you cut. You should change the blade when it becomes dull, chipped, or damaged, as a dull blade can cause burning, tear-out, and harder cutting. Listen to your saw and observe your cut quality.