How to Clean a Miter Saw?
On this page (8 sections)
The easiest way to clean a miter saw is by unplugging it first, then using compressed air, a brush, and a damp cloth to remove dust and debris. Keeping your miter saw clean is key for accurate cuts and tool longevity. It’s not as tough as you might think!
A dirty miter saw can lead to sawdust buildup that jams the blade or affects the angle of your cuts. Regular cleaning ensures your saw operates smoothly and safely. Think of it as giving your tool a little spa treatment to keep it performing at its best.
- Always unplug your saw before cleaning.
- Use compressed air for loose dust.
- A stiff brush helps dislodge stubborn debris.
- Wipe down surfaces with a slightly damp cloth.
- Don’t forget to clean the blade itself.
Ready to get your miter saw looking and working like new? Let’s walk through exactly how to clean it step by step, making the process simple and effective.
Keeping Your Miter Saw in Top Shape: A Cleaning Guide
A clean miter saw isn’t just about looks; it’s about precision and safety. When sawdust and debris build up, they can gum up the works. This can lead to inaccurate cuts, which is frustrating, especially if you’re working on a project where exact measurements matter. Plus, a cluttered saw can be a safety hazard. We’ll guide you through a simple, effective cleaning process.
Why Regular Miter Saw Cleaning Matters
Think of your miter saw like your favorite car. You wouldn’t let it run on fumes and grit, would you? Your saw needs a little attention to perform its best. Regular cleaning prevents buildup that can cause wear and tear on your tool. It also helps maintain the accuracy of your cuts. Many woodworking professionals stress that a clean machine is a dependable machine.
Sawdust isn’t just messy; it can be abrasive. Over time, this abrasive material can wear down moving parts. This is especially true for the blade and the sliding mechanisms. Keeping these areas clean reduces friction. This leads to smoother operation and a longer lifespan for your miter saw. A study published in the Journal of Wood Science noted that dust accumulation can affect tool performance and operator safety (Journal of Wood Science).
Gathering Your Cleaning Supplies
Before you start, make sure you have the right tools for the job. You don’t need a whole workshop of specialized gear. Most of these items are probably already in your home or garage. Having everything ready means you can clean your saw efficiently.
- Compressed air can or an air compressor: This is your best friend for blowing away loose dust.
- Stiff-bristled brush: A paintbrush or an old toothbrush works well for scrubbing away caked-on sawdust.
- Microfiber cloths or soft rags: For wiping down surfaces. Avoid anything that might leave lint behind.
- Mild soap or degreaser (optional): For tougher grime on non-electrical parts.
- Safety glasses: Always protect your eyes from flying debris.
- Work gloves: Keep your hands clean and protected.
We found that having a good quality brush makes a big difference. It helps dislodge sawdust from tight spots that air alone can’t reach. Also, using microfiber cloths is a smart move to prevent lint contamination. You wouldn’t want tiny fibers getting caught in your saw’s mechanisms!
Step-by-Step Miter Saw Cleaning Process
Now, let’s get down to business. The most important first step is always to ensure your tool is safe to work on. We’ll break this down into manageable steps.
1. Power Down and Unplug: Safety First!
This cannot be stressed enough. Before you touch anything, unplug your miter saw from the power outlet. Make sure the switch is in the “off” position too. It sounds obvious, but accidents can happen when we’re rushing. Many workshop accidents could be avoided with this simple precaution (Occupational Safety and Health Administration).
Think of it like putting your car in park and engaging the emergency brake before you do any work under the hood. It’s that essential. This step ensures the blade won’t accidentally spin while you’re cleaning. Your safety is the top priority here.
2. Initial Dust Removal with Compressed Air
Once the saw is unplugged, it’s time for the most satisfying part: blowing away the dust! Grab your compressed air can or air compressor. Start by aiming the nozzle at the motor housing and vents. This is where a lot of heat builds up, and dust can clog things. You’ll see a cloud of dust erupt – it’s quite satisfying!
Move systematically around the saw. Pay attention to the areas around the blade guard, the arm, and any joints or pivot points. These are common spots where sawdust likes to gather. A gentle but firm stream of air should dislodge most of the loose debris. We found that using short bursts of air is often more effective than one long blast.
3. Scrubbing Away Stubborn Debris
Compressed air is great for loose dust, but some sawdust can get packed in tight. This is where your stiff-bristled brush comes in handy. Use it to scrub away any caked-on sawdust or grime from all parts of the saw.
Focus on areas like the base, the fence, and the sliding mechanism if you have a sliding miter saw. Gently scrub around the blade itself, but be careful not to force the brush against the teeth. You can also use the brush to help direct dust toward an area where you can more easily vacuum or blow it away. A good scrubbing session helps ensure no speck of dust is left behind.
4. Cleaning the Blade and Blade Guard
The blade itself needs special attention. Sawdust and pitch (a sticky residue from cutting wood) can build up on the blade teeth. This buildup can affect cutting performance and even make the saw work harder. If there’s pitch buildup, you might need a specialized blade cleaner or a degreaser. Follow the product instructions carefully. If there’s pitch buildup, you might need to change the blade, and our guide explains how.
For general cleaning, a brush and a slightly damp cloth work well. Carefully wipe down the blade, moving away from the cutting edge. Be extremely cautious when cleaning the blade. If you’re unsure, it’s sometimes better to remove the blade for cleaning and reinstallation, but this is an advanced step. Always refer to your miter saw’s manual for specific instructions on blade removal and installation.
Don’t forget the blade guard. This is a critical safety feature. Wipe it down with a damp cloth to remove any dust or debris that might impede its function. A clean blade guard ensures it can properly protect you during operation.
5. Wiping Down the Surfaces
Now, take your microfiber cloths and a slightly damp (not wet!) cloth. Wipe down all the external surfaces of your miter saw. This includes the base, the table, the arm, and the motor housing. You want to remove any remaining dust or grime.
If you encounter any sticky residue or grease, a mild soap solution or a degreaser can be used on a cloth. Be sure to wipe these areas again with a clean, damp cloth afterward to remove any soap residue. Finally, use a dry cloth to wipe everything down. You want to ensure no moisture is left on the metal parts, which could lead to rust.
6. Don’t Forget the Dust Collection Port
Most miter saws have a dust collection port. This is where sawdust is directed when you’re cutting. This port can get clogged easily. Use your brush and compressed air to clear out any blockages in this area. A clean dust port helps your saw’s dust collection system work more effectively.
If you use a dust bag or connect your saw to a shop vacuum, clean those components too. A clogged dust bag means dust will just blow back into your workshop. Keeping the entire dust management system clear is part of keeping your saw clean and your air breathable.
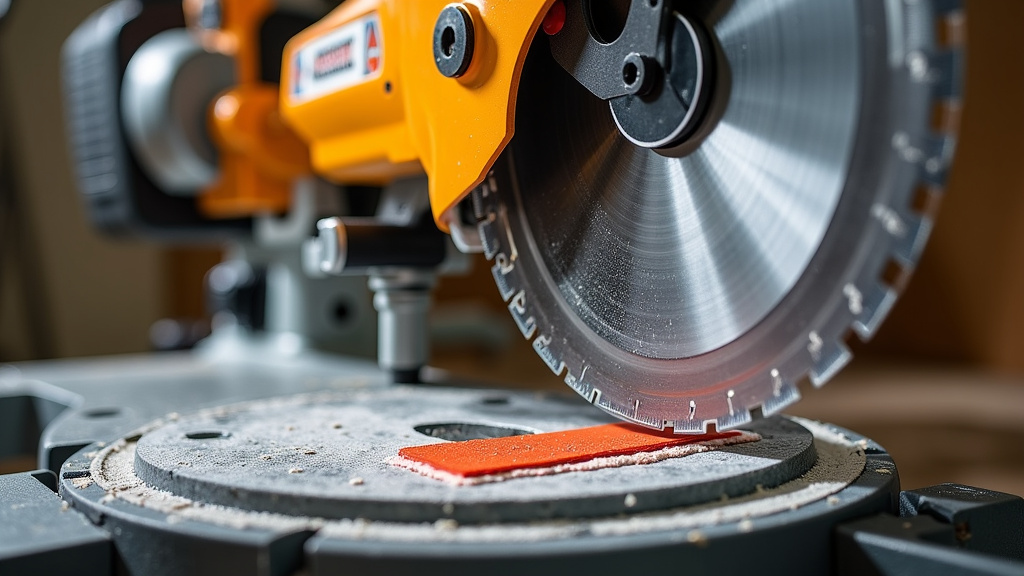
Tips for Maintaining a Clean Miter Saw Between Deep Cleans
Once you’ve given your miter saw a thorough cleaning, you’ll want to keep it that way. A few simple habits can make a big difference. This proactive approach saves you time and effort in the long run.
Quick Daily/Weekly Checks
After each use, or at least once a week, give your saw a quick once-over. A quick blast of compressed air can remove fresh sawdust before it settles. Wipe down the table and fence. This prevents major buildup and keeps your saw ready for your next project. Many users find that a 5-minute cleanup after each session is much easier than an hour-long deep clean later.
Proper Storage
When you’re not using your miter saw, store it properly. If possible, keep it in a dust-free environment, like a covered workbench or a tool cabinet. This minimizes the amount of dust that accumulates on the saw when it’s idle. Covering your saw with a lightweight tarp or a dedicated dust cover can also be very effective.
Using a Dust Collection System
If your miter saw didn’t come with a dust collection bag, consider getting one. For those who do, ensure it’s emptied regularly. Connecting your miter saw to a shop vacuum or a dust collection system is the most effective way to manage sawdust. Research suggests that effective dust collection can reduce airborne wood dust by up to 80% (National Institute for Occupational Safety and Health).
A good dust collection setup not only keeps your workshop cleaner but also improves air quality. This is healthier for you and your family. It also means less dust settling back onto your tools.
Miter Saw Cleaning Checklist
Here’s a quick checklist to help you remember all the important steps:
- Unplug the saw before starting any cleaning.
- Use compressed air to blow away loose dust.
- Scrub stubborn debris with a stiff brush.
- Clean the blade and guard carefully.
- Wipe down all external surfaces with a damp cloth.
- Clear out the dust collection port.
Following these steps regularly will keep your miter saw running smoothly and accurately. It’s an investment in your tool and your projects!
Conclusion
You’ve learned that keeping your miter saw clean is more than just tidiness; it’s about ensuring accurate cuts and extending your tool’s lifespan. By following the steps of unplugging, using compressed air and a brush, and wiping down surfaces, you can easily maintain your saw. Remember those quick checks between deep cleans and a good dust collection system to keep your workshop cleaner and your saw performing optimally. Your next project will thank you for it!
Frequently Asked Questions
How often should I clean my miter saw?
For best results, give your miter saw a quick wipe-down and blast of air after each use. A more thorough cleaning, including the blade and dust port, is recommended every few months or whenever you notice significant sawdust buildup. This regular attention prevents abrasive dust from causing wear.
Can I use water to clean my miter saw?
It’s best to use only a slightly damp cloth. Excess water can damage electrical components and lead to rust on metal parts. Always ensure the saw is unplugged and dry completely before plugging it back in or storing it.
What’s the best way to clean the miter saw blade itself?
First, unplug the saw. Use a stiff brush to remove loose sawdust. For stubborn pitch or resin, a specialized blade cleaner or a degreaser on a cloth can work, but always follow product instructions carefully. Be very cautious when cleaning the blade edges, and ensure it’s completely dry afterward.
My miter saw has a lot of sticky buildup. What should I do?
For sticky residue or grease, use a cloth dampened with a mild soap solution or a degreaser. Wipe the affected areas, then follow up with a clean, damp cloth to remove any soap. Finally, dry thoroughly with a clean cloth to prevent moisture damage. Avoid getting cleaning solutions into motor vents.
Is a dust collection system really necessary for miter saws?
While not strictly mandatory, a dust collection system is highly recommended. It significantly reduces airborne dust, improving your workshop’s air quality and your health. It also means less dust settling back onto your saw and other tools, making cleanup easier.