How to Make a 45 Degree Cut with a Miter Saw?
On this page (3 sections)
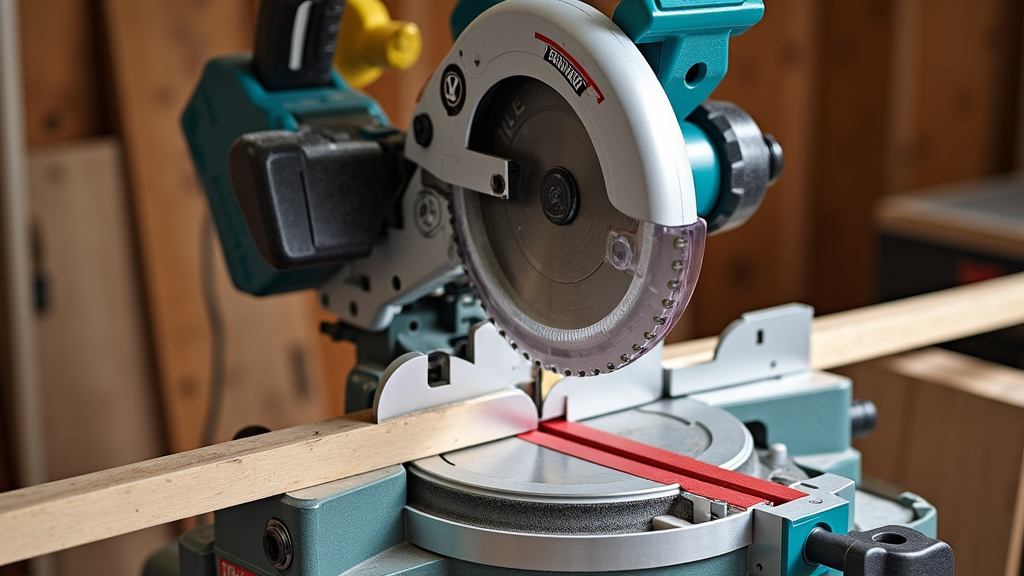
To make a 45-degree cut with a miter saw, you will adjust the miter angle setting on your saw to precisely 45 degrees, secure your workpiece, then carefully lower the blade through the material. This common cut is also known as a miter joint, perfect for corners.
Many projects you can make with a miter saw, like picture frames or crown molding, require precise 45-degree cuts for a clean finish. We found that understanding the parts of your miter saw and how they adjust is key. With a little practice, these cuts become simple and accurate.
- Set your miter saw to the correct angle.
- Ensure your wood is firmly in place.
- Lower the saw blade smoothly.
- Learn basic safety for miter saws.
Let’s walk through exactly how to set up your miter saw and make these precise cuts, step by step.
Mastering the 45-Degree Miter Cut
Making a perfect 45-degree cut with your miter saw can transform your projects. It’s truly a game-changer for clean, tight joints. We often see these cuts used in frames, trim, and molding. Let’s make sure your next project looks professional.
Safety First: Your Most Important Tool
Before you even plug in your saw, always prioritize safety. This isn’t just a suggestion; it’s essential. We found that most workshop accidents can be prevented with proper precautions. What’s the number one rule? Stay alert!
Essential Personal Protective Equipment (PPE)
Wearing the right gear protects you from potential hazards. Think of it as your personal force field. We always recommend these basics:
- Safety Glasses: Always wear them. They protect your eyes from flying debris. Splintering wood can be unpredictable.
- Hearing Protection: Miter saws can be loud. Earplugs or earmuffs save your hearing over time (National Institute for Occupational Safety and Health).
- Dust Mask: Fine sawdust isn’t good for your lungs. A simple dust mask can make a big difference.
- No Loose Clothing or Jewelry: These can get caught in the spinning blade. Tie back long hair too.
- Gloves (Optional): Some prefer gloves for grip, but make sure they aren’t bulky and won’t snag.
Power Tool Safety Checklist
A quick check before you start can prevent many problems. It takes only a moment but gives you peace of mind.
- Is the power cord in good condition? No frays or damage.
- Is your work area clear of clutter? You need room to move.
- Is the saw blade clean and sharp? A dull blade can cause kickback.
- Are all guards in place and working correctly? These are there for your protection.
- Is your workpiece properly supported and stable? This prevents wobbling during the cut.
Setting Up Your Miter Saw for a 45-Degree Angle
This is where the magic happens. Your miter saw is designed for precision, so taking a moment to set it correctly is crucial. Don’t rush this step. An accurate setting means an accurate cut.
Understanding Your Saw’s Controls
Every miter saw has specific adjustments. Get to know yours. You’ll usually find a handle or knob to change the miter angle. This is the angle of the blade relative to the saw’s fence. You’re looking for that sweet spot: 45 degrees.
Look for the miter scale on your saw. It’s usually marked with numbers. Gently move the saw’s table until the indicator lines up perfectly with the 45-degree mark. Many saws have detents, which are preset stopping points for common angles like 45 degrees. Feel for the “click” into place.
Double-Checking for Accuracy
Even with detents, it’s smart to verify. Why? Because a tiny error here means a gap in your project later. We’ve found that trust but verify applies here. Use a reliable digital protractor or a speed square. Place one edge against the saw’s fence and the other against the blade. Does it read exactly 45 degrees? Adjust as needed.
This simple check ensures your cut will be precise. It prevents the frustration of recutting material or having an unsightly joint.
Preparing Your Workpiece for the Cut
A secure workpiece is a safe workpiece. It’s also the secret to a clean, accurate cut. If your material shifts, your cut will be off, and it could even be dangerous.
Marking Your Cut Line Clearly
Always mark your wood where you want to cut. Use a pencil and a reliable square. Don’t just eyeball it. We recommend making a clear, thin line. This line will guide your blade.
Think about which side of the line you need to cut. “Waste” material should be on the side away from your measurement. This ensures your final piece is the correct length. Always aim to cut on the “waste” side of your line.
Securing the Material
This cannot be stressed enough. Never hold your material with just your hands while cutting. Use clamps! Many miter saws come with a material clamp. If yours doesn’t, consider buying one. It’s an important safety tool.
Make sure the workpiece is pressed firmly against the fence. This prevents it from moving laterally. Also, ensure it’s firmly on the work surface, not rocking. Any movement can cause kickback or an inaccurate cut.
Consider using extra support for long pieces of wood. We often see people using saw horses or roller stands. This keeps the material flat and stable, preventing it from tipping off the saw table.
Making the 45-Degree Cut
You’ve prepared, you’ve set, now it’s time to cut. This step requires focus and a smooth, controlled motion. Breathe, and take your time.
The Cutting Motion Defined
Here’s the step-by-step: plug in your saw. Now, before you start, ensure your hands are away from the blade’s path. Always. We found that maintaining a safe distance is non-negotiable.
- Engage the motor: Press the trigger or power button. Allow the blade to reach full speed before it touches the wood. This prevents splintering and strain on the motor.
- Lower the blade smoothly: With the blade at full speed, slowly and steadily lower it through the workpiece. Don’t force it. Let the saw do the work. A controlled downward motion is key.
- Cut completely: Continue lowering the blade completely through the entire thickness of the material.
- Release the trigger: Once the cut is complete, keep the blade lowered briefly.
- Allow the blade to stop: Let the blade come to a complete stop before raising it out of the workpiece. Raising a spinning blade can cause it to catch the wood and splinter it, or even cause kickback. This is a common mistake we warn against.
Tips for Clean, Accurate Cuts
Want those crisp, professional-looking cuts? Here are a few things we’ve learned over time:
- Don’t rush: Speed does not equal accuracy when using a miter saw. Take your time.
- Allow the blade to cool: For repetitive cuts, give your saw a moment to rest.
- Keep your blade clean: A resin-coated blade makes smoother cuts.
- Use the right blade: A blade with more teeth (e.g., 60-80 teeth) makes a smoother cut, especially on delicate materials like molding.
- Support the “offcut”: If you’re cutting a small piece off a longer board, make sure the small piece is also supported so it doesn’t fall and get pinched by the blade.
Troubleshooting Common 45-Degree Cut Issues
Even with practice, you might encounter small issues. Don’t worry, they are often easy to fix.
Why Your Cuts Might Not Be Perfect 45 Degrees
If your joint isn’t closing perfectly, your angle might be slightly off. Maybe it’s a hair too big or too small. Here’s why:
- Inaccurate saw setting: Re-check your saw’s angle with a reliable square or protractor. Your miter scale might need calibration.
- Blade deflection: A dull blade or forcing the cut can cause the blade to bend slightly, leading to an inaccurate angle.
- Material movement: If the wood shifted during the cut, the angle will be incorrect. Ensure it’s clamped firmly.
- Saw not calibrated: Over time, saws can go out of calibration. Consult your saw’s manual for instructions on how to recalibrate the miter scale.
Many reliable sources (like woodworking forums and tool manufacturers’ guides) suggest calibrating your saw periodically. Think of it like tuning a guitar—it needs attention to stay in perfect harmony.
Your 45-Degree Miter Cut Checklist
Keep this handy for every cutting session. It’s a quick reminder to ensure consistency and safety every time you approach your miter saw.
- Safety glasses and hearing protection on.
- Workpiece securely clamped against the fence and table.
- Miter saw set precisely to 45 degrees.
- Blade clean, sharp, and at full speed before cutting.
- Smooth, controlled descent and ascent of the blade.
- Hands clear of the blade path.
Conclusion
You now have a solid understanding of how to make accurate 45-degree cuts with your miter saw. We covered everything from setting up your saw to troubleshooting common issues. Remember that safety and precision go hand-in-hand in woodworking.
Each step, from securing your workpiece to allowing the blade to stop completely, is designed to give you the best results. Keep these tips in mind, and you’ll find your projects looking more professional. Now, go ahead and practice these techniques. Your next project awaits!
Frequently Asked Questions
What materials can I cut at a 45-degree angle with a miter saw?
You can cut various materials like wood, MDF, and many types of plastic trim. The key is to use the correct blade for the material to ensure a clean cut and prevent damage to both the material and your saw.
How do I prevent tear-out when making 45-degree cuts?
To minimize tear-out, we recommend using a blade with a higher tooth count, ensuring your material is firmly clamped, and placing a sacrificial piece of wood behind your workpiece. This creates a zero-clearance support at the cut line.
Can I cut a perfect 90-degree corner using two 45-degree cuts?
Yes, absolutely! Cutting two adjoining pieces of material at 45 degrees each will perfectly form a 90-degree corner when joined. This technique is commonly known as a miter joint and is ideal for frames and boxes.
My 45-degree cuts aren’t perfectly flush. What should I do?
If your cuts aren’t flush, see why 45-degree cuts are inaccurate and double-check your saw’s calibration with a reliable square or digital protractor. Even a half-degree off can create a noticeable gap. Also, ensure your material is not moving during the cut, as this can affect accuracy.
Is it possible to make a 45-degree bevel cut with a miter saw?
Yes, many miter saws are explicitly designed for bevel cuts. You adjust the blade’s tilt, not the miter table, to cut a bevel. Combine a miter and a bevel setup to create compound angles, often used in crown molding.