How to Choose the Right Miter Saw Blade for a Project?

To choose the right miter saw blade, you need to consider your material type, the cut quality you want, and your saw’s arbor size. The best blade will make your project easier and give you cleaner results. We found that matching the blade to the task is key.
Picking the correct blade isn’t just about buying the first one you see. It involves understanding blade features like tooth count, hook angle, and kerf. These elements dramatically affect how your saw performs and the finish on your wood.
- Match blade material to project material.
- Higher tooth counts mean smoother cuts.
- Lower tooth counts are better for faster cuts.
- Always check your saw’s arbor size.
- Consider the kerf (blade thickness).
Ready to get started? Let’s dive into the details so you can confidently pick the perfect miter saw blade for any project you tackle.
Selecting the Right Miter Saw Blade for Your Project
Choosing the correct miter saw blade means matching its features to your project’s demands. It’s not just about getting any blade; it’s about getting the right blade for the job. The better the match, the cleaner your cuts and the easier your work will be.
Think of it like choosing the right shoe for a sport. You wouldn’t wear hiking boots for a marathon, right? The same goes for saw blades. Each type has a specific purpose to help you achieve the best results.
Understanding Blade Anatomy: What Are We Looking At?
Before we dive into specific recommendations, let’s quickly break down what makes a miter saw blade tick. Knowing these parts helps you understand why one blade is better than another for certain tasks.
The Arbor Hole
This is the hole in the center of the blade. It fits onto your saw’s arbor, which is the shaft that spins the blade. You must match your blade’s arbor hole size to your saw’s arbor size. Most miter saws use a 5/8-inch arbor hole, but always double-check your saw’s manual. A mismatched arbor means the blade won’t fit, or worse, it won’t be safe. Understanding the correct blade direction is crucial for safe and effective operation.
Blade Diameter
This is the overall size of the blade. Common miter saw blade diameters are 8-1/2 inches, 10 inches, and 12 inches. Your saw is designed for a specific blade diameter, so don’t try to force a different size. Using the wrong size can damage your saw or cause dangerous kickback.
The Kerf
The kerf is the width of the cut the blade makes. It’s determined by the thickness of the blade and its teeth. We found two main types: thin kerf and full kerf. Thin-kerf blades are generally around 3/32 inch thick, while full-kerf blades are about 1/8 inch thick.
- Thin Kerf: These blades remove less material, putting less strain on your saw’s motor. They’re great for smaller saws or materials that don’t need a super-wide cut.
- Full Kerf: These are sturdier and less prone to wobbling, especially in thicker materials. They offer more stability and are often preferred for larger, more powerful saws.
Tooth Count and Configuration
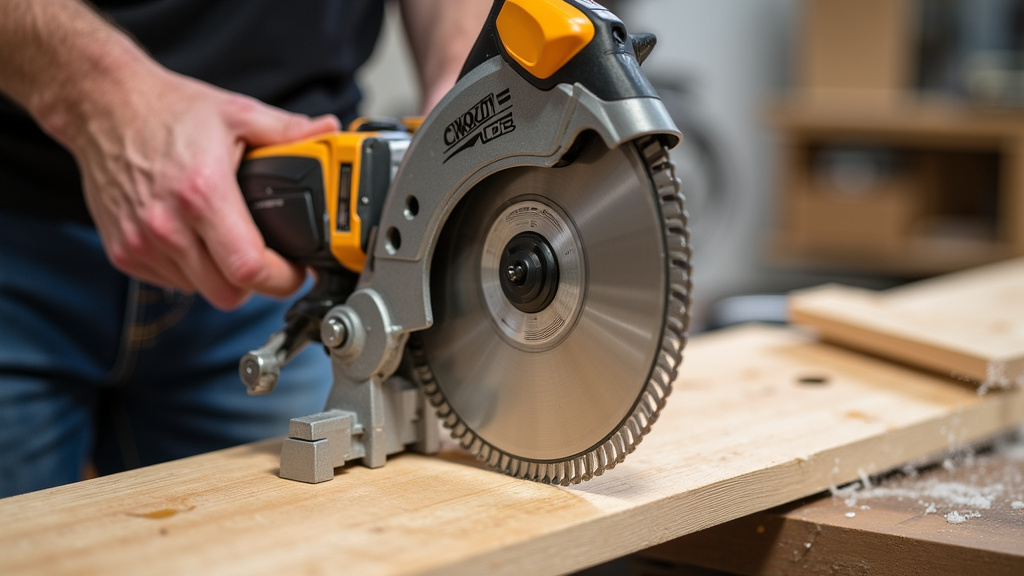
This is where things get interesting. The number of teeth and their shape (configuration) significantly impact the cut quality and speed. We’ve learned that more teeth generally mean smoother cuts, while fewer teeth mean faster, rougher cuts. It’s a trade-off between speed and finish.
Tooth Count Breakdown
- 24-40 Teeth: These blades are often called “ripping” blades. They cut fast but leave a rougher finish. Ideal for quickly cross-cutting framing lumber or cutting plywood to size where precision isn’t paramount.
- 60-80 Teeth: These are your go-to for general-purpose work. They offer a good balance of speed and smoothness. You’ll use these for most cross-cutting in hardwoods, softwoods, and even some composites.
- 80-100+ Teeth: These blades are designed for fine finish work. They create very smooth cuts, perfect for trim, molding, and delicate projects where tear-out is unacceptable. They cut slower but deliver a superior finish.
Tooth Configuration Types
Beyond the count, the shape of the teeth matters too. We found these are the most common types you’ll encounter:
- ATB (Alternate Top Bevel): This is the most common tooth style for miter saw blades. The teeth alternate, with one angled left and the next angled right. This design helps shear the wood fibers cleanly, reducing tear-out on cross-cuts. It’s excellent for general-purpose and finish work.
- FTG (Flat Top Grind): These teeth are flat across the top. They excel at ripping wood along the grain but can cause significant tear-out on cross-cuts. You rarely see these as the primary teeth on a miter saw blade, as miter saws are mainly for cross-cutting.
- Combination (ATB/R or ATBR): These blades combine ATB teeth with a flat-top raker tooth. They’re designed to handle both cross-cutting and some ripping tasks reasonably well. Think of them as a versatile option if you need to do a bit of everything without changing blades.
Hook Angle
The hook angle refers to how aggressively the teeth “lean” forward or backward. A positive hook angle means the teeth lean forward, grabbing the material more aggressively. A negative hook angle means the teeth lean backward, pushing the material down into the saw table.
- Positive Hook Angle: Provides faster cuts but can increase the risk of kickback, especially with miter saws.
- Negative Hook Angle: Offers a safer, more controlled cut, pushing the workpiece down. This is why most miter saw blades have a negative or very slight positive hook angle. It’s safer and provides better control during cross-cutting.
Matching Your Blade to Your Material
The type of material you’re cutting is a major factor in blade selection. A blade that works wonders on pine might tear up a delicate piece of oak. Here’s a quick guide:
| Material Type | Recommended Tooth Count | Kerf Type | Key Considerations |
|---|---|---|---|
| Softwoods (Pine, Fir) | 40-60 teeth | Thin or Full | Good balance of speed and finish. Fewer teeth for rough cuts, more for cleaner ends. |
| Hardwoods (Oak, Maple) | 60-80 teeth | Full Kerf preferred | More teeth and full kerf help prevent tear-out and blade deflection in dense wood. |
| Plywood/MDF/Laminates | 80-100+ teeth | Thin Kerf | High tooth count is essential for minimizing chipping and splintering on veneered surfaces. |
| Plastics/Acrylics | 80-100+ teeth (Triple Chip Grind) | Thin Kerf | Very high tooth count with a specialized grind (TCG) helps prevent melting and chipping. Requires slow feed rate. |
| Non-Ferrous Metals (Aluminum) | 80-100+ teeth (Triple Chip Grind) | Thin Kerf | Extremely high tooth count with TCG is needed. Use lubricant and a slow, controlled feed. Not for all miter saws. |
Considering Cut Quality: Fast & Rough vs. Slow & Smooth
Your desired cut quality should guide your blade choice. Do you need a super-smooth edge for a visible piece of furniture, or are you just cutting framing lumber that will be hidden inside a wall?
- Rough Cuts (e.g., framing lumber, quick breakdown): Opt for blades with 24-40 teeth. These blades cut very quickly because they remove a lot of material with each pass. The trade-off is a rougher edge that will likely need sanding or planing if it’s going to be exposed.
- General Purpose (e.g., shelving, basic woodworking): A 60-tooth blade is often considered the workhorse for miter saws. It provides a good compromise, cutting reasonably fast while leaving a decent finish for most projects. You might still do a light sanding, but it won’t be excessive.
- Fine Finish Cuts (e.g., trim, molding, cabinets): For those critical, visible cuts, you’ll want a blade with 80 teeth or more. These blades cut slower but produce an exceptionally smooth, clean edge with minimal tear-out. This reduces your finishing work significantly. Think of the crisp lines you need for crown molding – a high tooth count blade is a must.
Safety First: A Quick Reminder
We can’t stress this enough: always prioritize safety. No matter which blade you choose, always wear eye protection and hearing protection. Ensure your workpiece is securely clamped before making any cut (OSHA). A quality blade is a safe blade, but proper technique is even more important.
Your Miter Saw Blade Selection Checklist
To help you narrow down your options, here’s a quick checklist to run through before you buy a new blade:
- What is your saw’s blade diameter and arbor size?
- What type of material will you be cutting most often?
- What level of cut quality do you need (rough, general, or fine finish)?
- Are you cross-cutting or making combination cuts?
- Do you prefer speed or a super-smooth finish?
Conclusion
Choosing the right miter saw blade doesn’t have to be overwhelming. By considering your material, desired cut quality, and understanding basic blade anatomy, you can make informed decisions. We found that a little knowledge goes a long way in achieving professional results and ensuring safety.
Matching the blade’s tooth count, kerf, and hook angle to your specific task will transform your woodworking projects. Take a moment to review our checklist, and you’ll be ready to select the perfect blade for your next job, ensuring clean, precise cuts every time.
Frequently Asked Questions
What’s the best all-around miter saw blade?
For general-purpose use, we found a 60-tooth ATB blade with a negative hook angle is often the best choice. It balances cut quality and speed for most common materials like softwoods and hardwoods, making it versatile for many projects.
Can I use a miter saw blade on a table saw?
While some blades are designed for both, it’s generally best to use blades specifically made for each tool. Miter saw blades often have a negative hook angle for safer cross-cutting, while table saw blades might have a positive hook for ripping, which can be dangerous on a miter saw.
How often should I sharpen my miter saw blade?
The frequency depends on how often you use it and what materials you cut. We found that if you notice more tear-out, burning, or your saw struggling, it’s likely time for a sharpening. Quality blades can be sharpened multiple times by a professional.
What does “arbor size” mean for a saw blade?
The arbor size refers to the diameter of the hole in the center of the blade. This hole fits onto the spinning shaft (the arbor) of your miter saw. It’s crucial to match your blade’s arbor size to your saw’s arbor to ensure proper fit and safe operation.
Why is a thin kerf blade good for smaller miter saws?
Thin kerf blades remove less material, which means your saw’s motor doesn’t have to work as hard. This reduces strain on less powerful saws, making cuts easier and potentially extending the life of your tool. They’re also good for saving material.