
Do You Need a Compound Miter Saw for Crown Molding?

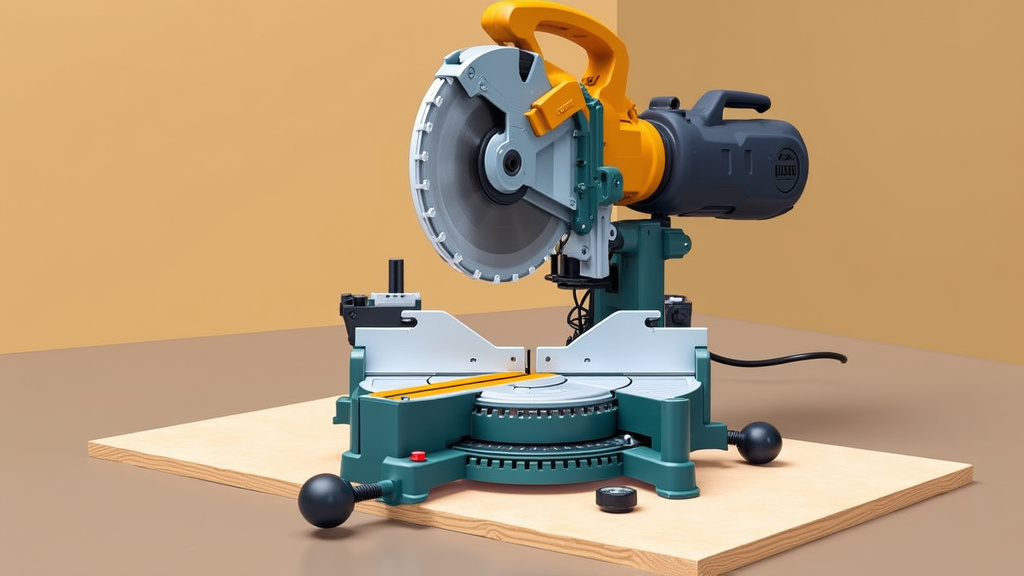
Yes, you absolutely need a compound miter saw for crown molding if you want professional-looking results and easier cuts. While other saws can technically cut crown molding, a compound miter saw makes the process much more accurate and straightforward, especially for those tricky angles.
Crown molding involves creating precise bevel and miter cuts simultaneously, something a standard miter saw or hand saw struggles with. We found that a good compound miter saw simplifies these complex cuts, reducing frustration and wasted material. It’s about achieving those tight, gap-free joints that make your trim look amazing.
- A compound miter saw is highly recommended for crown molding.
- It handles bevel and miter cuts simultaneously.
- Ensures professional-looking joints with less effort.
- Other saws make crown molding cuts much harder.
Ready to master your crown molding project? Let’s dive into why this tool is so essential and what to look for when choosing one.
Why a Compound Miter Saw is Best for Crown Molding
You’re wondering if a compound miter saw is truly necessary for crown molding. The short answer is yes, it makes a significant difference. Crown molding isn’t just flat trim; it sits at an angle, creating compound cuts. This means you need to cut two angles at once: a miter (side-to-side) and a bevel (up-and-down). A compound miter saw is designed to handle both of these angles simultaneously, making your life much easier.
Without this capability, you’d be trying to create these complex angles with less suitable tools. We found that trying to manually adjust for both angles often leads to frustrating gaps and misalignments in your finished project. This is where the compound miter saw truly shines.
Understanding Compound Cuts
Let’s break down what a compound cut really means for your crown molding. Imagine trying to fit two pieces of crown molding together in a corner. They meet at an angle on the wall, but they also angle away from the wall. This dual angle requires precision that most saws can’t offer in a single pass.
A compound miter saw allows you to set the saw blade to tilt (the bevel) and swing left or right (the miter) at the same time. This dual action is critical for creating perfect crown molding joints. We found that this feature alone saves hours of trial and error.
The Miter Angle
The miter angle is the horizontal cut. It’s the angle you set for common corner joints, like a 45-degree angle for a 90-degree corner. On a compound miter saw, you’ll adjust the turntable to get this angle.
For crown molding, these angles can be tricky. You’re often cutting the molding “upside down and backward” or “flat on the fence.” The miter setting changes based on your cutting method. Many experienced trim carpenters can eye these angles, but precise measurements are key.
The Bevel Angle
The bevel angle is the vertical cut, where the blade tilts. This is what gives crown molding its distinct angled profile against the ceiling and wall. Without the ability to bevel, your crown molding won’t sit flush.
A compound miter saw lets you tilt the blade to the precise bevel needed for your crown molding profile. This is usually around 31.6 degrees or 33.9 degrees, depending on the molding. We found that getting this bevel right is essential for tight joints.
Comparing Saws: Why Other Options Fall Short
You might be wondering if you can just make do with another type of saw you already own. While technically possible, it usually leads to more headaches than it’s worth. Let’s look at why other saws just don’t measure up for crown molding.
We’ve talked to many DIYers who started with a basic miter saw or even a handsaw. They often report spending significantly more time and wasting more material. It’s like trying to cut steak with a butter knife; you can do it, but it’s not ideal.
| Saw Type | Crown Molding Capability | Pros | Cons for Crown Molding |
|---|---|---|---|
| Compound Miter Saw | Excellent | Simultaneous miter & bevel, highly accurate, versatile | Higher initial cost, takes up space |
| Standard Miter Saw | Limited | Good for basic trim, precise miter cuts | No bevel adjustment, requires complex jigs/calculations |
| Sliding Compound Miter Saw | Excellent (ideal for wider molding) | Handles very wide crown, simultaneous miter & bevel | More expensive, larger footprint, heavier |
| Table Saw | Difficult/Advanced | Can make some angled cuts | Dangerous for long pieces, very complex setups, not intuitive |
| Hand Saw & Miter Box | Very Basic/Tedious | Low cost, portable, no power needed | Slow, fatiguing, very difficult to get precise compound angles |
Standard Miter Saws: A Half-Measure
A standard miter saw, sometimes called a chop saw, can cut angles left and right (miter). But it can’t tilt the blade for a bevel cut. This means you can’t create the compound angles needed for crown molding in one go.
To use a standard miter saw for crown molding, you’d need to use complex jigs or stack pieces of wood to simulate the bevel. This involves a lot of math and guesswork. We found that this method is prone to errors and gaps.
Table Saws: High Skill, High Risk
A table saw can make angled cuts, but using it for crown molding is an advanced technique. It requires building custom jigs to hold the molding at the correct spring angle. This can be dangerous and is not recommended for beginners.
You’re dealing with a large, exposed blade and long pieces of molding. The risk of kickback or injury is much higher. For most DIYers, a table saw is simply not the right tool for crown molding (National Safety Council).
Hand Saws and Miter Boxes: Patience of a Saint
Can you cut crown molding with a hand saw and a miter box? Yes, but it will test your patience and precision. A hand miter box usually only allows for miter cuts, not bevels. You’d have to freehand the bevel cut, which is incredibly difficult to do accurately.
We found that achieving tight, professional-looking joints with a hand saw is extremely challenging. You’ll likely spend a lot of time sanding and using wood filler to hide imperfections. It’s a method best reserved for very small repairs or if you have absolutely no other option.
Key Features to Look for in a Compound Miter Saw
If you’re convinced (and we hope you are!) that a compound miter saw is the way to go, what should you look for? Choosing the right saw will make your crown molding project much smoother. Think about your project’s scope and your budget.
We found that some features are nice-to-haves, while others are absolute must-haves for tackling crown molding with confidence. It’s an investment, so you want to pick wisely.
Dual Bevel Capability
This is a major feature for crown molding. A dual bevel saw allows the blade to tilt both left and right. This means you can make all your bevel cuts without flipping the workpiece. Flipping the workpiece can introduce errors and confusion.
A single bevel saw only tilts one way. You’d have to flip the crown molding for certain cuts, which can get confusing. We found that dual bevel saves time and reduces mistakes, especially for inside and outside corners.
Sliding vs. Non-Sliding (Axial Glide)
A sliding compound miter saw has rails that allow the blade to move forward and backward. This significantly increases the cross-cut capacity. If you’re working with very wide crown molding (over 6-8 inches), a slider is a game-changer.
Many experts say that for standard crown molding (under 6 inches), a non-sliding compound miter saw is often sufficient. However, if you plan to tackle other wide lumber projects, a sliding saw is a versatile addition to your workshop.
Positive Stops and Detents
Look for saws with easy-to-use positive stops or detents at common angles (like 0, 15, 22.5, 31.6, 33.9, 45 degrees). These pre-set angles ensure accuracy and speed up your workflow. The detents should feel solid and lock into place firmly.
Having a bypass lever to quickly override these stops is also helpful for fine adjustments. We found that reliable detents prevent accidental angle changes during a cut.
Laser Guide or LED Shadow Line
While not strictly necessary, a laser guide or an LED shadow line can greatly improve accuracy. These features project a line onto your workpiece, showing you exactly where the blade will cut. This helps you align your cuts perfectly and reduces guesswork.
Some people prefer the LED shadow line, as it’s less prone to being obscured by dust or daylight than a laser. We found that either option provides helpful visual guidance, especially for those who are new to crown molding.
Tips for Cutting Crown Molding with Your New Saw
So, you’ve got your compound miter saw. Now what? Cutting crown molding can still be a bit intimidating at first. But with the right approach, you’ll be making perfect cuts in no time.
Remember, practice makes perfect. Don’t be afraid to use scrap pieces of molding to get a feel for your saw and the angles. We found that a few practice cuts build confidence and prevent costly mistakes on your good material.
- Always use safety gear: Eye protection and hearing protection are a must.
- Understand your spring angle: This is the angle your crown molding sits at against the wall/ceiling.
- Use a crown stop: These attachments hold the molding at the correct angle against the fence.
- “Upside down and backward” method: A common way to cut crown molding flat on the saw.
- Test cuts on scrap: Always, always test your angles on a small piece of wood first.
- Go slow: Let the saw do the work; don’t force the blade through the material.
The “Upside Down and Backward” Method
This is a popular method for cutting crown molding, especially if your saw doesn’t have crown stops. You essentially orient the molding on your saw as if the ceiling is the saw’s fence and the wall is the saw’s table.
For an inside corner, you’ll place the molding upside down with the bottom edge against the fence. The miter angle will be set to 45 degrees for a 90-degree corner, and the bevel will be set to the crown’s spring angle complement (e.g., 31.6 degrees). It sounds confusing, but it becomes intuitive with practice.
Using Crown Stops
Many compound miter saws offer crown stop accessories. These attach to your saw’s fence and hold the crown molding at its exact spring angle. This method allows you to cut the molding “in position,” meaning it sits on the saw just as it would on your wall.
This can simplify the process, as you don’t need to do the “upside down and backward” mental gymnastics. We found that crown stops are especially helpful for beginners, as they remove a layer of complexity.
Conclusion
You’ve seen why a compound miter saw isn’t just a convenience for crown molding; it’s a necessity for achieving truly professional results. It handles those tricky compound cuts with precision, saving you time, material, and a lot of frustration. Investing in the right tool means your crown molding project will look fantastic, with tight, gap-free joints that impress.
We found that once you experience the ease and accuracy, you’ll wonder how you ever considered doing it without one. So, take the next step. Choose a saw that fits your needs, practice a few cuts, and get ready to transform your space with beautiful crown molding.
Frequently Asked Questions
Can a regular miter saw cut crown molding?
A standard miter saw can make the miter (side-to-side) cuts, but it lacks the bevel (up-and-down) adjustment needed for crown molding. You’d have to use complex jigs and calculations, which often lead to inaccurate results and wasted material.
Is a sliding compound miter saw better for crown molding?
A sliding compound miter saw is excellent for crown molding, especially if you’re working with wider profiles. The sliding feature allows for a greater cross-cut capacity. However, for standard crown molding widths, a non-sliding compound miter saw is often sufficient and more affordable.
What is the “spring angle” of crown molding?
The spring angle refers to how the crown molding sits angled against the wall and ceiling. It’s the angle at which the molding “springs” out from the wall. This angle is crucial for setting your saw’s bevel correctly.
Do I need special blades for cutting crown molding?
While not strictly “special,” we recommend using a sharp, fine-toothed blade (60-80 teeth) designed for cross-cutting wood. This will give you cleaner, smoother cuts on your molding, reducing tear-out and making your joints look better.
How can I practice cutting crown molding without wasting material?
You can purchase inexpensive pine or MDF utility molding to use as practice pieces. This lets you get a feel for your saw and the cutting methods without risking your good crown molding. We always suggest making test cuts on scrap first.
