
Do You Need a Stop Block for Repeat Cuts?

You absolutely need a stop block for making repeat cuts accurately. Without one, your cuts will likely be inconsistent and frustrating. A stop block ensures every piece you cut is the exact same length, which is essential for many woodworking and DIY projects.
Think of it like this: would you try to measure out the same distance repeatedly without a ruler? A stop block acts as your measuring guide for your saw. It’s a simple tool that saves you tons of time and prevents wasted material. Many woodworkers consider it an absolute must-have for repeatable accuracy.
- Stop blocks are essential for consistent cuts.
- They help you make pieces the exact same length.
- This tool prevents wasted wood and saves you time.
- It’s a simple addition that greatly improves accuracy.
Let’s dive into why this little jig is so important and how you can make or use one effectively for your next project.
Why You Absolutely Need a Stop Block for Precise Repeat Cuts
When you’re working on a project that requires multiple pieces of the exact same size, like building shelves or creating trim, precision is key. You might wonder if you really need a special tool for this. The short answer is a resounding yes. A stop block is your secret weapon for making those perfectly matched cuts, time after time. It’s a simple jig that makes a world of difference in the final outcome of your work.
Think about trying to bake cookies and having each one a slightly different size. It might look a bit wonky, right? The same applies to woodworking. If your pieces aren’t the same length, your project won’t look professional. A stop block ensures that you get consistent results without all the fuss. It’s a small addition to your workflow that saves a lot of headaches and wasted material down the line.
Understanding What a Stop Block Is and How It Works
So, what exactly is a stop block? At its core, it’s a simple physical barrier. It’s a piece of material, often wood or metal, that you attach to a fence or a guide on your saw. This barrier is positioned at a specific distance from the blade. When you slide your workpiece against this block, it stops your material at that exact point. This way, every piece you cut will be the same length, provided you push the material against the stop block each time. So, what exactly is a stop block? Our guide on how to make a miter saw jig explains its function.
It’s essentially a foolproof measuring device for your saw. Instead of relying on your own potentially shaky hands to stop the wood at the right mark, you’re using a solid reference point. This takes the guesswork out of the equation entirely. Many woodworkers find that once they start using a stop block, they can’t imagine going back to their old methods.
How a Stop Block Enhances Accuracy
The primary benefit of a stop block is its ability to deliver unparalleled accuracy for repeated cuts. When you’re cutting multiple identical pieces, even slight variations can add up. Imagine cutting 20 pieces for a project, and each one is off by just 1/16th of an inch. By the end, you could have a noticeable difference between your first and last piece. A stop block eliminates this variability.
Research in woodworking practices consistently highlights the importance of jigs and fixtures for improving precision. A stop block falls into this category. It’s a specialized tool designed for a specific task, and it excels at it. This allows you to focus on the cut itself, rather than the measuring and marking process for each individual piece.
The Time-Saving Aspect of Using Stop Blocks
Beyond accuracy, stop blocks are also fantastic time-savers. Think about how long it would take to measure, mark, and cut each piece individually. With a stop block, you set it up once. Then, you simply make your mark on the first piece, position it, make the cut, slide the next piece against the block, and cut again. This drastically speeds up the process, especially for larger projects.
This efficiency is why many professionals and serious hobbyists rely on them. We found that for projects requiring dozens or even hundreds of identical components, the time saved by using a stop block is immense. It frees you up to concentrate on other aspects of your build. It’s a simple way to work smarter, not harder.
Different Types of Stop Blocks and How They’re Used
Stop blocks aren’t a one-size-fits-all tool. There are several types, and the best one for you often depends on the saw you’re using and the materials you’re cutting. Let’s look at a few common options.
Simple Wooden Stop Blocks
The most basic and often most effective stop block is made from a simple piece of wood. You typically attach it to the rip fence of your table saw. Often, this involves a small block of hardwood that you can clamp or screw onto the fence. You then position this block at the desired distance from the blade. You can use double-sided tape, clamps, or even screws for attachment, depending on how permanent you need it to be.
This type is incredibly versatile. You can easily adjust its position by loosening the clamp or screw and sliding it. If you need to cut pieces of varying lengths, you can simply move the stop block. For maximum repeatability, many woodworkers will make a dedicated stop block for a specific length and secure it firmly. It’s a favorite because it’s inexpensive and easy to make yourself.
Adjustable Stop Blocks and Measuring Systems
For those who need even more flexibility and precision, there are adjustable stop blocks and integrated measuring systems. These often come as part of a larger miter gauge setup or a track saw system. They allow for very fine adjustments, often with a digital readout or a precise scale. These systems are great for high-volume work or when extreme accuracy is paramount.
These advanced systems can be more costly, but they offer significant advantages. They might feature locking mechanisms that ensure the stop doesn’t move accidentally. Some systems can be set to multiple lengths, allowing you to quickly switch between different dimensions without re-measuring. If you’re doing a lot of repetitive cutting for commercial projects or fine furniture, this could be a worthwhile investment.
Using Stop Blocks with Different Saws
The application of stop blocks can vary slightly depending on your saw. For a table saw, you’ll typically attach the stop block to the rip fence. Your material rests against the fence and the stop block. For a miter saw, the stop block is usually attached to the base or a sliding arm that extends from the saw. You slide the material against the fence of the miter saw, and it hits the stop block.
For track saws or circular saws used with guide rails, you can attach stop blocks directly to the guide rail itself. This offers excellent portability and precision for cuts made on sheet goods or larger panels. The key is always to have a solid reference point that doesn’t move during the cut. We found that consistency in how you position the stop block and how you feed the material is just as important as the block itself.
Tips for Using Your Stop Block Effectively
Simply having a stop block isn’t enough; using it correctly is vital for consistent results. Here are some tips to help you get the most out of this handy tool.
Secure Attachment is Non-Negotiable
The most critical rule for any stop block is that it must be firmly attached. If your stop block shifts even a tiny bit during a cut, you’ll end up with inconsistent lengths. Whether you’re using clamps, screws, or double-sided tape, ensure it’s locked down tight. Check it before every cut, especially if you’re making many identical pieces.
Many experts recommend a robust attachment method. For table saws, using a clamp that grips the fence securely is often preferred over temporary tape. For jigs, ensuring the block is seated flush and tightened down is essential. A wobbly stop block is worse than no stop block at all, as it provides a false sense of security.
Consistency in Feeding Material
Once your stop block is secure, the next step is to be consistent with how you feed your material. Always ensure the workpiece is pushed firmly against both the fence and the stop block before you make the cut. Don’t allow the wood to lift or twist as you approach the blade. A smooth, steady feed motion will yield the best results.
We found that it’s helpful to develop a repeatable motion. Place the wood against the stop, ensure it’s snug, and then push through the cut. Avoid slamming the wood into the stop. A gentle, firm contact is all that’s needed. Practicing this motion a few times before you start your project can make a big difference.
Measuring for Your Stop Block Placement
When you first set up your stop block, you need to measure accurately. Use a reliable tape measure or ruler. The most common mistake is measuring from the wrong point. You want to measure the distance from the blade’s cutting edge to the face of the stop block. Ensure your measuring tool is held perpendicular to the blade for accuracy.
Many woodworkers use a pencil to mark the desired cut length on their workpiece, then position the stop block so that the pencil mark aligns with the front face of the stop block when the wood is snugged against it. Another method is to measure directly from the blade to the stop block. Whatever method you choose, be precise.
Considerations for Different Materials
The material you are cutting can also influence how you use your stop block. For soft woods, a simple wooden block works wonderfully. For harder materials or when dealing with larger pieces, you might need a more robust stop block. If you’re cutting metal or plastic, ensure your stop block material is appropriate and won’t melt or deform.
Also, consider the surface of your workpiece. If you’re cutting delicate veneers or finished surfaces, you might want to place a thin layer of felt or rubber on the face of your stop block to prevent marring. This adds an extra layer of protection and ensures your material remains pristine. It’s all about adapting the basic principle to your specific needs.
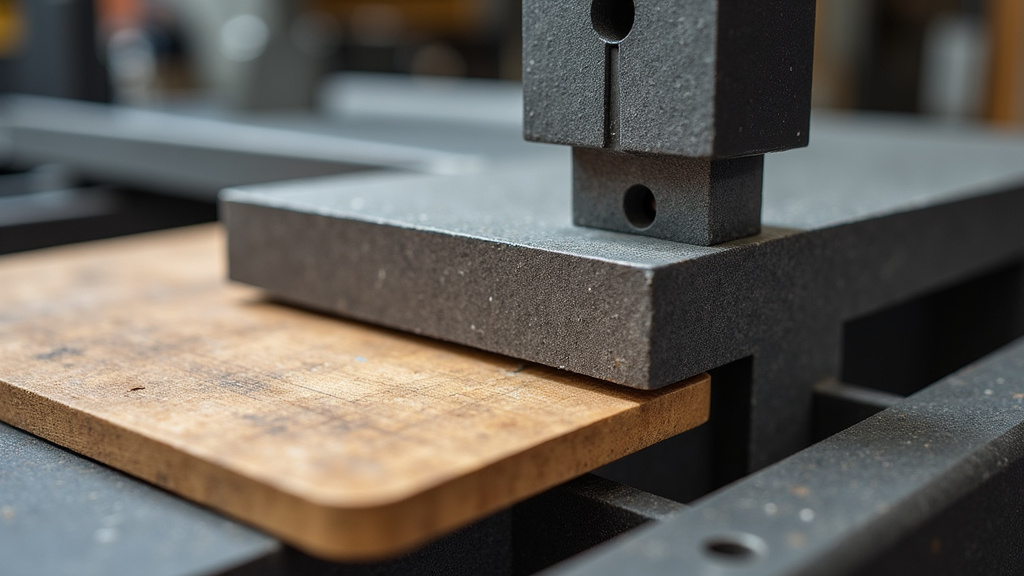
Making Your Own Simple Stop Block
You don’t need to buy fancy equipment to have a great stop block. You can easily make one yourself with common workshop materials. This is a fantastic weekend project for any DIYer.
Materials You’ll Need
- A piece of hardwood (like oak or maple), about 3/4 inch thick, 2-3 inches wide, and 4-6 inches long.
- A clamp (like a F-style clamp or a small C-clamp) OR strong double-sided tape OR a way to screw it onto your fence.
- A tape measure and pencil.
Basic Construction Steps
- Cut your hardwood to the desired size. A block about 4 inches long is usually sufficient.
- Determine the fence you’ll be using (e.g., your table saw rip fence).
- Position the hardwood block against the fence at your desired cut length. Measure carefully from the blade to the face of the block.
- Secure the block. If using a clamp, simply clamp the block to the fence. If using tape, apply it firmly to both the block and the fence. If screwing, pre-drill pilot holes and secure it directly to the fence.
- Double-check that the block is solid and doesn’t move.
This DIY approach is cost-effective and allows you to create a stop block perfectly suited to your saw and common project dimensions. It’s a small effort for a huge gain in precision.
A Quick Checklist for Perfect Repeat Cuts
Ready to put your stop block to work? Here’s a handy checklist to ensure you nail every cut:
- Confirm your stop block is securely attached.
- Measure the distance from the blade to the stop block accurately.
- Ensure your workpiece is pushed firmly against both the fence and the block.
- Use a consistent feeding motion for each cut.
- Check for any splintering or tear-out after the cut.
- If cutting multiple pieces, re-check the stop block occasionally.
Following these steps will help you achieve the consistent, accurate results you’re looking for in your projects. You’ll be amazed at how much easier and more satisfying your work becomes!
Conclusion
You’ve learned that a stop block isn’t just a helpful addition; it’s a fundamental tool for anyone seeking accuracy in repeat cuts. By providing a solid reference point, it eliminates guesswork and ensures your projects have that professional, consistent finish you’re aiming for. We’ve seen how it saves you time and material, making your woodworking more efficient and enjoyable. Don’t let inconsistent cuts derail your next project. Make or acquire a stop block, integrate it into your workflow, and experience the difference repeatable precision makes!
Frequently Asked Questions
Can I use a regular ruler as a stop block?
No, a ruler isn’t designed to act as a stop block. A stop block needs to be a rigid, physical barrier that your material can press firmly against. A flexible ruler would bend and lead to inaccurate, inconsistent cuts, defeating its purpose.
How do I know where to place the stop block for the correct length?
You’ll measure the desired length from the cutting edge of your saw blade to the face of the stop block. Ensure your measuring tape is held perfectly straight and perpendicular to the blade for the most accurate placement.
What happens if my stop block moves slightly during a cut?
If your stop block shifts even a fraction of an inch, your repeat cuts will become inconsistent. This is why ensuring a secure attachment is so critical. Always double-check that it’s locked down before you start cutting, especially for longer runs.
Can I use a stop block with a hand saw?
While primarily used with power saws like table saws and miter saws, you can adapt the concept for hand saws. You would need a way to create a stable fence and attach a stop block to it, ensuring your workpiece is held securely against both.
Is it okay if my stop block is made of softer wood than my workpiece?
For most common woodworking projects, a hardwood stop block is recommended to avoid premature wear. If you’re cutting very soft woods, a hardwood block will still work perfectly and last longer. Just ensure the stop block material is firm enough not to deform under pressure.
