What Are the Two-Hole Board Supports on a Miter Saw?
The two-hole metal board supports on a miter saw are removable support arms that bolt onto the side of the saw base to hold long board ends level. The two holes take screws or bolts, so you can fit, move, or remove the arm without drilling new holes.
On this page (11 sections)
- Where do the two-hole metal supports sit on a miter saw?
- How do the two holes hold the support arm in place?
- Which boards need a miter saw lumber support most?
- How do you attach the support arm using the two holes?
- How do you line up the support with the saw table?
- When is a bolt-on arm not enough for long boards?
- How do outfeed supports, tables, and roller stands compare?
- Which blade should you use with a supported board?
- Can you use a metal blade on a miter saw with board supports?
- How do you keep the two-hole supports square over time?
- What should you check before your next long cut?
The two-hole metal board supports on a miter saw are removable support arms that bolt onto the side of the saw base to hold long board ends level. You use the two holes to fix the arm in place so it does not swing or drop under load.
That small ledge makes a big difference on trimming and crosscuts. Without support, a long board can tip, sag, or pull the cut off line.
With the arm in place, the board stays flat as it feeds toward the blade.
Where do the two-hole metal supports sit on a miter saw?
They sit on the left or right side of the metal saw base, level with the table surface. Most arms look like a short metal bar or bracket with two holes near one end.
When you look at the saw from the front, you will see the holes on the side casting. A board sliding left or right from the blade will rest on the arm once it passes the fence line.
The arm's top face should line up with the saw table. If it sits low, the board will dip.
If it sits high, the board will rock. Small shims or a quick level check can help you set it right.
How do the two holes hold the support arm in place?
Two bolts or screws spread the load and stop the arm from rotating. One hole alone would let the arm pivot under a board's weight.
Two holes lock the position along the base.
You should use the fasteners that came with the arm or match the size in your manual. Loose screws let the arm sag mid cut.
Tight screws keep the ledge steady from the first board to the last.
Do not drill new holes to make an arm fit. The factory holes keep the arm square to the table.
A misaligned arm can push a board into the blade at a slight angle.
Which boards need a miter saw lumber support most?
Long boards overhang the table and drop past the cut line need support the most. Trim, casing, and deck stock over 3 ft can tip before the blade finishes the cut.
Short pieces that stay fully on the table need less help. Still, a support arm can stop a board from sliding off the side when you swing the saw for a miter.
Crown molding is a special case. It often sits at an angle on the fence, so a flat support arm may not match its profile.
A dedicated crown stop can hold that shape more firmly.
The DEWALT Miter Saw Crown Stops (DW7084) include 2 stops in tough steel construction. DEWALT says they accurately position crown molding vertically against the saw fence.
That fit matters more than a flat arm when the board profile is curved.
How do you attach the support arm using the two holes?
Attach the arm before you set the board on the table. Slide the arm's holes over the threaded holes in the base, add the bolts, and tighten them by hand first.
Check that the arm extends straight out from the base. Sight down its top edge to confirm it matches the table height.
Adjust while the bolts are still loose, then tighten both evenly.
Test the arm with light downward pressure. It should not flex or twist.
If it moves, tighten the bolts or check for dirt in the holes.
Remove the arm when you need full access to the side of the saw. Store the arm and its bolts together so you don't lose the correct size.
How do you line up the support with the saw table?
Line it up so the top of the arm is flush with the table top. Use a straightedge across the table and arm to spot any step up or down.
A small step can lift the board end and change the cut angle. A dip can make the board bind near the blade.
Both errors show up as uneven edges on long trim.
Raise or lower the arm only with the method your model allows. Some arms have slots for fine adjustment.
Others rely on shims under the bolts.
Recheck the height after you move the saw to a new stand or table. A change in stance can shift the whole base by a small amount.
When is a bolt-on arm not enough for long boards?
A bolt-on arm helps near the saw, but it cannot hold the far end of a 10 ft board. The weight at the far end will still pull the board down.
Pair the arm with a second support set farther out. That second support holds the board level across its full length.
The cut stays true from entry to exit.
Our guide to Best Miter Saw Material Support compares arms, stands, and tables for that job. It helps you match the support to board length and weight.
For cutting boards that extend well past the arm, see how to cut long boards with a miter saw. That guide covers feed direction and short support placement.
How do outfeed supports, tables, and roller stands compare?
Outfeed supports hold the board at blade height on the exit side. Extension tables add a flat surface that bolts to the saw base.
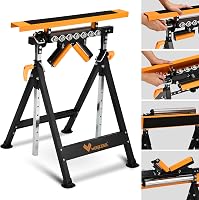
Roller stands use a post and roller to set height anywhere along the board.
A bolt-on arm is the simplest option. It stores on the saw and sets up in seconds.
It suits trim and medium boards that extend a few feet past the blade.
An extension table suits repeat work on the same length. It gives a wide, steady surface for boards that slide sideways.
Our roundup of Best Miter Saw Outfeed Support covers dedicated arms for that role.
A roller stand suits very long or heavy stock. You can move it as board length changes.
Our Best Miter Saw Extension Table guide covers fixed tables, and our Best Miter Saw Roller Stand guide covers mobile stands.
Choose the arm first if you only need help a foot or two past the blade. Add a stand or table when the far end still drops.
Which blade should you use with a supported board?
A sharp, matched blade keeps a supported board cutting straight with less push. A dull blade can wander, and support alone cannot fix that drift.
For 12 in saws, a crosscutting 2-pack gives you an 80 tooth blade for fine work and a 32 tooth blade for faster, rougher cuts. That choice lets you match tooth count to board type.
The DEWALT 12-Inch Miter Saw Blade set includes 2 blades in tungsten carbide for crosscutting. DEWALT says the set helps you make quick, smooth, and accurate cuts in hardwood, softwood, plywood, and chipboard.
The 80 tooth blade suits finish trim. The 32 tooth blade suits rougher stock where speed matters more.
A single 7-1/4 in finish blade suits some smaller saws and portable work. It has 40 teeth in an alternating top bevel pattern for smooth crosscuts.
The Freud Diablo Finish Saw Blade is 7-1/4 in with 40 teeth and a 5/8 in arbor. Freud says its TiCo Hi-Density carbide teeth are designed for smooth crosscuts in hardwood, softwood, and plywood.
Its Perma-SHIELD coating protects against heat, gumming, and corrosion.
Check the size and arbor fit before you buy. A blade that does not match your saw will not seat correctly, no matter how sharp it is.
Can you use a metal blade on a miter saw with board supports?
Only if the blade and saw are rated for metal work. A standard wood blade or a finish blade for wood will not cut metal safely or cleanly.
Metal chips and sparks change the safety picture. Guards, clamping, and support needs differ from wood work.
Your saw manual will state whether metal cutting is allowed.
Our article Can You Use A Metal Blade On A Miter Saw? covers blade types, speed, and safety limits. Read it before you switch blades for a different material.
For wood boards, keep the blade matched to the task. Use the 80 tooth blade for trim that shows.
Use the 32 tooth blade for framing stock that you will plane or sand later.
How do you keep the two-hole supports square over time?
Keep the holes clean and the bolts snug. Dust and chips in the holes can stop the arm from seating flat.
A quick brush or pick clears them without damage.
Check the arm's top edge for bends after a drop. A bent arm will hold every board at a slight angle.
Straighten or replace it before the next cut.
Tighten both bolts evenly each time you fit the arm. Uneven tightness can tilt the ledge.
Test with a straightedge after tightening.
Store the arm flat and dry. Rust on the holes will make future fits loose.
A light wipe with oil on the metal parts helps prevent that rust.
What should you check before your next long cut?
Check arm height, bolt tightness, blade choice, and far support before you cut. That quick pass prevents most long board errors.
Set the arm flush with the table. Confirm the board rests flat across the arm and the second support.
Pick the blade that matches the finish you need.
Support the board by hand on the feed side, but keep hands clear of the blade path. Let the board slide on the supports rather than lifting it mid cut.
If the board still tips, move the far support closer to the blade. If it still binds, check for a dull blade or a misaligned fence.
The two-hole metal support is only one part of a straight cut.
Frequently asked questions
What are the two holes on the side of a miter saw?
They are mounting holes for a removable lumber support arm. You bolt the arm through both holes so it stays square and does not pivot.
The arm gives a long board a level ledge beyond the saw table.
Can I use the board support on both sides of a miter saw?
Many models have matching holes on both sides, so you can move the arm to the side where the board extends. Check your manual for the correct side and bolt size.
Do not force an arm onto holes that do not line up.
Do I still need a roller stand with a support arm?
Yes, for very long or heavy boards. The bolt-on arm helps near the saw, but it cannot hold the far end of a long board by itself.
A roller stand or table sets the height far from the blade.