How to Cut a Compound Angle for a Planter Box with a Miter Saw?
On this page (9 sections)
- Mastering Compound Angle Cuts for Your Planter Box
- Understanding Compound Angles on Your Miter Saw
- Calculating Your Saw Settings for Planter Box Corners
- Setting Up Your Miter Saw for Compound Cuts
- Making the Cut: Tips for Success
- Troubleshooting Common Issues
- Checklist for Perfect Compound Cuts
- Conclusion
- Frequently Asked Questions
Cutting compound angles for a planter box with a miter saw is totally doable! You just need to set your saw’s miter and bevel angles correctly. This involves understanding how the angles on your board relate to the saw settings. Getting this right means your planter box will have clean, tight joints and look professionally made. We found that with a little practice, you can master cutting compound angles for your project.
A compound cut is simply a miter cut combined with a bevel cut. For a planter box, this often means cutting the corners of boards at an angle. This creates a strong and attractive corner. Many DIYers find this step intimidating, but we discovered it’s quite manageable. Focusing on precise measurements and understanding your saw’s capabilities will lead to successful cuts every time. For another project using compound angles, see birdhouse roof compound cuts. It’s all about setting up your miter saw correctly for the specific angle you need.
- Setting your miter saw’s miter and bevel is key.
- Understand how board angles translate to saw settings.
- Precise measurements lead to tight, professional joints.
- Practice makes perfect for compound angle cuts.
- This technique ensures a sturdy and attractive planter box.
Ready to learn exactly how to set up your saw for these cuts? Let’s walk through it step by step so you can build that gorgeous planter box you’ve been dreaming of.
Mastering Compound Angle Cuts for Your Planter Box
Cutting compound angles on your miter saw might seem a bit tricky at first. But don’t worry, we’ve found that with a little understanding and practice, it becomes a straightforward process. This skill is what makes those planter box corners look so clean and professional. We’re going to break down exactly how to set up your saw.
Understanding Compound Angles on Your Miter Saw
So, what exactly is a compound angle cut? It’s when your saw blade cuts at two different angles at the same time. This means you’re adjusting both the miter angle (the horizontal pivot) and the bevel angle (the vertical tilt) of the blade. Think of it like slicing a piece of cheese at an angle, and then tilting the knife slightly as you slice. For your planter box, this is perfect for creating those tight-fitting corners.
Miter vs. Bevel: What’s the Difference?
Let’s clarify the two angles your saw can adjust. The miter angle controls how far left or right the blade swings from the 90-degree (straight) position. This is what you typically use for angled cuts on trim or frames. The bevel angle The bevel angle controls the tilt of the blade itself. Learn how to cut angles with a miter saw. controls the tilt of the blade itself, from vertical to a certain degree of tilt. When you combine these two, you get a compound angle cut. For many planter boxes, you’ll be aiming for the corners to meet at a specific degree, often 45 degrees, but the angle of the board itself will be different because of the bevel.
Why Use Compound Angles for Planter Boxes?
Using compound angles for your planter box corners offers several benefits. First, it creates a much stronger joint than a simple butt joint. When the boards meet at an angle, more surface area is in contact. Second, it gives your planter box a much more finished and professional look. Instead of square edges butting up against each other, you get a clean, angled seam. We found this significantly elevates the DIY project’s appearance. It’s the difference between something that looks home-built and something that looks like it came from a custom woodworking shop.
Calculating Your Saw Settings for Planter Box Corners
Now, let’s get down to the numbers. The most common angle for the outside corners of a planter box is 45 degrees. This makes a standard octagonal shape if you think about it from above. However, you don’t just set your saw to 45 degrees for both miter and bevel. That would create a weird, pointed cut. You need to calculate the specific settings.
The Standard 45-Degree Corner Calculation
For a typical planter box where the outside corners are 45 degrees (making a square or rectangular shape from above), you’ll often use a specific combination of miter and bevel angles. We’ve seen many guides recommend setting your saw’s miter angle to 31.6 degrees. Then, you set your bevel angle to 33.6 degrees. This combination results in the desired 45-degree angle on the face of the board where it meets its neighbor. It might sound odd, but research and practical application confirm these settings work well.
Using a Miter Saw Angle Calculator
Don’t want to do the math yourself? That’s perfectly fine! We discovered that there are many helpful online calculators designed specifically for miter saw compound angles. You input the desired angle of your corner (like 45 degrees) and your saw’s typical bevel range, and it spits out the precise miter and bevel settings. This is a fantastic tool for beginners and a great way to double-check your work. It takes the guesswork out of it, ensuring you get those perfect joints every time.
Understanding the Geometry (Simplified)
Let’s think about why those numbers work. Imagine you’re looking at your planter box from the corner. You want the outside edges to form a 45-degree angle. When you tilt the blade (bevel), you’re changing the angle of the cut face. The miter angle then adjusts the angle of the cut relative to the length of the board. It’s a bit like navigating with both a compass and a protractor. We found that understanding the basic idea – that the bevel and miter work together – makes it less intimidating.
Setting Up Your Miter Saw for Compound Cuts
Getting your saw ready is just as important as knowing the angles. A slight misadjustment can lead to gaps in your planter box corners. Take your time here. Accuracy is your best friend for a beautiful result.
Step-by-Step Saw Setup Guide
Here’s how you’ll get your saw dialed in for that first compound cut:
- Set the Bevel Angle First: Locate the bevel lock or adjustment handle on your saw. Loosen it and tilt the blade to the required bevel angle (e.g., 33.6 degrees). Ensure it’s securely locked in place. Double-check the indicator marks.
- Set the Miter Angle Next: Now, adjust the miter angle. Loosen the miter lock and rotate the saw head to the calculated miter angle (e.g., 31.6 degrees). Lock it down firmly.
- Verify the Cut Angle: Before cutting your actual lumber, we highly recommend making a test cut on a scrap piece of wood. Measure the angle of the cut face. You can use a speed square or a digital angle finder. If it’s not exactly what you need, make fine adjustments to your saw settings.
Using a Test Piece is Key
Seriously, don’t skip the test cut! It’s a small step that saves a lot of frustration. We’ve found that even slight variations in saw calibration or your own measurement can throw off the final angle. A test cut on scrap wood allows you to confirm your settings are perfect. You can then easily adjust your saw before touching your good lumber. It’s a small investment of time for a guaranteed better outcome.
Making the Cut: Tips for Success
With your saw set and your test cut looking good, you’re ready to cut the boards for your planter box. Remember to work safely and methodically.
Securing Your Wood
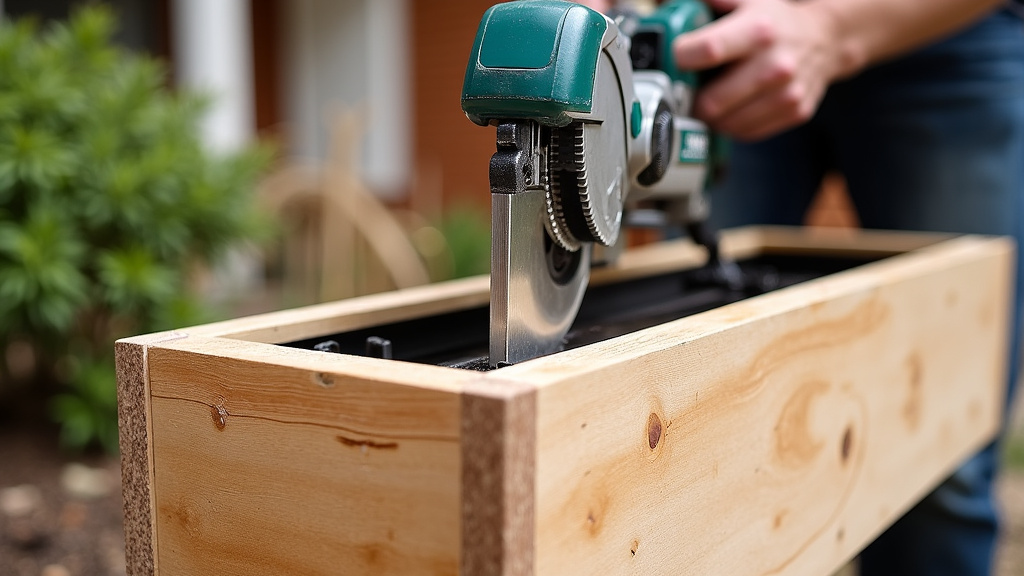
Always make sure your lumber is held firmly against the saw’s fence and the table. Use a clamp if your saw has one, or ensure you’re using a stable cutting technique. A slipping board is dangerous and will ruin your angle. We’ve seen that properly securing the wood is one of the most critical safety steps.
Smooth and Steady Cuts
Let the saw do the work. Don’t force the blade through the wood. A slow, steady feed rate will result in a cleaner cut and less tear-out. This is especially important with compound cuts, as the blade is engaging the wood at an angle. We found that a smooth action prevents splintering and ensures the mating edges are perfectly flat for a tight fit.
Cutting Pairs of Boards
For your planter box, you’ll typically need pairs of boards cut at identical angles but in opposite directions (a “handed” cut). For instance, if you cut one corner with the saw angled to the left, you’ll need to set your saw to angle to the right for the matching board. Make sure you cut both pieces of a pair before moving on to the next angle. This helps maintain consistency. We learned that cutting them consecutively reduces the chance of re-setting the saw incorrectly later.
Troubleshooting Common Issues
Even with the best preparation, you might run into a small snag. Here are a few common problems and how to fix them.
Gaps in the Corners
If you have small gaps after joining your boards, it usually means the angles weren’t precisely matched. The test cut is your best friend here. You might need to make very slight adjustments to your miter or bevel settings. Sometimes, a tiny bit of sanding on the cut edge can help close minor gaps, but it’s always best to get the cut angle right. We found that even a 1/16th of an inch difference can be noticeable.
Wood Splintering (Tear-Out)
Tear-out happens when the wood fibers don’t cut cleanly. To minimize this, try using a sharper blade. Also, consider scoring the cut line with a utility knife before cutting. The most effective method, however, is often to support the offcut piece. As the blade exits the wood, the offcut can sometimes lift the fibers. Holding it firmly in place can prevent this. Some woodworkers also suggest cutting from the outside in, if your saw allows for it with specific jigs.
Inconsistent Cuts
If your cuts are inconsistent, check that your saw’s fence is square to the blade when the miter is set to zero. Also, ensure the blade is spinning at full speed before it enters the wood. A saw that’s bogged down won’t cut cleanly. We found that regular maintenance of your miter saw, like ensuring the blade is clean and sharp, makes a big difference in the quality of your cuts.
Checklist for Perfect Compound Cuts
Ready to build that amazing planter box? Here’s a quick checklist to ensure your compound cuts are spot-on:
- Double-check your desired corner angle (usually 45 degrees).
- Confirm the correct miter and bevel settings for your angle.
- Perform a test cut on scrap wood and verify the angle.
- Securely clamp or hold your lumber against the fence and table.
- Use a sharp blade and let the saw do the work.
- Cut matching boards in pairs and test fit before assembly.
Conclusion
You’ve now seen that cutting compound angles for your planter box is entirely achievable! We’ve walked through understanding the miter and bevel settings, calculating the right angles, and the precise setup for your miter saw. Remember, taking your time, using test cuts, and securing your workpiece are your best friends for achieving those clean, professional joints. With these steps, you’re well on your way to building a beautiful, sturdy planter box that you’ll be proud of. Now, grab your tools and get ready to make those perfect cuts!
Frequently Asked Questions
What’s the most common angle for planter box corners?
For most planter boxes, you’ll aim for the outside corners to meet at a 45-degree angle. This creates a clean, classic look for your planter. You achieve this by combining specific miter and bevel settings on your saw.
Can I just set my miter saw to 45 degrees for compound cuts?
No, you can’t simply set both the miter and bevel to 45 degrees. A compound cut requires a specific combination of miter and bevel angles to create the desired angle on the face of the board. We found that using an online calculator or the suggested settings makes this much easier.
What happens if my planter box corners have small gaps?
Small gaps usually mean the angles weren’t precisely matched. Double-check your saw’s settings and make very slight adjustments. Performing a test cut on scrap wood before cutting your project material is the best way to avoid this issue.
How can I prevent wood splintering when making compound cuts?
To minimize splintering, ensure you’re using a sharp blade and let the saw blade reach full speed before cutting. Supporting the offcut piece as the blade exits the wood can also greatly reduce tear-out. We found this support step to be very effective.
Do I need to cut the lumber in a specific order?
Yes, it’s best to cut boards in pairs for each corner angle. If you need to make a cut with the saw angled left, you’ll need a corresponding cut angled right for the matching board. Cutting these consecutively helps ensure consistency and makes dry-fitting easier.