How to Cut Angles with a Miter Saw?
On this page (7 sections)
To cut angles with a miter saw, you will first need to adjust the miter saw blade to the desired angle. Then, carefully position your workpiece and make the cut with controlled motion. This method lets you create precise angles for many projects.
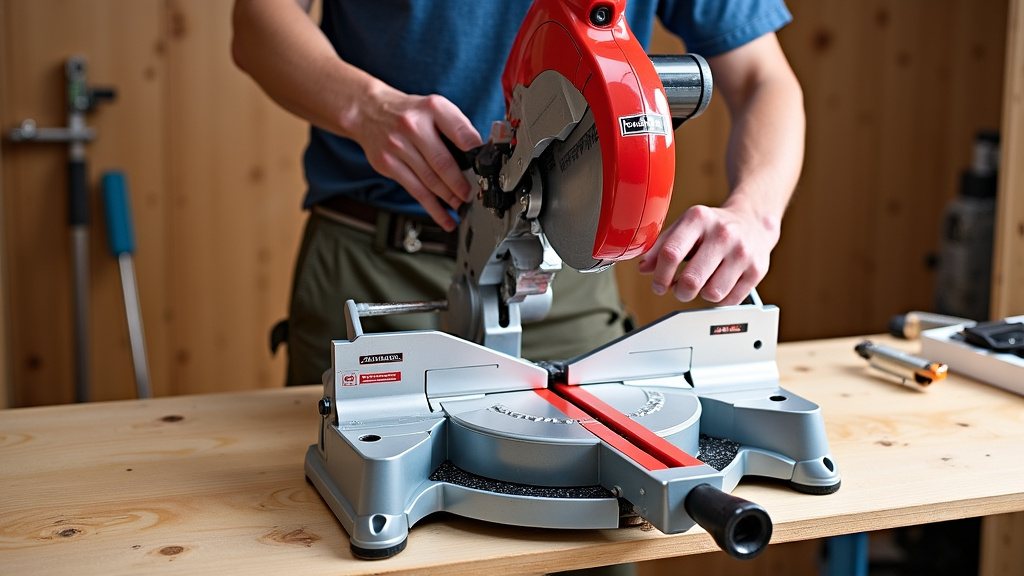
Most miter saws feature a pivoting fence and a rotating table. This design allows you to set a wide range of angles quickly. You can find markings on your saw that help you dial in the exact degree for your project. Understanding these settings is key to success.
- Set the correct angle on your saw.
- Place your material firmly against the fence.
- Make a practice cut on scrap wood.
- Always keep safety in mind.
Ready to make those perfect angled cuts? Let’s walk through how to master your miter saw, step by careful step.
Setting Up Your Miter Saw for Angled Cuts
Before you make a single cut, proper setup is non-negotiable for safety and precision. Think of it like a chef preparing their ingredients; everything needs to be in its place. We’ll walk through getting your saw ready.
Understanding Your Miter Saw’s Controls
Your miter saw is a marvel of engineering, but it’s only as good as your understanding of its functions. Let’s look at the key parts you’ll use for angle cutting. These include the miter scale, miter lock, and bevel adjustments. Each plays a vital role.
The Miter Scale and Lock Explained
The miter scale is usually found at the base of your saw, directly in front of you. It’s a curved guide, typically marked in degrees from miter scale range in both directions. This is where you select your angle. The miter lock is the mechanism—often a handle or knob—that secures the saw table at your chosen angle. Without a locked miter, your cut will be wobbly and inaccurate. Always make sure it’s tightly secured before cutting (OSHA recommends this for safe operation).
Working with Bevel Angles
Unlike miter cuts, which angle across the width of your wood, bevel cuts angle through the thickness. Some miter saws can only miter, but many can do both, often called “compound miter saws.” The bevel adjustment allows the saw blade to tilt left or right. You’ll find a locking lever or knob at the back or side of the saw. Loosen it, tilt the saw head to the desired angle on the bevel scale, and then lock it firmly in place. This adds another dimension to your angled cuts.
Measuring and Marking Your Material
Accurate measurements are the foundation of any good project. A tiny error here can lead to a big problem later. Don’t rush this step. It’s often said, “measure twice, cut once,” and for good reason!
Using a Tape Measure and Pencil
Grab a reliable tape measure and a sharp pencil. Measure the length you need and make a clear mark on your wood. For angles, it helps to use a speed square or combination square to extend your line across the material, ensuring it’s straight and accurate. Do you ever wonder why your joints don’t meet up? It’s often because of a sloppy mark.
The Importance of a Test Piece
Especially when cutting critical angles or working with expensive lumber, always use a test piece. This scrap wood, similar in size and thickness to your actual project material, lets you verify your saw’s settings. Cut the angle, check it with a protractor or against another piece. Does it fit? Perfecting your settings on scrap can save you frustration and material later.
Technique for Making Precise Angle Cuts
Now for the fun part: making the cut! But hold on, it’s about technique, not just power. A good cut is a controlled cut. Let’s break it down.
Positioning Your Wood Correctly
Place your workpiece firmly against the fence and the miter saw table. The fence provides stability and straightness, guiding your cut. Make sure your marked line aligns with the saw blade’s kerf (the path the blade will take). For smaller pieces, use a clamp to secure the material. Never hold small pieces by hand directly when cutting; kickback is a real danger (Consumer Product Safety Commission).
| Angle Type | Saw Adjustment | Common Use |
|---|---|---|
| Miter Cut | Rotate saw table left/right | Picture frames, trim, crown molding (flat) |
| Bevel Cut | Tilt saw blade left/right | Angled edges, chamfers, compound cuts |
| Compound Cut | Both miter and bevel adjustments | Crown molding (installed), complex trim joints |
Executing the Cut Safely
With your vision clear and hearing protection on, start the saw and allow the blade to reach full speed before lowering it into the wood. Maintain a slow, steady, and controlled downward motion. Don’t force the saw. Let the blade do the work. Once through the wood, keep the saw running as you slowly raise the blade to its home position. Only then should you release the trigger. This technique helps prevent splintering and promotes a clean cut. Remove your hands from the danger zone before starting the saw. Always know where your hands are.
Troubleshooting Common Angled Cutting Issues
Even with the best intentions, things can go awry. We’ve all been there! Let’s look at some common problems and how to solve them.
When Your Angles Don’t Match Up
If your angles aren’t joining perfectly, the first thing to check is your saw’s calibration. For a closer look at angle math, see how to calculate miter saw angles. Is the miter scale truly accurate? You can check this with a framing square or a digital angle finder against a known 90-degree reference. Sometimes, the scale can get knocked slightly. Also, check for movement in your material during the cut. Sloppy work holding is a frequent culprit. Double-check your measurements and markings too; pencil lines can be deceiving if they’re too thick. For a specific setting, see this guide to a 30-degree miter angle.
Dealing with Tear Out and Splintering
Tear out, or splintering, is frustrating. It happens when the exiting blade tears wood fibers instead of cleanly cutting them. To minimize this, use a sharp blade specifically designed for fine cross-cutting (more teeth means a finer cut). You can also place a “sacrificial fence” – a piece of scrap wood – between your workpiece and the saw’s fence. This provides support for the wood fibers as the blade exits, reducing tear out dramatically. Often, slowing your cut speed helps too.
Maintenance Tips for Consistent Angle Cuts
A well-maintained saw is a happy saw, and a happy saw makes precise cuts. Neglecting your tool can lead to inaccurate angles and even present safety hazards. A little love goes a long way!
Keeping Your Blade Sharp and Clean
A dull blade works harder, heats up, and produces rougher cuts that are prone to tear out. It can even cause dangerous kickback. Change your blade when it shows signs of dullness – perhaps every few projects, depending on use. Also, periodically clean your blade. Pitch and resin buildup can make a sharp blade act dull. Special blade cleaners can remove gunk, making your saw cut like new (Tool reviews consistently mention blade sharpness as key).
Calibrating Your Saw Regularly
Your saw’s calibration can drift over time due to vibrations, bumps, or wear and tear. Regularly check your saw’s 0° and 45° settings with a reliable square or digital angle gauge. Most saws have adjustment screws for fine-tuning these settings. A correctly calibrated saw ensures that when you set it to 45°, it’s actually cutting 45°. This periodic check is essential for continued accuracy.
Here’s a quick checklist to keep your saw in top form for angle cutting:
- Inspect blade for sharpness and damage.
- Clean blade of any pitch or resin buildup.
- Verify miter and bevel scales for accuracy.
- Tighten all locking mechanisms and bolts.
- Clear sawdust and debris from the saw’s table and fence.
- Check power cord for fraying or damage.
Conclusion
You now have the knowledge to confidently cut angles with your miter saw. For a project that uses repeated miter cuts, see this herringbone pattern guide. Remember, attention to detail in setup, precise marking, and careful execution are your best friends. Mastering these steps will ensure your projects look professional and fit together perfectly. Always prioritize safety and take your time. With practice, you’ll find yourself making clean, accurate angled cuts with ease. Now, go give it a try and build something great!
Frequently Asked Questions
What is the best way to cut small pieces at an angle on a miter saw?
When cutting small pieces, safety is paramount. Always use a hold-down clamp to secure the material firmly against the fence and table. Avoid holding small pieces by hand directly when the blade is near them. Consider using a stop block for repetitive cuts to keep fingers away from the blade.
How do I check if my miter saw’s angles are truly accurate?
To check accuracy, set your saw to 0 degrees and cut a piece of scrap wood. The same angle checks help with geometric projects such as cutting a hexagon. Then, flip one of the cut pieces over and try to join the two cut edges. If there’s a gap, your 90-degree setting needs adjustment. For other angles, use a reliable digital protractor or an accurate drafting triangle to compare against your saw’s scale.
Can I cut compound angles without a compound miter saw?
A standard miter saw can only make miter cuts (horizontal angles). To achieve a true compound angle, which requires both a miter and a bevel, you generally need a compound miter saw or a radial arm saw. Some advanced jigs might allow for creative solutions, but they are often less precise and more complex.
What kind of saw blade should I use for precise angle cuts?
For the cleanest and most precise angle cuts, especially on finish materials, use a high tooth count blade. For another example of repeated angled cuts, see this hexagon cutting guide. A blade with 60 teeth or more for an 8-10 inch saw, or 80+ teeth for a 12-inch saw, will offer a smoother finish and reduce tear-out. Ensure the blade is sharp and clean for optimal performance.
My miter saw often pushes the wood away from the fence during a cut. How can I prevent this?
This “kick-out” can often be attributed to a dull blade, incorrect blade type for the material, or insufficient clamping. Ensure your blade is sharp and designed for cross-cutting. Always press your workpiece firmly against the fence and table, and use clamps for added stability, especially on longer or wider pieces.