How to Cut a Herringbone Pattern with a Miter Saw?
On this page (3 sections)
Yes, you can absolutely cut a herringbone pattern with a miter saw. This woodworking technique looks fancy, but it’s achievable with careful measuring and angled cuts. Learning how to cut herringbone with your miter saw opens up exciting possibilities for your projects, from flooring to decorative accents.
Many DIYers find the prospect intimidating. They worry about achieving perfect angles and clean joints. However, with a bit of practice, you can master this technique. You’ll create stunning designs that add a unique touch to your home or custom builds, making your projects truly stand out from the crowd.
- Herringbone patterns are achievable with a miter saw.
- Key is precise angle cuts and accurate measurements.
- Practice on scrap wood first.
- It’s great for floors, accent walls, and furniture.
Below, we break down exactly how to set up your miter saw and make those precise cuts for a beautiful herringbone effect. Let’s get started on creating this eye-catching pattern!
So, you’re ready to tackle a herringbone pattern! It’s a design that instantly adds a touch of sophistication and visual interest to any space. Many woodworkers think it’s a job only for master craftsmen, but with a miter saw and a little patience, you can achieve those classic diagonal lines. This guide will walk you through the process, step-by-step, so you can feel confident cutting those perfect angles.
Mastering Angled Cuts for Herringbone Designs
Cutting a herringbone pattern with your miter saw is all about setting up your saw correctly and making precise, repeatable cuts. The distinctive V-shape of the pattern comes from joining two pieces of wood, each cut at an angle, that meet at a perpendicular junction. It’s like building a beautiful, angled puzzle.
Understanding the Basic Herringbone Cut
The core of the herringbone pattern is two pieces of wood, each cut at a specific angle, coming together to form a 90-degree corner. Imagine two arrows pointing towards each other. One piece will have a left-side bevel, and the other a right-side bevel. When placed side-by-side, these angled ends form that iconic zig-zag.
The 45-Degree Myth: What You Really Need
Many people assume a herringbone pattern requires 45-degree cuts. While 45 degrees can work in some specific scenarios, it often creates a pattern that looks more like a chevron or a staggered pattern rather than a true herringbone. For a classic, tight herringbone, you’ll typically be working with angles that are less than 45 degrees. A common starting point is around 31.6 degrees, but this can vary depending on the width of your material and the exact look you want. We’ll cover how to find the perfect angle for your project.
Determining Your Angle
The precise angle you need depends on the width of the boards you’re using and the desired tightness of the pattern. There isn’t a single magic number that fits all situations. You’re essentially trying to create a 90-degree angle when two pieces meet. If you’re using boards that are 3 inches wide, the angle will be different than if you’re using 5-inch wide boards.
We found that using a bit of trigonometry can help find the sweet spot. The formula involves the arctangent of half the width of your board divided by its length (or the length you want each piece to be). However, for most DIYers, trial and error on scrap pieces is the easiest way to find your angle. Many woodworkers settle on angles between 22.5 and 31.6 degrees for their miter saw. It’s about creating that perfect intersection.
Setting Up Your Miter Saw for Herringbone Cuts
A properly set up miter saw is your best friend for this project. Accuracy is key here, so take your time with these steps. Don’t rush; a little extra attention now saves a lot of frustration later.
Calibrating Your Saw
First, ensure your miter saw is accurately calibrated. Check that the 0-degree mark is truly perpendicular to the blade. Most saws have adjustable stops. You’ll want to make sure the fence is also perfectly at 90 degrees to the blade when the saw is set to zero. A good carpenter’s square is helpful for this calibration. If your saw is off even a degree, your pattern will be off, and your joints won’t meet cleanly.
Finding the Right Bevel Angle
This is where the magic happens. You need to set your saw’s bevel adjustment, not just the miter angle. The bevel is the tilt of the blade from vertical. For most herringbone patterns, you’ll be setting a bevel angle, and then you’ll adjust the miter angle to achieve the final shape of the cut on your workpiece. We found that setting your bevel to a specific angle, say 25 degrees, and then experimenting with the miter angle on scrap wood is the most effective method. You’re looking for the cut where the two angled edges of your boards meet perfectly at a sharp point. Understanding how to cut compound angles is key to achieving complex patterns like herringbone.
Using a Stop Block for Consistency
Once you’ve determined your angles, you’ll want to use a stop block. This is a piece of wood clamped to your miter saw’s fence. It ensures that each piece you cut is the exact same length. For a herringbone pattern, consistency in length is just as important as the angle of the cut. This prevents one side of your pattern from being noticeably longer or shorter than the other, which would throw off the entire design. We recommend cutting pairs of identical lengths for each section of your pattern.
Cutting Your Herringbone Pieces: A Step-by-Step Guide
Now that your saw is set up, it’s time to make some cuts! Remember, practice on scrap wood first. This is non-negotiable. You wouldn’t try a new recipe without tasting it first, right? Treat this the same way. Get comfortable with the saw’s settings before you cut into your project material.
Step 1: Set Your Initial Angles
Start by setting your saw’s bevel angle to the specific degree you’ve determined will work for your board width. Then, set your miter angle. For a true herringbone, one side of your workpiece will be cut at a positive miter angle (e.g., 15 degrees to the right), and the mating piece will be cut at a negative miter angle (e.g., 15 degrees to the left). You are aiming for the long point of the cut to be the length you desire for your pattern piece.
Step 2: Make Your First Cut (The Left Side)**
Take your first board. Position it against the fence. Make the angled cut. Ensure the blade guard is down and your hands are safely away from the blade. If you’re using a stop block, make sure the end of your board is firmly against it. This cut should create the first half of your V-shape, with the long point facing outward from the fence.
Step 3: Make Your Second Cut (The Right Side)**
Now, flip your board over or adjust your saw’s miter angle to the opposite side. You are making the complementary cut on the other end of the same board. This cut should also meet the first cut precisely at the intended length. When you’re done, you should have a board with two angled ends that meet at a sharp point. For a true herringbone, you’ll have one board cut like this, then another board cut in reverse so they can interlock.
Step 4: Repeat and Verify
Continue cutting your pieces. Always cut in pairs: one piece angled to the left, and one angled to the right. It helps to lay them out as you go. Place two pieces together to check that they form a perfect 90-degree angle at their peak and that the lengths are consistent. If there’s a small gap, you might need to adjust your angles slightly. Many experts recommend a small test piece first to verify your setup.
Laying Out Your Herringbone Pattern
Once you have a pile of perfectly cut pieces, it’s time to lay them out. This is where you see your hard work come to life! We found that planning your layout on the floor before you start permanently fixing anything is a great strategy.
Starting Point and Direction
Decide where you want your pattern to start. Are you beginning in a corner? In the center of a wall or floor? For a floor, you might start from a central line and work outwards. For an accent wall, you might start at the bottom and work your way up. The direction you lay your first few pieces will set the stage for the entire pattern. Consider the visual flow and how the pattern will meet the edges of your space.
Achieving that Perfect V
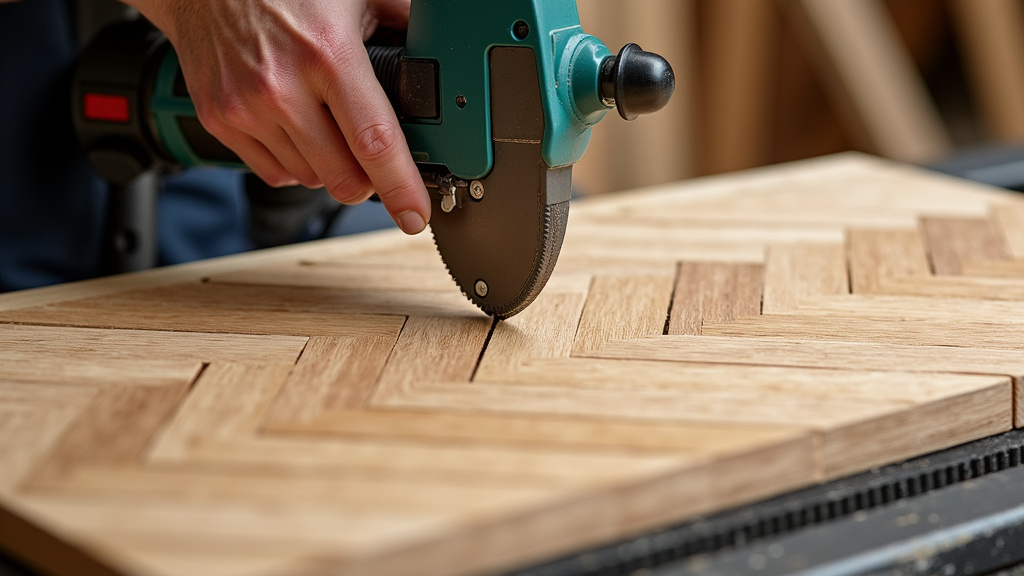
The defining characteristic of herringbone is that V-shape. As you lay your pieces, ensure that the points of each V are sharp and that the adjacent pieces meet flush. You’ll be alternating the direction of the V. One V will point up and to the right, the next will point up and to the left, creating that continuous zig-zag effect. Many find it helpful to lay out a small section first to get a feel for the rhythm of the pattern.
Dealing with Edges and Obstacles
When you reach the edges of your project area, you’ll likely need to make some partial cuts. Don’t be afraid to trim your pieces to fit. This might involve cutting off the long point or trimming the end to a different angle to make it fit neatly against a baseboard or wall. Measuring twice and cutting once is crucial here. It’s always better to have a slightly longer piece you can trim down than a piece that’s too short.
Tips for a Flawless Herringbone Finish
Even with perfect cuts, a few extra steps can make your herringbone pattern look professionally done. We’ve gathered some common recommendations from experienced woodworkers to help you achieve that stunning final result.
- Use the Right Wood: Hardwoods tend to hold their shape and provide a cleaner cut than very soft woods.
- Sharp Blade is a Must: A dull blade will splinter your wood and create ragged edges. Ensure your miter saw blade is sharp and has a high tooth count for clean cuts.
- Work in Sections: Especially for larger projects like floors, work in manageable sections. This prevents your adhesive from drying before you can place the wood.
- Dry Fit First: Always dry fit a section before you commit to adhesive or fasteners. This allows you to spot any alignment issues.
- Consider the Grain Direction: For aesthetic appeal, pay attention to the direction of the wood grain in your pattern.
Here’s a quick checklist to keep you on track:
- Confirm miter saw accuracy.
- Determine correct bevel and miter angles on scrap.
- Use a stop block for consistent length.
- Cut alternating left and right angled pieces.
- Dry-fit sections before final installation.
- Plan your starting point and pattern direction.
By following these steps and paying close attention to your saw’s settings, you can confidently cut a beautiful herringbone pattern that will make your woodworking projects truly exceptional. It’s a skill that adds a significant “wow” factor!
Conclusion
Mastering the herringbone pattern with your miter saw is entirely within your reach. By focusing on precise angle calibration, consistent stop-block usage, and practicing on scrap wood, you’ll create those signature interlocking V-shapes. Don’t be discouraged by the angled cuts; they’re the key to a professional look. Now that you understand the setup and cutting process, you’re ready to apply this technique to your next project. Start by planning a small accent piece, like a decorative box or a small shelf, to build your confidence before tackling larger floors or walls.
Frequently Asked Questions
What’s the most common angle for herringbone cuts on a miter saw?
While there isn’t one single angle that fits all board widths, many woodworkers find success with bevel and miter angles between 22.5 and 31.6 degrees. The exact angle depends on your board’s dimensions and how tightly you want the pattern to interlock. Experimentation on scrap pieces is your best bet for finding that perfect fit.
Can I use a standard miter saw, or do I need a special one for herringbone?
You can absolutely use a standard miter saw for herringbone patterns. The key is ensuring your saw is well-calibrated and that you understand how to use both the miter (horizontal angle) and bevel (vertical tilt) adjustments correctly. A sharp blade is also essential for clean cuts.
How do I ensure my herringbone pieces are the same length?
Using a stop block is the most effective way to ensure consistent length for all your herringbone pieces. Clamp a piece of scrap wood to your saw’s fence at the desired length. Each board you cut will then rest against this block, guaranteeing uniformity across your pattern.
What happens if my herringbone joints don’t meet perfectly?
Slight gaps or misalignments usually indicate an issue with your saw’s angle calibration or your cutting technique. Double-check that your bevel and miter settings are accurate and that your saw is properly zeroed. Making a few test cuts on scrap wood can help you fine-tune the angles until the joints meet flush.
Is it better to cut all pieces for one side first, or cut alternating pieces as I go?
It’s generally more efficient to cut alternating pieces as you go, or at least in small batches of pairs (one left-angled cut, one right-angled cut). This allows you to dry-fit sections periodically to ensure your angles and lengths are working together correctly. Laying out a small section on the floor before making final cuts can also reveal any emerging pattern issues.