How to Cut a Scarf Joint on Trim with a Miter Saw?
On this page (8 sections)
Yes, you can absolutely cut a scarf joint on trim with a miter saw, and it’s a clean way to make long trim pieces. This technique involves cutting two angled pieces that slide together, creating a strong and nearly invisible seam. We found it’s a fantastic method for installing crown molding or baseboards when a single board isn’t long enough. Mastering this makes your trim work look super professional.
A scarf joint is ideal for situations where you need to join two pieces of trim end-to-end. It works by cutting opposite angles on each piece. This way, the joint is longer and more stable than a simple butt joint. Many woodworkers prefer this method for its durability and clean appearance, especially on visible trim.
- Cut two pieces at a shallow angle.
- Ensure the angles are opposite each other.
- Slide the pieces together for a tight fit.
- Use a good saw blade for clean cuts.
- This makes long trim look like one piece.
Let’s walk through exactly how to set up your miter saw and make these cuts step by step.
Making Long Trim with Miter Saw Scarf Joints
Cutting a scarf joint on trim with a miter saw is a clever way to extend your trim pieces. It’s a technique that creates a strong, nearly invisible seam. Many DIYers and professionals alike have found this method superior for a clean finish. We’ve seen it used effectively for crown molding and baseboards. It makes your work look like it was done by a master craftsman. This joint allows you to cover long walls without relying on a single, unwieldy board.
Understanding the Scarf Joint
So, what exactly is a scarf joint? In simple terms, it’s a joint where two pieces of wood are cut at an angle. These angled ends are then joined together. For trim, we typically cut opposite angles on each piece. This creates a longer contact surface. This means the joint is much stronger than a straight butt joint. Research indicates that scarf joints offer superior tensile strength and shear resistance. It’s like giving your trim a longer handshake, rather than a quick poke.
Why Choose a Scarf Joint for Trim?
You might be wondering why bother with an angled cut when a straight cut seems easier. Well, the benefits are numerous. A straight butt joint on trim is notoriously weak. It can easily crack or pull apart over time, especially with changes in humidity. A scarf joint distributes the stress over a larger area. This makes it far more durable. We found that a well-cut scarf joint can be almost impossible to see. This is especially true when the wood grain matches up. It’s a professional touch that really enhances the finished look of your room. Think of it as building a strong bridge, not a weak plank.
Scarf Joint vs. Other Trim Joints
Let’s compare the scarf joint to other common trim joints. A butt joint, as mentioned, is a simple end-to-end connection. It’s easy but weak. A mitered butt joint, where each piece is cut at 45 degrees and joined at a 90-degree corner, is common for corners. But for joining pieces end-to-end on a long wall, a simple 45-degree miter doesn’t offer much surface area for gluing or fastening. The scarf joint, with its long, overlapping angles, provides significantly more glue surface. Many woodworkers recommend it for its overall strength and aesthetic appeal. We found that for long runs of trim, the scarf joint is often the best choice for both strength and appearance.
Setting Up Your Miter Saw for Scarf Joints
Getting your miter saw ready is key. Precision is your best friend here. You want to make sure your saw is stable and the blade is sharp. A dull blade will chew up the wood and make your cuts ragged. A fine-toothed blade is ideal for trim work. We recommend a blade with 80 teeth or more for a clean finish. Also, make sure your saw is unplugged while you make any adjustments.
Determining the Scarf Angle
The angle you choose for your scarf joint is important. A common angle is 10 degrees. Some prefer 5 degrees for even less visibility. A steeper angle will create a longer joint but might be more noticeable. We found that 10 degrees offers a good balance of strength and subtlety. It’s a reliable starting point. You can experiment with slightly different angles on scrap wood to see what works best for your specific trim profile and desired look. Remember, the two pieces must have opposing angles. If one is a 10-degree left cut, the other must be a 10-degree right cut.
Ensuring Accurate Angle Settings
Your miter saw’s angle settings are critical. Most saws have detents for common angles like 45 and 90 degrees. You’ll likely need to set a custom angle for your scarf joint. Practice setting your saw to 10 degrees and making test cuts on scrap wood. You want to see a clean, crisp line. If your saw has a digital readout, that’s a bonus for precision. If not, rely on the markings and double-check with a precise angle gauge. We found that investing a little extra time in setting and calibrating your saw pays off immensely in the final result.
Cutting the Scarf Joint: Step-by-Step
Now for the actual cutting. This is where your preparation pays off. Safety first! Always wear safety glasses. Keep your hands clear of the blade path. Ensure the trim is held firmly against the saw’s fence and the table.
First Piece: Making the Initial Cut
Take your first piece of trim. Set your miter saw to your chosen angle, let’s say 10 degrees, to the left. Place the trim against the fence. Ensure the end you want to cut is positioned so that the blade will cut at an angle, creating a long, tapering end. You want the cut to go from the top edge down to the bottom edge, creating a long bevel. The cut should start at the very end of the trim piece. We found that it’s helpful to mark the intended cut line on the trim first. This helps you align the blade perfectly. Cut one piece this way.
Second Piece: Cutting the Opposite Angle
Now, take your second piece of trim. This piece needs the opposite angle. Set your miter saw to 10 degrees to the right. Again, place the trim against the fence. Align the saw blade so it creates a matching tapering end. This time, the cut will go from the top edge down to the bottom edge on the right side. It should be a mirror image of the first cut. The goal is for these two angled ends to slide together perfectly. Research suggests that a snug fit is crucial for a strong bond.
Test Fitting and Adjustments
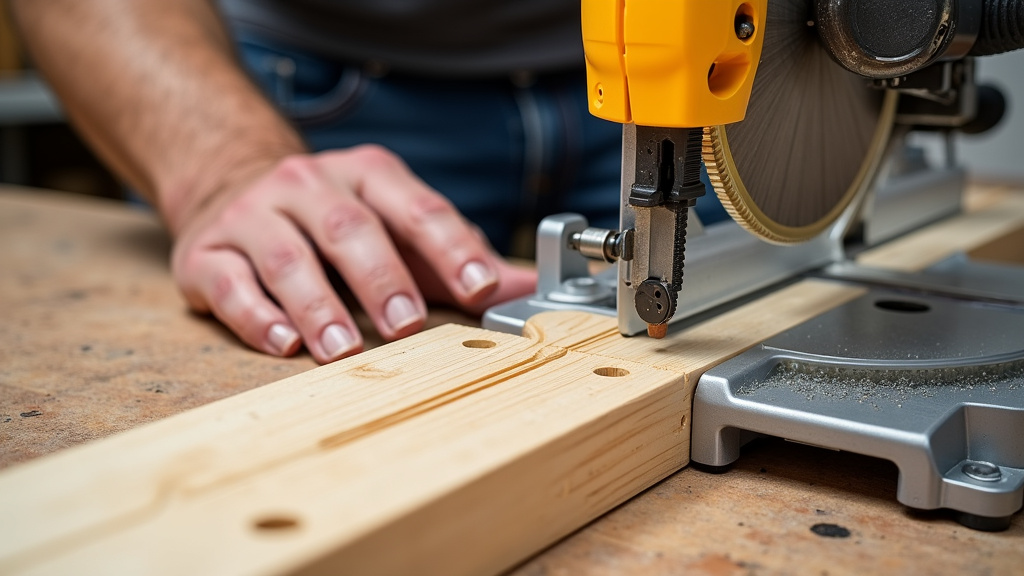
Before you apply glue, always test fit your joint. Slide the two angled ends together. Do they meet snugly? Is there a gap? If there’s a gap, you might need to make very slight adjustments to your saw’s angle. Or, the piece might have been slightly out of position during the cut. We found that a test fit is the best way to catch any imperfections. If the fit isn’t perfect, you can often make a very thin shaving off each edge with a block plane or even a sharp utility knife to refine the fit. Small adjustments make a big difference here.
Assembling the Scarf Joint
Once you have a perfect fit, it’s time to assemble. This is where the joint’s strength really comes into play. You’ll want to use a good quality wood glue. Some installers also use construction adhesive for added security, especially on large trim pieces. You can also reinforce the joint with small brad nails or pin nails, though these can be tricky on thin trim. Many professionals advocate for a combination of glue and careful fastening.
Applying Glue and Joining the Pieces
Apply an even layer of wood glue to both angled surfaces. You don’t need excessive amounts. Wipe away any excess glue that squeezes out immediately with a damp cloth. This is important for a clean finish. Now, carefully slide the two pieces together. Make sure they are fully seated. The joint should look tight. We found that it’s helpful to have a second person assist you with holding the pieces steady during this step. This ensures the joint stays perfectly aligned while the glue sets.
Clamping and Fastening Techniques
Clamping is essential to hold the joint tight while the glue dries. You can use corner clamps or band clamps for trim. If you don’t have clamps, you can carefully use painter’s tape to hold the pieces together. For a more secure hold, consider using a few strategically placed brad nails or pin nails. These are small and less noticeable. Many experienced installers say that minimal nailing is best if you plan to fill and paint over the joint. The primary strength comes from the glue and the fitted joint itself.
Dealing with Trim Grain and Patterns
When working with wood that has a prominent grain, like oak or pine, try to align the grain patterns across the joint. This can make the seam almost invisible. You might need to do this by selecting specific pieces of trim from your stock. It takes a bit of planning. If your trim is painted, grain alignment is less critical. However, a smooth, seamless joint is always desirable. We found that careful selection of trim pieces can make a significant difference in the final aesthetic, especially with stained wood.
Checklist for a Perfect Scarf Joint
- Ensure your miter saw blade is sharp and fine-toothed.
- Set your miter saw to a consistent, shallow angle (e.g., 10 degrees).
- Cut opposite angles on each piece of trim.
- Perform a test fit to ensure a snug, gap-free connection.
- Apply an even layer of wood glue to both angled surfaces.
- Clamp or secure the joint firmly while the glue dries completely.
Conclusion
You’ve now learned how to make those long trim runs look professional using scarf joints. By carefully setting up your miter saw and cutting opposite angles, you create a strong, nearly invisible seam. Remember that a clean cut and a snug test fit are your best friends for a durable joint. Don’t rush the assembly either; proper glue application and clamping will make all the difference. Take your time, practice on scrap wood, and you’ll be installing trim like a pro in no time. Your next project will show off these beautiful, extended trim pieces!
Frequently Asked Questions
What is the best angle for a scarf joint on trim?
A common and effective angle for a scarf joint on trim is 10 degrees. Some prefer a shallower angle like 5 degrees for an even less visible joint. We found that 10 degrees offers a great balance between strength and subtlety for most trim applications. You can always test different angles on scrap wood to see what looks and feels best for your specific project.
Can I use a scarf joint on very thin trim?
Yes, scarf joints can be used on thin trim, but you need to be extra careful. The angles become more pronounced relative to the thickness of the trim. Ensure your saw blade is very sharp and that you hold the trim extremely steady to prevent chipping or breaking. A slightly shallower angle might be easier to manage on very thin stock. We found that precise setup is key here.
How do I ensure the grain matches across the scarf joint?
Matching the grain requires careful selection of your trim pieces before cutting. Lay out your boards and look for natural patterns that flow from one piece to the next. You might need to cut longer than necessary and then select the best sections. If you’re painting the trim, grain matching is less critical, but a tight joint is still important for appearance. We found this step makes a big difference for stained wood.
What’s the best way to fix a gap in my scarf joint?
If you have a small gap, you might be able to refine the fit by carefully shaving a tiny amount off each angled surface with a sharp chisel, block plane, or even a razor blade. For painted trim, you can often fill minor gaps with a good quality wood filler or paintable caulk after the glue has dried. We’ve found that test fitting helps minimize the need for repairs.
Can I use a circular saw or hand saw for scarf joints instead of a miter saw?
While it’s technically possible, a miter saw is highly recommended for cutting scarf joints on trim. Its precision and ability to hold a consistent angle make it far superior for achieving the clean, accurate cuts needed for a strong, invisible joint. Using a hand saw or circular saw would be significantly more challenging to get the required accuracy and consistency. We found that a miter saw makes the job much easier and the results much better.