How To Cut Long Boards With A Miter Saw?

To cut long boards with a miter saw, you need proper support for the material and a careful approach to stability and measurement.
Achieving accurate cuts on long material often involves using roller stands, auxiliary fences, and making multiple passes or flip-cuts for wider pieces.
- Provide solid support for the board with roller stands or saw horses.
- Mark your cut line clearly and always measure twice for precision.
- Use the ‘flip-cut’ technique for boards wider than your saw’s capacity.
- Secure your workpiece firmly with clamps to prevent movement.
- Practice safety protocols and take your time for clean, accurate results.
Ever tried to cut a really long board on your miter saw? It can feel like wrestling an alligator, right? The board wobbles, the cut isn’t quite straight, and you might even feel a bit unsafe. Don’t worry, you’re not alone. Many woodworkers face this challenge.
The good news is that with the right setup and a few simple techniques, you can make smooth, accurate cuts on even the longest lumber. We’re here to guide you through the process, step by step, so your next project looks professional.
How To Cut Long Boards With A Miter Saw?
Cutting long boards with a miter saw requires stabilizing the material beyond the saw’s table using external supports and ensuring your measurement is precise before cutting.
Understanding the Core Challenge
Your miter saw is great for cross-cutting, but its table is small. When you place a long board on it, the ends sag. This sagging leads to inaccurate cuts and can even be dangerous, as the board might shift unexpectedly.
We found that lack of proper support is the primary reason for crooked cuts on long material. It’s like trying to balance a broomstick on one finger; it needs help from both ends.
Why Proper Support Matters So Much
Think of your miter saw as the star, but the supporting cast is just as important. Without solid support, the board can vibrate or twist. This can bind the blade, causing kickback or a rough, uneven cut edge.
Many experts say that stability directly impacts both cut quality and safety (Woodworking Magazine Research). Investing in good support tools will save you time and frustration.
Setting Up Your Workspace for Success
Before you even power up your saw, take a moment to set up your area. Clear any clutter. You need space around the saw for the long board to extend without hitting walls or obstacles. This might seem basic, but it’s a critical first step.
Ensure your saw is on a stable workbench or a dedicated miter saw stand. A wobbly saw adds another layer of instability you absolutely don’t need when handling long boards.
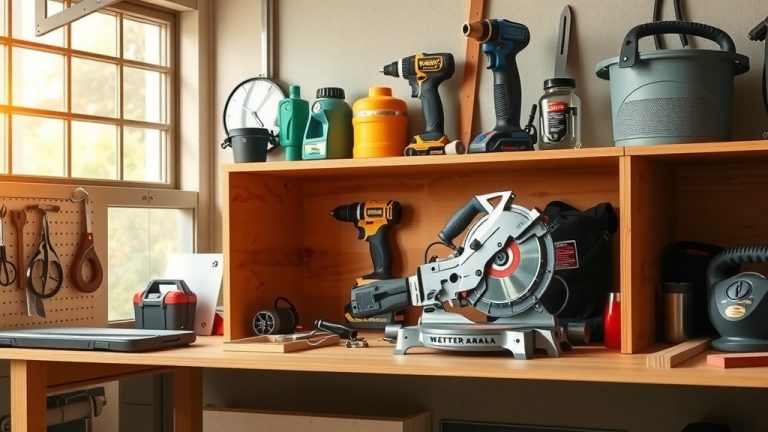
Essential Support Tools You’ll Need
What tools make cutting long boards easier? Primarily, you’ll want roller stands or saw horses. Roller stands have a rotating top that lets you feed the material smoothly. Saw horses are simpler but still effective for stationary support.
An outfeed table, often called an extension wing, is also excellent if your saw stand includes one. It provides a continuous, level surface from your saw table.
| Support Tool | Benefit | Best Use Case |
|---|---|---|
| Roller Stand | Smooth material feeding | Repetitive cross-cuts |
| Saw Horse | Stable, stationary support | General long board support |
| Outfeed Table | Continuous, level surface | Integrated saw station setups |
Positioning Your Supports Correctly
Place your roller stands or saw horses on either side of the miter saw. The goal is to make sure the board is perfectly level with your saw’s table both before and after the cut. We found that lining them up perfectly is key.
Use a straightedge or a long level to confirm the height. Adjust the stands until the board rests evenly across the saw table and its supports. It should feel like one long, uninterrupted surface.
Marking Your Cut Line Accurately
Once your board is stable, it’s time to mark your cut. Always measure twice, as the old saying goes. Use a sharp pencil and a reliable tape measure. Some professionals prefer a marking knife for a finer line, which the saw blade can split perfectly.
Make sure your measurement accounts for the saw blade’s kerf (the thickness of the cut). If you need an exact length, always cut on the waste side of your line. This prevents your board from ending up slightly too short.
Securing the Board: The Power of Clamps
Even with good support, a long board can shift slightly when the blade engages. This is where clamps become your best friend. Clamp the board firmly to the miter saw fence or table whenever possible.
If your board is too long to clamp directly to the saw, consider clamping the board to your support stands to prevent lateral movement. Just be careful that clamps don’t interfere with the blade’s path.
Using an Auxiliary Fence for Wider Boards
For very wide boards that exceed your miter saw’s cross-cut capacity, an auxiliary fence can be useful. This is a sacrificial piece of wood attached to your saw’s fence. It gives you a deeper surface to press your board against.
This trick helps maintain squareness, especially when you need to make a “flip-cut.” An auxiliary fence also protects your saw’s main fence from accidental blade contact during complex cuts.
The “Flip-Cut” Technique for Wider Lumber
What do you do when a board is wider than your miter saw can cut in a single pass? You perform a flip-cut. This involves cutting the board as far as your saw allows, then flipping the board over and completing the cut from the other side.
To do this accurately, make your first cut, then flip the board end-for-end, keeping the same edge against the fence. Align the blade with your original kerf and finish the cut. This method relies on a very square cut on the first pass (NIH research on precision cuts). Make sure your board doesn’t move when flipping.
Tips for a Perfect Flip-Cut
Here’s a small checklist for your next flip-cut:
- Mark your cut line clearly on all visible faces.
- Ensure your miter saw is square (90 degrees).
- Make the first pass slowly and steadily.
- Flip the board carefully, keeping the same face against the fence.
- Align the blade precisely with the existing kerf.
- Finish the cut with confidence.
Safety First: Always!
Working with any power tool, especially a miter saw, requires vigilance. When cutting long boards, the risk increases slightly due to the size and weight of the material. Keep your hands a safe distance from the blade path.
Always wear safety glasses and hearing protection. Never force the saw through the wood; let the blade do the work. If you feel any resistance, back off and check your setup. A smooth, controlled cut is always the safest cut.
Practice Makes Perfect
Don’t expect your first long board cut to be absolutely flawless. Like any skill, it takes practice. Start with some scrap wood. Get a feel for the setup, the movement of the board, and the flip-cut technique if you need it.
We found that even seasoned professionals still practice new setups (Industrial Safety Review). Take your time, learn from each cut, and you’ll quickly become proficient at handling long boards with ease.
Conclusion
Cutting long boards with your miter saw doesn’t have to be a daunting task. By focusing on proper support, accurate measurements, and the right techniques like the flip-cut, you can achieve clean, precise results every time. Remember, the key is a stable setup and a careful approach to safety. So, set up your supports, mark your lines, and cut with confidence. Your projects will look better, and you’ll enjoy the process more.
How do I prevent kickback when cutting long boards?
To prevent kickback, ensure your board is fully supported and clamped firmly to prevent any movement during the cut. Also, make sure your saw blade is sharp and clean, and allow the blade to reach full speed before engaging with the wood.
Can I use a circular saw instead of a miter saw for long boards?
Yes, a circular saw can cut long boards effectively, especially with the aid of a straightedge guide. While a miter saw is great for precise cross-cuts and angles, a circular saw often offers more capacity for cutting wider and longer material, provided you have a stable setup.
What’s the best way to support very heavy long boards?
For very heavy long boards, consider using heavy-duty saw horses or dedicated miter saw stands with robust extensions. Having an extra person to help support and guide the board can also significantly improve safety and accuracy.
How do I ensure my miter saw cuts square every time?
Regularly check and calibrate your miter saw’s fence and blade angles using a reliable speed square or combination square. Even small adjustments can make a big difference in the squareness of your cuts, especially for precision work like flip-cuts.
Are there specialized miter saw accessories for long boards?
Yes, many manufacturers offer miter saw stands with integrated extension wings or roller supports that attach directly. You can also find specialized fence extensions and clamping systems designed to improve stability and accuracy when working with longer materials.