
How to Use a Miter Saw?
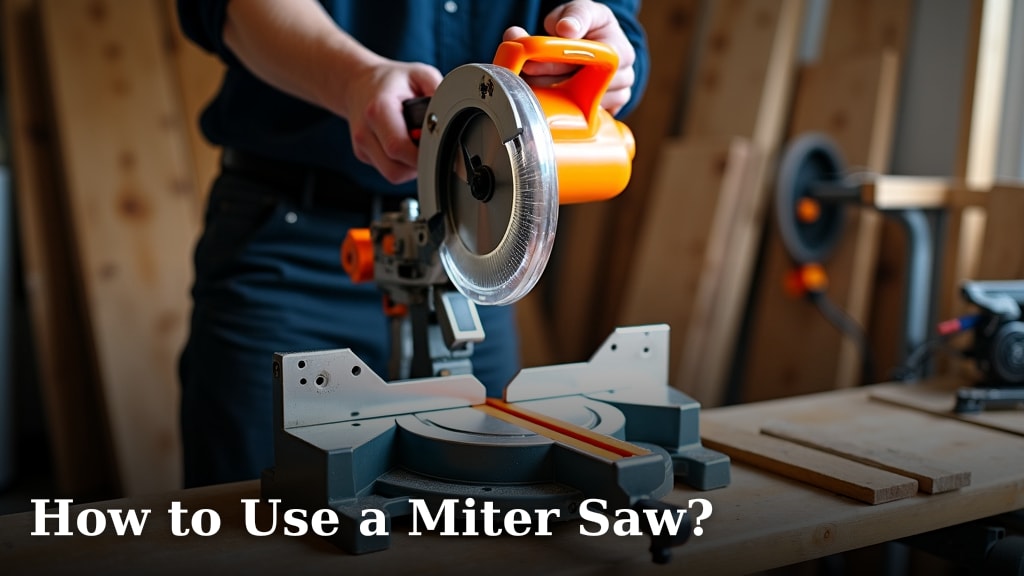
To use a miter saw, you first need to set up your workstation safely, secure your material, and then carefully make precise wood cuts for your projects. This tool is fantastic for creating accurate angled cuts quickly and efficiently.
You might be wondering how to get those perfect corners for trim, or maybe you’re building a picture frame. This saw is a go-to tool for DIYers and professionals alike, making quick work of crosscuts and angled pieces. With a little practice, you’ll be making clean, crisp cuts every time.
TL;DR: How to Use a Miter Saw
- Always prioritize safety when operating a miter saw.
- Understand the basic parts and functions of your saw.
- Learn how to make straight, miter, and bevel cuts.
- Practice proper material handling and measuring techniques.
- Discover tips for common miter saw projects.
Ready to master your miter saw? Let’s walk through exactly how to set up, operate, and maintain this powerful tool, helping you achieve professional-looking results on your next project.
Getting Started with Your Miter Saw
Before you make your first cut, it’s really important to get to know your tool. Understanding the different parts and how they work ensures both your safety and the accuracy of your projects. Think of it like learning the dashboard of a new car – you want to know what everything does before you hit the road.
Understanding the Anatomy of Your Miter Saw
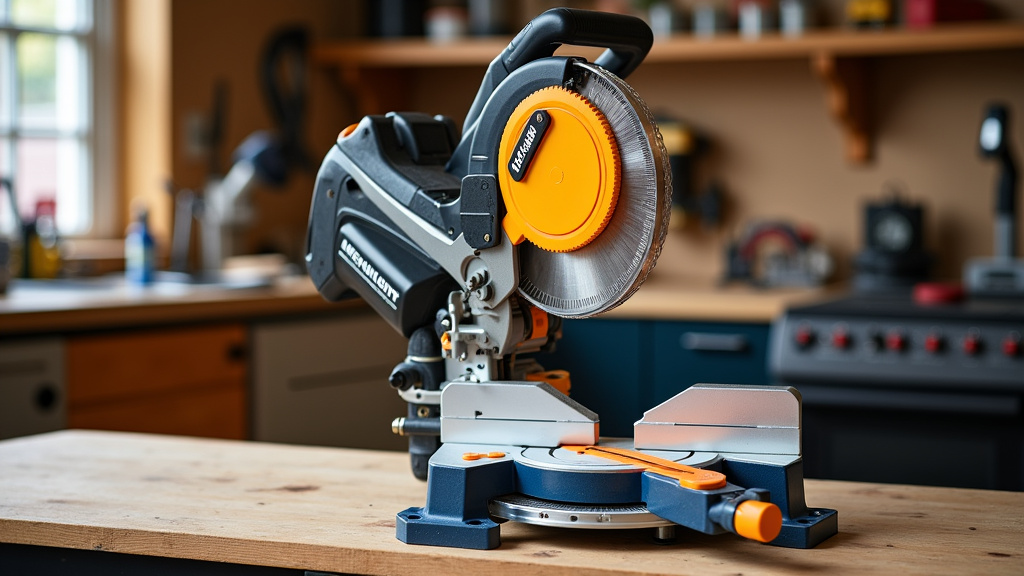
Your miter saw might look a little intimidating at first glance, but once you break it down, it’s quite straightforward. Most saws share common features, no matter the brand or type. Getting familiar with these will build your confidence.
Key Components to Identify
- Blade: This is what does the cutting. Miter saw blades are circular and come in different tooth counts for various materials and finishes (more teeth equals a smoother cut).
- Motor Housing: This covers the motor that spins the blade. It often houses the handle and trigger.
- Handle and Trigger: You’ll squeeze the trigger on the handle to start the saw. Some models have safety switches you need to engage first.
- Guard: A plastic or metal shield covers the blade when it’s not cutting. This is a critical safety feature. Never remove it.
- Fence: This is the vertical backstop against which you hold your material. It helps stabilize your workpiece and ensures accurate cuts.
- Table (or Base): The flat surface where your material rests. It often has a miter scale for angled cuts.
- Miter Angle Adjustment: A lever or knob that lets you pivot the blade left or right for miter cuts. It has a scale marked in degrees.
- Bevel Angle Adjustment: Found on compound and sliding compound miter saws, this allows the blade to tilt from side to side for bevel cuts.
- Dust Port/Bag: Connects to a dust bag or shop vacuum to collect sawdust, keeping your workspace cleaner.
- Clamping System: Many saws include a clamp to secure your material, adding an extra layer of safety and precision.
Setting Up Your Workspace for Safety
Safety is not just a suggestion when using power tools; it’s a must. Setting up your workspace correctly helps prevent accidents and makes your work much more enjoyable. We want you to work smart and stay safe.
- Stable Surface: Always place your miter saw on a firm, level workbench or saw stand. The saw should not wobble.
- Clear Area: Remove anything that could get in the way of your cut or fall onto the saw. This includes scrap wood, tools, and even pets.
- Proper Lighting: Make sure your cutting area is well-lit so you can clearly see your material, your mark, and the blade.
- Extension Cords: If you need an extension cord, use one rated for outdoor use and heavy-duty tools. Make sure it’s long enough without being stretched too thin.
- Personal Protective Equipment (PPE): Always wear safety glasses to protect your eyes from flying debris. Hearing protection is also a good idea, as miter saws can be loud. A dust mask can protect your lungs.
Mastering Miter Saw Cuts
Now that your saw is set up and you’re wearing your PPE, it’s time to learn how to make some cuts. You’ll primarily be making three types of cuts with your miter saw: crosscuts, miter cuts, and bevel cuts. Each has its own purpose, and mastering them opens up many project possibilities.
The Basic Crosscut
A crosscut is your most common cut, going straight across the width of your board at a 90-degree angle. This is often used for sizing lumber to length. It’s the foundation for everything else you’ll do.
- Mark Your Material: Use a pencil and a measuring tape or ruler to mark your desired cut line clearly on your workpiece.
- Position the Wood: Place your wood firmly against the fence and flat on the saw table. Line up your cut mark with the saw blade. It’s good practice to make the cut on the waste side of the line.
- Secure the Material: If your saw has a clamp, use it. If not, hold the wood firmly with your non-cutting hand, keeping your fingers at least 6 inches away from the blade.
- Start the Saw: With the blade raised, depress the trigger and let the blade get up to full speed before lowering it.
- Make the Cut: Slowly and steadily lower the spinning blade through the wood. Don’t force it; let the saw do the work.
- Release and Raise: Once the cut is complete, release the trigger and wait for the blade to stop spinning entirely before raising it back up.
Angling with Miter Cuts
Miter cuts are angled cuts made across the face of your wood. These are perfect for creating joints like those found in picture frames or trim, where two pieces meet at an angle to form a corner. Think of cutting a corner of a picture frame.
- Set the Miter Angle: Loosen the miter adjustment lever and pivot the saw table to your desired angle (e.g., 45 degrees for a 90-degree corner joint). Lock the angle in place.
- Mark and Position: Mark your material and place it against the fence, ensuring your mark aligns with the blade.
- Secure and Cut: Clamp the material down or hold it firmly with your non-cutting hand, keeping it well clear of the blade path. Start the saw and slowly lower the blade through the wood.
- Finish the Cut: Release the trigger, wait for the blade to stop, and then lift it.
Tilting with Bevel Cuts
Bevel cuts are angled cuts made through the thickness of your wood. This means the blade itself tilts to the side. These are often used for crown molding or creating unique architectural details. Some saws can only bevel in one direction (single-bevel), while others can tilt both left and right (dual-bevel).
- Set the Bevel Angle: Loosen the bevel adjustment knob (usually at the back of the saw) and tilt the motor housing to your desired angle. Lock it firmly.
- Mark and Position: Mark your material as usual. Position it flat on the table and against the fence.
- Secure and Cut: Secure the workpiece. Always double-check your hand placement, as the tilted blade might come closer than expected. Start the saw, let it reach full speed, and then slowly lower the blade.
- Finish and Release: Once the cut is done, release the trigger, wait for the blade to stop completely, and raise it back up.
You can even combine miter and bevel cuts to create compound cuts, which are essential for things like crown molding. But don’t worry about those just yet. Master the basics first!
Tips for Precision and Best Practices
Achieving clean, accurate cuts consistently takes practice and attention to detail. Here are some pointers to help you get professional-looking results every time you use your miter saw.
Ensuring Accurate Measurements and Marks
Your cuts will only be as good as your measurements. A small error here can snowball into big problems for your project. We found that taking a moment to measure carefully saves a lot of headaches later.
- Use a Good Tape Measure: A high-quality tape measure with a clear, readable scale is essential.
- Mark Clearly: Use a sharp pencil or a marking knife for precise lines.
- “Cut to the Waste Side”: Always aim to cut just outside your measurement line, leaving the line itself on the piece you want to keep. This ensures your piece isn’t slightly too short.
- Check for Square: Periodically check your saw’s fence and blade for squareness against a known square. Saws can sometimes shift out of alignment.
Material Handling and Support
Properly supporting your material is crucial, especially for longer boards. An unsupported piece can sag, leading to inaccurate cuts or even dangerous kickback. Think of it like trying to cut a spaghetti noodle in the air; it’s just not stable.
- Support Long Pieces: If your board extends past your saw’s table, use roller stands, sawhorses, or extra hands to support the weight at the same height as your saw table (National Institute for Occupational Safety and Health).
- Hold Firmly: Always keep your workpiece firmly against the fence and flat on the table throughout the cut.
- Small Pieces: Be extra careful with very small pieces. They can be dangerous to hold. Consider using a push stick or a jig, or avoid cutting them on the miter saw if possible.
Blade Selection and Maintenance
The blade you use makes a huge difference in cut quality. Just like a chef needs the right knife, you need the right blade for your wood. We found that investing in a good blade is one of the best upgrades you can make.
| Blade Type | Tooth Count | Best For | Cut Quality |
|---|---|---|---|
| General Purpose | 40-60 teeth | Framing, rough cuts | Fair to Good |
| Fine Finish | 60-80 teeth | Trim, plywood, crosscuts | Excellent |
| Plywood/Laminate | 80-100 teeth | Plywood, veneered boards | Very Good (minimizes tear-out) |
Always make sure your blade is sharp and clean. A dull blade can cause splintering, burning, and put extra strain on your saw’s motor. Clean pitch and resin off your blade regularly with a blade cleaner. If a blade is bent or damaged, replace it immediately.
Pre-Cutting Checklist
Before you make any cut, take a moment to run through this quick checklist. It’s a simple habit that can prevent mistakes and keep you safe (Occupational Safety and Health Administration).
- Have I put on my safety glasses and hearing protection?
- Is my saw plugged in and turned on?
- Is my material completely stable and supported?
- Is my desired angle (miter/bevel) correctly set and locked?
- Is the blade clean, sharp, and secure?
- Are my hands and fingers well clear of the blade path?
By following these steps, you’ll be well on your way to confidently using your miter saw for all sorts of woodworking projects. Happy cutting!
<h2><b>Conclusion></b></h2>
<p>You’ve truly learned the essentials of using a miter saw. Remember, <strong>safety always comes first</strong>. Take time to set up your workspace properly and wear your PPE. Understanding your saw’s parts, making precise measurements, and using the right blade will help you achieve clean, accurate cuts every time.</p>
<p>Practice making the different types of cuts – crosscuts, miters, and bevels – until you feel confident. We found that <strong>patience and attention to detail</strong> are your best allies. Now, go confidently tackle your next project, creating beautiful, precise results with your miter saw!</p>
<h2><b>Frequently Asked Questions></b></h2>
<h3><b>How often should I clean my miter saw blade?</b></h3>
<p>You should clean your miter saw blade regularly, especially if you notice pitch or resin buildup. For active users, cleaning after every few hours of use, or at the end of each project, is a good habit. A clean blade ensures better cut quality and extends its lifespan.</p>
<h3><b>Can I cut metal with a miter saw?</b></h3>
<p>Generally, you should not cut metal with a miter saw designed for wood. Using the wrong blade can damage your saw and create dangerous sparks or debris. There are specialized miter saws and blades made for cutting metal, often called “chop saws.”</p>
<h3><b>What’s the best way to prevent wood tear-out with a miter saw?</b></h3>
<p>To minimize tear-out, we recommend using a high tooth count blade (60-80 teeth for fine finish). You can also place a “sacrificial” backer board behind your workpiece. This provides support for the wood fibers as the blade exits, leading to a cleaner cut.</p>
<h3><b>Is it necessary to clamp down every piece of wood I cut?</b></h3>
<p>While not strictly “every” piece, clamping down your workpiece is highly recommended for stability and safety. It prevents the wood from shifting during the cut, which can distort the angle or cause kickback. For smaller pieces, clamping is even more important due to hand proximity.</p>
<h3><b>How do I know if my miter saw fence is square?</b></h3>
<p>You can check your fence for squareness by using a known accurate square, such as a machinist’s square. Place the square against the fence and the saw table when the blade is at its 90-degree crosscut setting. Any gaps indicate your fence needs adjustment. We found that checking this periodically keeps your cuts precise.</p>
