
How To Secure A Miter Saw?
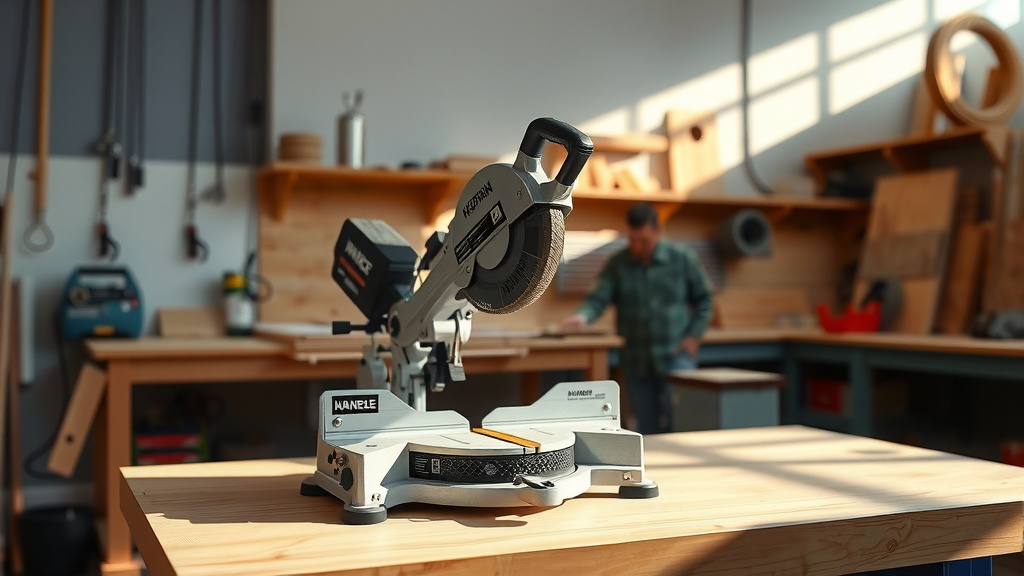
To secure a miter saw, firmly clamp it to a sturdy workbench or a dedicated miter saw stand.
This critical step prevents movement during cuts, ensuring both safety and precise results for your miter saw projects.
- Always use clamps or bolts to firmly attach your miter saw to a stable surface.
- A dedicated miter saw stand offers excellent portability and stability for most users.
- Prioritize safety by double-checking all connections before starting any cutting tasks.
- Consider your workspace and project type to choose the best securing method for your saw.
How To Secure A Miter Saw?
Securing a miter saw involves fastening it to a stable surface like a workbench or a specialized stand to prevent movement during operation.
This keeps you safe and ensures every cut you make is accurate and clean.
Why Is Miter Saw Security So Important?
Imagine trying to cut a straight line on a moving target. Not easy, right?
That’s why a secure miter saw is so essential. It’s all about control and predictable outcomes.
Safety First: Protecting You and Your Project
A loose miter saw can be genuinely dangerous. We found that unexpected movement can lead to kickbacks or even severe injury (OSHA guidelines frequently emphasize this).
Keeping your saw fixed means you can focus on the wood, not on wrestling with the tool.
Precision Matters: Getting Those Perfect Cuts
Every woodworker knows the satisfaction of a perfectly square or angled cut. A wobbly saw makes this nearly impossible.
A secure setup ensures your blade meets the material exactly where you intend, time after time.
Essential Tools for Securing Your Miter Saw
You don’t need a huge arsenal of tools to keep your miter saw steady. A few key items will do the trick nicely.
Think of these as your saw’s personal anchors.
Clamps: Your Best Friends
C-clamps, bar clamps, or quick-release clamps are fantastic for temporary setups. They grip your saw’s base to your workbench.
Many experts say clamps are the go-to for situations where you don’t want a permanent fixture.
Miter Saw Stands: Dedicated Stability
These stands are designed specifically for miter saws. They often have quick-release mounting brackets, making setup and breakdown simple.
We found that a good stand offers both portability and robust stability for various job sites or workshop layouts.
Mounting Hardware: For Permanent Setups
If your saw lives in one spot, bolts, nuts, and washers are your best bet. This creates a solid, unmoving bond with your workbench.
Research often connects fixed mounting with maximum stability for repetitive tasks (Tooling Magazine reviews).
Step-by-Step Guide: How To Secure A Miter Saw
Ready to get your saw locked down? Let’s walk through the process together. It’s simpler than you might think.
Step 1: Choose Your Workspace
Pick a spot that’s flat, level, and strong enough to support your saw and the material you’ll be cutting.
A sturdy workbench or a dedicated saw stand is ideal. Avoid unstable surfaces like sawhorses without proper bracing.
Step 2: Utilize Clamps Effectively
- Place your miter saw on the workbench.
- Position at least two clamps: one on each side of the saw’s base.
- Tighten the clamps firmly, ensuring the saw cannot slide or lift.
- Give it a gentle nudge – if it moves, tighten more or add another clamp.
Step 3: Bolting to a Workbench
If your saw has mounting holes, align them with your workbench. Mark the spots for drilling.
Drill pilot holes, then use bolts, washers, and nuts to secure the saw from underneath. This creates a super-stable workstation.
Step 4: Using a Miter Saw Stand
Most stands come with universal mounting brackets. Attach these brackets to your saw’s base according to the stand’s instructions.
Then, simply snap or bolt your saw onto the stand. Always check the stand’s locking mechanisms.
Step 5: Double-Check Everything
Before plugging in or making any cuts, always give your saw a good shake. Does it budge?
Are all clamps tight? Are bolts snug? This quick check can prevent accidents and flawed cuts.
What If You’re On the Go? Portable Security
Sometimes your workshop is wherever the job is. Don’t worry, there are still great ways to keep your saw secure.
Portable Miter Saw Stands
These stands are designed for easy transport and quick setup. Many have wheels and folding legs.
They offer excellent stability even on uneven ground, often with adjustable feet to compensate.
Tailgate and Temporary Setups
If you’re using a truck tailgate or a temporary table, ensure it’s robust. Use multiple clamps to secure the saw.
Consider placing a rubber mat underneath for extra grip and vibration dampening (DIY experts often suggest this).
Common Mistakes to Avoid When Securing Your Saw
It’s easy to overlook small details, but these can make a big difference in safety and performance.
One common error is using too few clamps or not tightening them enough; a loose saw is just as bad as an unsecured one.
Another mistake is mounting the saw too close to the edge of a surface, which creates an imbalance. Always ensure your setup has a wide, stable footprint.
Checklist for a Secure Setup
Here’s a quick mental run-through before you power up your miter saw:
- Is the saw base flat against the securing surface?
- Are all clamps or bolts firmly tightened?
- Does the saw wobble when you push it? (It shouldn’t!)
- Is your workpiece supported on both sides for long cuts?
- Are there any potential obstructions in the blade’s path?
- Is the power cord safely out of the way?
When to Re-evaluate Your Setup
Life happens, and things shift. Regularly check your miter saw’s security.
If you’ve moved the saw, transported it, or even just used it heavily, take a moment to re-confirm everything is still tight.
Also, if you notice any unusual vibration or noise during operation, it could be a sign your saw isn’t as secure as it should be.
| Securing Method | Best For | Key Advantage | Consideration |
|---|---|---|---|
| Clamps to Workbench | Temporary, varied projects | Quick setup and removal | Requires sturdy workbench |
| Bolting to Workbench | Permanent workshop setup | Maximum stability | Less portable |
| Dedicated Miter Saw Stand | Portability, job sites | Designed for mobility and stability | Requires initial assembly |
Conclusion
Securing your miter saw isn’t just a suggestion; it’s a fundamental step for any project. Whether you’re a weekend DIYer or a seasoned pro, a stable saw means safer operation and more precise results.
Take the few extra moments to ensure your miter saw is firmly anchored. Your projects will thank you, and more importantly, so will your peace of mind. Stay safe and enjoy your woodworking!
How do I prevent my miter saw from vibrating?
Prevent vibration by ensuring your miter saw is firmly secured to a stable, heavy surface. Using rubber mats underneath the saw or stand can also help absorb vibrations, leading to smoother cuts.
Can I use a miter saw without a stand?
Yes, you can use a miter saw without a stand if you secure it properly to a sturdy workbench or a flat, stable surface using clamps or bolts. The key is preventing any movement during operation.
What is the best way to support long boards on a miter saw?
For long boards, use outfeed supports or roller stands on both sides of the miter saw. This keeps the material level with the saw’s table, preventing sagging and ensuring accurate cuts.
How tight should I clamp my miter saw?
You should clamp your miter saw tight enough so that it cannot shift or lift even with moderate force. However, avoid over-tightening to prevent damage to your saw’s base or the workbench.
Is it safer to bolt or clamp a miter saw?
Bolting offers the most permanent and arguably safest connection for a stationary miter saw, as it’s less prone to loosening over time. Clamping is safe for temporary setups when done correctly and checked regularly.


