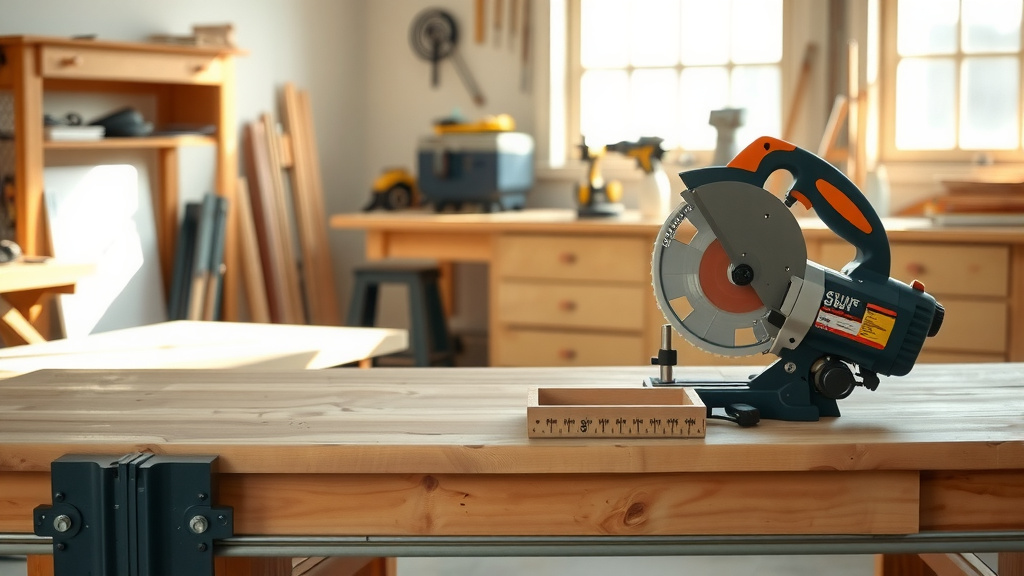
How to Choose a Miter Saw Angle Jig
Choose a miter saw angle jig that fits your saw and holds the workpiece in the position your cut requires. Crown stops suit vertical molding, while adjustable support stops help with repeat cuts and longer boards.
On this page (10 sections)
- What should a miter saw jig for angles do?
- How do you choose an angle jig for your saw?
- What is the best jig for crown molding angles?
- When should you choose a work-piece support stop?
- How do spring angles affect a crown molding jig?
- What features help with repeatable angle cuts?
- Should you buy a jig or make one?
- How should you check a miter saw angle jig before cutting?
- How does a blade choice affect angled cuts?
- What is the final choice for a miter saw angle jig?
A miter saw jig for angles should match your saw, hold the material securely, and suit the cut you plan to repeat. Crown stops are built for vertical molding, while work-piece supports and stops help control long boards and repeated lengths.
The right jig can make an angled cut easier to set up because it gives the material a fixed reference point. It cannot correct an incompatible mounting pattern, an incorrect spring angle, or a board that is too large for the saw and jig.
Before choosing, identify the job:
- Crown molding held vertically against the fence
- Baseboard, casing, or other tall trim
- Repeated crosscuts at a fixed length
- Long material that needs support beyond the saw table
- A custom jig for unusual angles or project-specific work
For a broader look at building your own setup, see How To Make A Jig For Miter Saw?. A homemade jig may make sense when your saw, material, or angle falls outside the purpose of a ready-made accessory.
What should a miter saw jig for angles do?
A useful miter saw jig for angles creates a stable reference for the workpiece. It should reduce movement, keep the material in the intended position, and let you repeat the setup without guessing each time.
The jig does not replace the saw's miter and bevel controls. A miter saw laser attachment can help show where the blade will cut.
Instead, it helps control the relationship between the material and the fence, table, blade, or stop.
Look for these functions:
| Jig function | Best use |
|---|---|
| Vertical crown support | Crown molding and tall trim |
| Adjustable length stop | Repeated pieces of the same length |
| Material support | Long boards extending beyond the saw |
| Fixed spring-angle support | Crown molding with a known installation angle |
| Removable or flip-up stop | Switching between stop cuts and free cuts |
| Saw-specific mounting | Accessories designed around listed saw models |
A jig that performs one job well can be easier to use than a highly adjustable setup. For example, a crown stop may be the better choice for repeated molding cuts, while a rail-mounted stop is more useful for casing, boards, and project parts with different lengths.
How do you choose an angle jig for your saw?
Choose an angle jig by checking the exact saw model, mounting points, and available table or stand space. Similar saws can use different holes, rails, or accessory systems.
Start with the model number on your saw. Compare it with the accessory's stated compatibility list.
If the accessory is designed for a specific stand, check the stand model too.
A jig can fit the saw but still be a poor match for the work if it blocks the fence, changes the usable cutting width, or places the material outside the safe support area. Measure the material and check the saw's manual before setting up a new accessory.
For help choosing the saw itself, read How To Choose A Miter Saw?. The saw's table size, bevel range, fence design, and stand system all affect which angle accessories are practical.
Which mounting details matter most?
The most important mounting details are the hole pattern, rail or stand connection, fasteners, and clearance around the blade. A jig that needs custom drilling may take more setup and may not be suitable if you want a quick, reversible accessory.
Some accessories use existing threaded holes. Others use clip nuts, stand rails, or a separate support system.
Check whether the jig includes the hardware needed for its intended mounting method.
Also check whether the jig can be removed when you need to make flat cuts. A stop that folds, flips, slides, or comes off easily can be more useful than one that stays in the cutting path.
What is the best jig for crown molding angles?
The best crown molding jig is one that holds the molding in a repeatable position against the fence. Crown stops are useful because crown molding can roll or shift when you hold it by hand.
The correct setup depends on the molding's spring angle and the cutting method. Some crown setups use the nested method, where the trim sits against the fence and table in a controlled position.
Others use a flat method that requires different saw settings.
Do not assume that a 45-degree miter setting applies to every crown molding cut. The miter and bevel settings depend on the molding, the corner, and the selected cutting method.
If you are working on a crown project, our guide to How To Make A Crown Molding Jig For Miter Saw? explains the basic purpose of a dedicated setup.
DEWALT Miter Saw Crown Stops
The DEWALT Miter Saw Crown Stops include 2 stops. They are designed for use with the DEWALT DW703, DW706, DW708, DW712, DW715, DW716, DW717, DW718, and DWS780 models.
Their main purpose is vertical crown molding positioning. That makes them a focused choice when your work involves repeated crown cuts and your saw appears on the compatibility list.
The stops are made of steel and are intended to sit on either side of the blade area. Check your exact saw model before buying, especially if your saw is from another brand or is not included in the stated compatibility list.
AltitudeCraft Miter Saw Crown Stops
The AltitudeCraft Miter Saw Crown Stops are designed for specific DEWALT saws, including DW702, DW703, DW706, DW708, DW712, DW713, DW715, DW716, DW717, DW718, and DWS780.
The system includes 1 left crown stop, 1 right crown stop, 2 knobs, and 2 clip nuts. Its stated setup is intended to hold crown molding for a nested cut without using the saw's bevel adjustment.
AltitudeCraft also describes the stops as suitable for tall baseboards, casing, and trim. The compatibility warning matters here.
The product is designed for specific saws, and other brands or unlisted models may require custom drilling.
When should you choose a work-piece support stop?
Choose a work-piece support stop when the main problem is board support or repeatable length, not vertical crown molding position. A support stop can help keep long material level with the saw table and give you a fixed point for repeated cuts.
This type of accessory is useful for trim, shelving parts, framing pieces, and other boards that extend beyond the saw. It can also reduce the need to measure every piece from the blade when you are making a batch of equal-length cuts.
DEWALT Miter Saw Work-Piece Support/Stop
The DEWALT Miter Saw Work-Piece Support/Stop is made for the DW723, DWX723, and DWX724 miter saw stands. It can be repositioned along the rail, which helps when the required cut length changes.
Its flip-up stop lets you switch between material support and a cut stop. The height adjusts from 3 7/8 in to 6 in, so you can match it to the height of your miter saw table.
This is a better fit for long workpieces and repeated lengths than a crown stop. It does not serve the same purpose as a vertical molding support, so choose it based on the task rather than the word “stop” in the name.
How do spring angles affect a crown molding jig?
The spring angle affects how the crown molding sits against the fence and table. Common molding angles can use different positions, so the jig must hold the material in the intended orientation.
A crown molding jig may be built around a fixed position, such as a nested setup. That position can make the cut easier to repeat, but it does not remove the need to measure the molding and confirm the correct saw settings.
Before cutting finished trim, make a short test piece from scrap. Check the inside or outside corner, the direction of the cut, and whether the molding sits fully against the jig and fence.
A jig helps maintain position, but it cannot compensate for a warped piece, a damaged fence, or a saw that is out of alignment. Keep the workpiece pressed against the intended reference surfaces during the cut.
For more accessory ideas, see best miter saw crown stops. Compare the intended molding position, compatibility, and mounting method before choosing a stop.
What features help with repeatable angle cuts?
The most useful features are a firm reference surface, easy adjustment, visible positioning, and a way to return to the same setup. A miter saw guide light can make the cut line easier to see.
Repeatability matters when you are cutting several matching pieces for a frame, wall, cabinet, or trim run.
Consider these points:
- A solid stop should not shift when the board touches it.
- A support should keep the material level with the saw table.
- A removable or flip-up stop should clear the blade path.
- A left and right setup can help with different cut directions.
- Adjustable positioning is useful when piece lengths change.
- A simple fixed position can be better for one repeated molding task.
- Steel construction can provide a rigid stop surface, but proper mounting still matters.
- The accessory should leave enough room for your hands and clamps.
Mark the stop position if you often return to the same cut length. If the accessory slides along a rail, tighten it securely and confirm the position with a test piece before cutting your project material.
Do not use the stop as a substitute for holding the workpiece securely. Long, narrow, or flexible boards may need additional support away from the saw.
Should you buy a jig or make one?
Buy a ready-made jig when you want a known mounting system and a quick setup for a common cut. Build a jig when your material, saw, or project requires a shape that commercial accessories do not offer.
A purchased crown stop can save time on repeated molding work if it fits your saw. A rail-mounted support stop can be useful when your stand and saw share the intended system.
A homemade jig may be useful for a one-time project, unusual trim, or a custom reference angle. It also lets you size the support around your actual material and available table space.
The trade-off is repeatability and fit. A homemade jig needs a stable base, clear blade access, a dependable fence reference, and a way to keep the workpiece from shifting.
Read How To Make A Miter Saw Jig? if you are comparing a custom build with a ready-made accessory. Keep the jig clear of the blade and verify its position with scrap before making a finished cut.
How should you check a miter saw angle jig before cutting?
Check the jig by dry-fitting it, confirming clearance, and making a test cut in scrap. The test should show whether the material stays in position and whether the resulting angle matches the project.
Use this basic check:
- Confirm the saw and accessory model compatibility.
- Mount the jig according to its intended setup.
- Move the saw through its full planned range with the power disconnected.
- Check the blade path, fence, table, stop, and clamps for clearance.
- Place the workpiece against the jig and fence.
- Confirm that the material is supported beyond the saw table.
- Make a scrap cut.
- Check the angle, fit, and repeat length before cutting finished material.
Keep your hands away from the blade path, and do not reach across the blade while it is moving. Follow the saw's safety instructions and use suitable eye and hearing protection for the operation.
A jig should make the setup easier to repeat, not encourage a cut that exceeds the saw's capacity. If the board is too tall, too long, or unstable, change the support plan before cutting.
How does a blade choice affect angled cuts?
The blade affects the quality and fit of the cut, while the jig controls the material's position. Choose a blade that matches the material and finish you need, then confirm that its size and arbor fit your saw.
A jig cannot fix torn fibers, a dull blade, or the wrong tooth pattern. It also cannot make an inaccurate saw setting correct.
Read How To Choose Miter Saw Blade? before selecting a replacement blade. Match the blade to the material and project, and check the saw manual for the required blade specifications.
For angle work, use a clean reference edge and check the cut with the matching piece. A small error at one corner can become more visible when several pieces meet.
What is the final choice for a miter saw angle jig?
Choose a crown stop for vertical molding, a work-piece support and stop for long boards and repeat lengths, or a custom jig for an unusual project-specific angle. Compatibility should be the first filter, followed by the position and support your cut needs.
The DEWALT Miter Saw Crown Stops suit compatible DEWALT saws when your main task is positioning crown molding vertically. The AltitudeCraft Miter Saw Crown Stops offer a similar crown-focused purpose with a stated compatibility list and included mounting hardware.
The DEWALT Miter Saw Work-Piece Support/Stop is the better match for compatible DEWALT stands when you need adjustable rail positioning, material support, and a flip-up length stop.
Check the saw model, measure the workpiece, and test the setup on scrap before cutting finished trim. A correctly matched jig can make angled work more repeatable, but safe support and accurate saw setup still control the final result.
Frequently asked questions
What is the best miter saw jig for angles?
The best miter saw jig for angles is the one that fits your saw and supports the cut you need. Crown stops help hold molding vertically against the fence, while a work-piece support and stop helps support longer boards and repeat cut lengths.
Do miter saw angle jigs fit every saw?
No. Miter saw angle jigs use different mounting points, rails or saw-specific fittings.
Check the compatible model list before buying, and compare the jig's mounting method with your saw before assuming that a similar-looking accessory will fit.
Can a crown stop replace a bevel cut?
Some crown stop designs let you position molding for a nested cut without changing the saw's bevel setting. That does not make every angle possible on every saw, so follow the jig's intended setup and confirm compatibility first.
Should I choose a crown stop or a work-piece stop?
Choose a crown stop for holding crown molding or other tall trim in a fixed position against the fence. Choose a work-piece stop when you need material support, a repeatable length, or an adjustable stop along a miter saw stand rail.