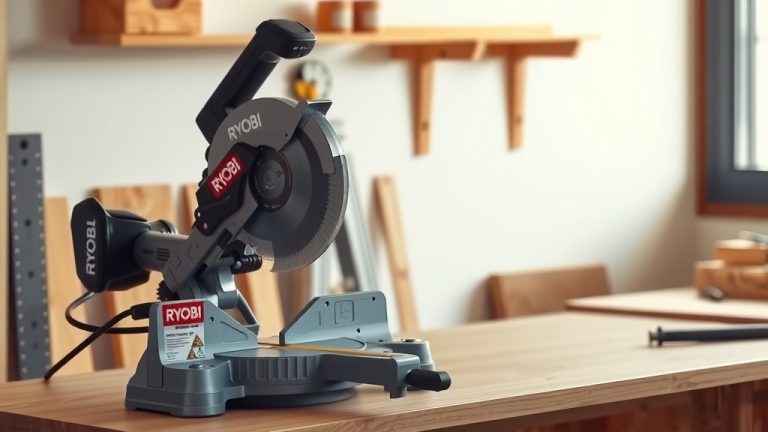
How To Make A Jig For Miter Saw?

A miter saw jig helps you make precise, repeatable cuts for angles or lengths that your saw fence cannot easily handle, ensuring accuracy and safety.
To make a jig for your miter saw, you generally construct a sled or fence extension using plywood or MDF, designed to hold your workpiece securely for specific cuts.
- Miter saw jigs boost accuracy and safety for repetitive or complex cuts.
- Common jigs include crosscut sleds, stop blocks, and tapering jigs.
- Plywood or MDF are ideal materials for jig construction due to stability.
- Always measure twice and cut once for perfect, professional results.
- Safety precautions are paramount when using any jig with a power tool.
How To Make A Jig For Miter Saw?
Creating your own miter saw jig is a rewarding project that significantly improves your woodworking precision and safety. You can build a simple, effective jig with common shop materials and basic tools.
This process typically involves designing a custom guide or sled that interacts with your miter saw’s capabilities. We found that the right jig transforms your saw into a more versatile tool for specific tasks.
Why Do You Need a Miter Saw Jig?
Ever struggled with making the exact same cut over and over? Or maybe you needed a cut that felt a little unsafe to freehand? This is where a miter saw jig becomes your best friend in the workshop.
Many experts say jigs are essential for woodworking efficiency and consistency (Wood Magazine). They help you conquer tricky cuts with confidence.
Accuracy and Repeatability
Imagine cutting 20 pieces of trim, all needing to be precisely 10 inches long. Doing this freehand can be a nightmare for consistency. A jig locks in your measurement, giving you the same cut every time.
You essentially create a custom, rock-solid guide for your material. This ensures every piece matches the last, saving you time and preventing frustrating mistakes.
Enhanced Safety
Keeping your hands clear of the blade is always the top priority. A well-designed jig positions your material securely, often holding it further away from the danger zone. It acts as an extra set of hands.
Research often connects proper jig use with a reduced risk of kickback or accidental slips (OSHA guidelines). Your hands stay safe, and your focus remains on the cut.
Essential Materials for Your Jig Project
Before you start building, let’s gather the right components. You don’t need exotic materials; simple, accessible items work best. Thinking ahead ensures your jig is sturdy and effective.
Choosing the Right Wood
The foundation of your jig will likely be wood. You want something stable, flat, and resistant to warping. We found that certain wood products stand out for jig making.
Plywood and MDF (Medium-Density Fiberboard) are the most popular choices. They offer great stability and are relatively inexpensive.
| Material | Pros | Cons |
|---|---|---|
| Plywood | Strong, stable, holds screws well, lightweight | Can splinter on cuts, edges may need sealing |
| MDF | Very flat, smooth, easy to cut, inexpensive | Heavy, absorbs moisture, screws can strip easily |
| Hardwood | Very durable, smooth surface, long-lasting | More expensive, heavier, harder to work with |
Hardware and Fasteners
Beyond the wood, you’ll need a few pieces of hardware to assemble your jig. What you choose depends on the specific jig, but some items are quite common.
- Wood glue for strong, permanent bonds.
- Wood screws for attaching fences and supports.
- T-track and T-bolts if you want adjustable stops.
- Toggle clamps or other clamps for holding workpieces.
- Sandpaper for smoothing edges and surfaces.
Building a Basic Crosscut Sled Jig
A crosscut sled is one of the most useful jigs you can build. It lets you make perfectly straight 90-degree cuts or precise angled cuts on wider stock. Ready to build it?
Step 1: Measuring and Cutting the Base
First, you need a flat, stable base. Choose a piece of 1/2-inch or 3/4-inch plywood or MDF. It should be wide enough to comfortably hold your workpieces and long enough to clear your miter saw’s fence when cutting.
Measure your miter saw’s base to see how much room you have to work with. You want the jig to extend a few inches past the blade’s travel in both directions. Cut your base piece to these dimensions.
Step 2: Attaching the Fence
This is where the magic happens for accuracy. You will attach a straight fence to the back edge of your base. Use a piece of straight plywood or hardwood, at least 2 inches tall and as long as your base.
Carefully align the fence at a perfect 90-degree angle to the blade line, making sure it’s square. Use wood glue and screws to secure it. Many experts suggest using a framing square or digital angle gauge for this step (Fine Woodworking).
Step 3: Adding a Stop Block (Optional but Recommended)
A stop block is what gives your jig repeatability. This is a small block of wood or metal that you can clamp onto your fence at a specific distance from the blade. It creates a reference point.
Once set, you can push multiple workpieces against it, making identical cuts without re-measuring. We found this feature dramatically speeds up batch processing for small parts.
Advanced Jig Ideas for Your Miter Saw
Once you master the basic sled, a whole world of specialized jigs opens up. These can help you tackle unique projects with ease. What creative problem are you trying to solve?
Tapering Jigs for Furniture Legs
Want to make elegant, tapered furniture legs? A tapering jig holds your workpiece at an angle while you push it through the saw. It’s usually a simple sled with an adjustable fence.
You can create a custom angle for each side of the leg. This jig is a huge time-saver and delivers perfectly consistent tapers, far better than hand-sanding (Popular Woodworking).
Picture Frame Jigs for Perfect Corners
Cutting precise 45-degree angles for picture frames can be tricky. A picture frame jig is a small sled that supports the wood at the exact angle needed. You make two cuts for each corner.
Many woodworkers say this type of jig helps eliminate small gaps at the corners. The result is beautiful, professional-looking frames. Precision is the key to a tight joint.
Safety First: Using Your New Jig
Building a jig makes your miter saw safer, but you still need to follow smart safety practices. Never let your guard down when operating power tools.
Always wear safety glasses and hearing protection. Make sure your jig is securely attached and stable before making any cuts. Don’t force the saw; let the blade do the work. Keep hands away from the blade path. A clear work area helps you focus.
Maintenance Tips for Your Jigs
Your handmade jigs can last for years with a little care. Treating them well ensures they remain accurate and reliable. Think of them as extensions of your valuable tools.
Keep them clean from sawdust and debris. Store them in a dry place to prevent warping. Check screws periodically and tighten any that have loosened. If your jig gets damaged, fix it or rebuild it. A damaged jig can affect accuracy and safety.
Conclusion
Making a jig for your miter saw is a fantastic way to upgrade your workshop capabilities. It’s a straightforward project that yields big returns in terms of precision, safety, and efficiency. You’ll find yourself making cleaner cuts and tackling more complex projects with confidence.
Whether it’s a simple crosscut sled or a specialized tapering jig, the effort you put into building it will pay off on every project. You’re not just building a tool; you’re building confidence and skill. Go ahead and give it a try!
What are the benefits of using a miter saw jig?
Using a miter saw jig brings several benefits, primarily increased accuracy and repeatability for your cuts. It also significantly enhances safety by holding the workpiece securely and keeping your hands further from the blade. Jigs allow you to make complex or identical cuts consistently, which is challenging to achieve freehand.
Can I make a jig for compound miter cuts?
Yes, you can certainly design jigs for compound miter cuts, which involve both an angle and a bevel. These jigs are often more complex, requiring precise angles and supports to hold the workpiece in two planes. They might involve angled fences or wedges integrated into a sled design to achieve specific compound angles for crown molding or complex joinery.
What types of wood are best for making jigs?
The best types of wood for making jigs are stable and flat, such as Baltic birch plywood, standard plywood, or MDF. These materials resist warping, offer good strength, and are relatively inexpensive. Hardwoods like maple or oak can also be used for specific parts requiring extra durability, but they are heavier and more costly.
How do I store my miter saw jigs?
To keep your miter saw jigs in top condition, store them in a dry, stable environment to prevent warping or damage from moisture. Many woodworkers hang them on a wall, stack them neatly on shelves, or keep them near the miter saw for easy access. Proper storage protects their accuracy and extends their lifespan.
Is making a jig cheaper than buying one?
In most cases, yes, making a jig is significantly cheaper than buying a pre-made one. You can often use scrap wood or inexpensive plywood and common hardware you already have in your shop. The cost primarily comes down to your time and the basic materials, making it a very cost-effective solution for custom woodworking needs.