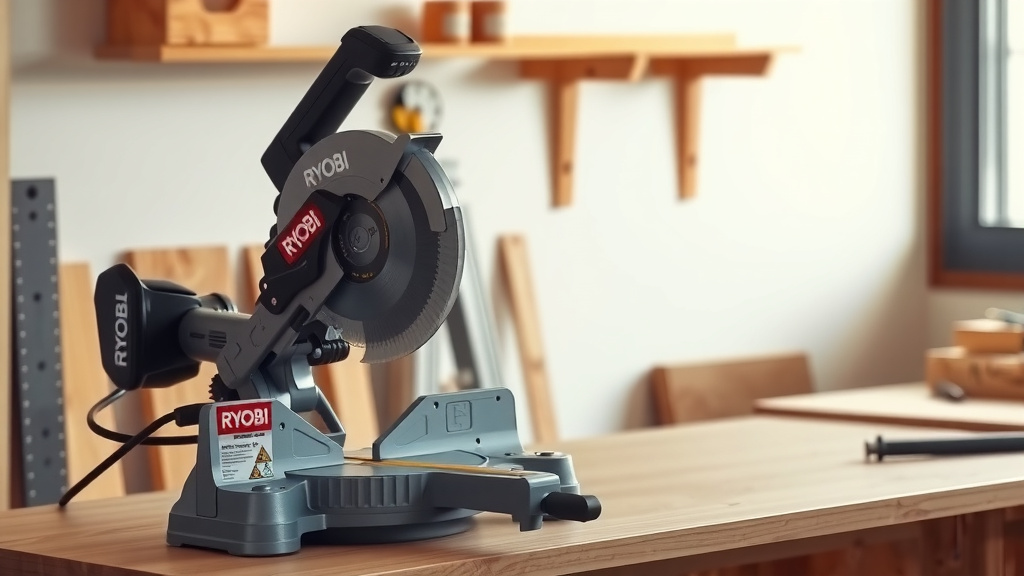
How to Replace a Ryobi Miter Saw Guard Spring
A Ryobi spring guard replacement on miter saw fix means unplugging the saw, removing the blade guard cover, releasing the old return spring, and fitting the correct spring with the guard moving freely. If the guard itself is cracked or bent, replace the full guard instead of only the spring.
On this page (10 sections)
- Is a ryobi spring guard replacement on miter saw the right fix for a slow guard?
- What tools and parts do you need for the spring swap?
- How do you remove the guard cover without damaging the pivot?
- How do you release the old spring and fit the new one?
- What should you check after the spring is fitted?
- When should you replace the full guard instead of the spring?
- Is it safe to use a miter saw without a guard?
- Which blades and accessories help after a guard repair?
- How do you keep the guard spring in good shape?
- Do you need a new saw instead of a spring?
A Ryobi spring guard replacement on miter saw job is small but safety critical. The guard must cover the blade at rest and return on its own after each cut.
If it hangs open or needs a tap to close, treat the spring as failed.
You do not always need a whole new guard. Many return springs are a separate part held by a hook or a small pin, so check the guard itself first.
Is a ryobi spring guard replacement on miter saw the right fix for a slow guard?
Yes, a spring swap is right when the guard shell is intact and only the return action is weak. The guard should move with light hand pressure and snap back without help.
Lift the guard by hand with the saw unplugged and the blade stopped. Smooth movement and a quick snap shut point to a sound pivot, while sticking suggests dirt or wear.
Check cracks around the pivot boss and along the fork tips. Damage there means plan a full guard replacement, since a new spring will not fix it.
Our guide to how to take apart a miter saw shows how the parts fit before you remove covers.
How do you test guard return before you start?
Test return with the blade stopped and the saw unplugged. Move the guard open by hand and release it from mid travel.
A good spring pulls the guard closed quickly and fully. A weak spring closes slowly or stops short, and a broken spring leaves the guard where you leave it.
What tools and parts do you need for the spring swap?
You need the correct Ryobi spring for your model, a screwdriver set, a small pick or needle nose pliers, and a clean rag. A phone flashlight helps you see the spring hooks inside the housing.
Find your exact model number on the saw label before you order. Ryobi guards and springs vary by saw size and production run, and a spring that looks close can hook in the wrong direction.
Keep the old spring after removal. Compare its length, hook shape, and coil direction with the new one to catch mistakes before you close the cover.
Note whether your saw uses a torsion spring or a tension spring. Photos taken before removal make reassembly much easier.
How do you remove the guard cover without damaging the pivot?
Remove the cover by unplugging the saw first, then loosening only the screws that hold the guard housing. Keep each screw with its location.
Support the guard with one hand as you free it. A spring loaded guard can swing when tension is released, and that swing can bend a fork tip if it hits the bench.
Use a rag under the guard while you work. It keeps small screws from rolling away and protects the shell from scratches.
If a screw feels seized, stop and check that you have the right driver size. Back the screw out in small turns rather than forcing it in one move.
How do you release the old spring and fit the new one?
Fit the new spring by hooking one end first, then guiding the other end into place with pliers while the guard stays open. Keep your fingers clear of the hook path.
Release the old spring by opening the guard and unhooking one end at a time. Do not pull both ends at once, since one end may be under tension and can jump when it frees.
Seat the new spring in the same orientation as the old one. Check that the coils do not rub the shell as it moves, since rubbing will wear the spring and slow return.
Close and open the guard several times before refitting the cover.
What should you check after the spring is fitted?
Check the guard for full coverage at rest, free movement, and a clean return after each test cycle. The guard should close on its own from any position in its travel.
Look at the fork tips and the lower guard edge. They should clear the blade and the fence without touching either, since a bent fork can push the guard off center.
Run the saw head through its full swing with power off. The guard should stay clear of the fence and table insert at every angle.
Never test the fix by cutting with a guard that still drags. Make slow hand movements first, then a test cut on scrap only after the guard closes fully.
When should you replace the full guard instead of the spring?
Replace the full guard when the shell, fork, or pivot shows cracks, bending, or wear. A new spring cannot restore damaged plastic or a loose pivot bore.
A worn pivot lets the guard wobble side to side. That wobble can leave a gap over the blade even when the spring pulls hard, so check for sideways movement by hand.
For the full job, our steps for how to replace a guard on a Ryobi miter saw cover guard removal and fitting. The same logic applies to how to replace a guard on a chop saw.
Always match the part to your exact model.
How do you decide between a spring and a full guard?
Choose a spring-only fix if the guard is straight, clean, and free on its pivot. Choose a full guard if any part of the shell or pivot is damaged.
Price is not the main factor here. Safety and correct coverage matter more, and a guard that does not cover the blade at rest is not ready for use.
Is it safe to use a miter saw without a guard?
No, never use a miter saw with the guard removed or held open. The guard lowers contact risk and helps control offcuts near the blade.
If your guard needs repair, keep the saw unplugged and out of use until the fix is done. Read is it safe to use a miter saw without a guard before you consider any shortcut.
Dust and chips also matter. A guard that hangs open can deflect debris toward you instead of away from the blade path.
Wear eye protection for test cuts and keep hands clear of the blade path. Let the blade stop fully before you reach near the guard.
Which blades and accessories help after a guard repair?
A good blade helps you make clean test cuts after the guard is fixed. Use the right blade for the material and check that it runs true before you judge guard action.
What does the DEWALT 12 inch blade set offer?
The DEWALT 12-Inch Miter Saw Blade set includes two 12 inch tungsten carbide crosscutting blades, one with 80 teeth and one with 32 teeth. That gives you a fine tooth option for trim and a coarser option for faster cuts.
DEWALT says the thin kerf and wedge shoulder design help the blades cut smooth and accurate lines. The 80 tooth blade suits hardwood, softwood, plywood, and chipboard where a clean edge matters.
The 32 tooth blade is the better pick for rougher framing stock where speed matters more. Check your saw size before you order, since these blades are made for 12 inch miter saws and slide miter saws.
What does the Freud Diablo finish blade offer?
The Freud Diablo Finish Saw Blade is 7-1/4 inches in diameter with 40 teeth and a 5/8 inch arbor. It is made for smooth crosscuts in hardwood, softwood, and plywood.
Freud says the TiCo Hi-Density carbide teeth and Perma-SHIELD coating help the blade cut clean and resist gumming. The thin laser cut kerf gives a smooth finish with less material loss.
This blade fits 7-1/4 inch circular saws, so check your saw type before you buy it. It is not a direct fit for every miter saw.
What do the DEWALT crown stops offer?
The DEWALT Miter Saw Crown Stops help you position crown molding upright against the fence. They come as a pair of steel stops, one for each side of the blade.
DEWALT says the stops accurately position crown molding vertically against the saw fence. That matters when you test cut trim after a guard repair and want the piece to sit square.
These stops are made for DEWALT models DW703, DW706, DW708, DW712, DW715, DW716, DW717, DW718, and DWS780. Check your model before you order.
How do you keep the guard spring in good shape?
Keep the spring in good shape by cleaning the pivot area, checking hooks after each blade change, and storing the saw dry. Sawdust packed around the pivot slows return action over time.
Blow dust from the guard housing with compressed air after dusty jobs and wipe the pivot with a dry rag. Do not flood the pivot with oil unless your manual allows it, since oil can trap dust.
Check the spring hooks each time you change a blade. A hook that slips from its notch will cause a slow guard on the next cut, so reseat it before work.
For another brand, our guide to how to replace a guard on a Craftsman miter saw follows the same spring first, guard second logic.
Do you need a new saw instead of a spring?
No, a weak guard spring alone is rarely a reason to buy a new saw. Check how much is a Ryobi miter saw only if the saw has other major issues.
Save your money for the correct spring or guard part first. If the motor, fence, and slide action are still sound, a spring swap is the smarter fix.
Plan the repair in this order: confirm the model, test guard return, inspect the shell and pivot, fit the correct spring, then test with scrap wood. No full guard return means no cuts, so confirm full coverage before you get back to work.
Frequently asked questions
Can you replace just the spring on a Ryobi miter saw guard?
Yes, you can replace just the spring if the guard shell, pivot, and mounting parts are still in good shape. Check that the guard moves freely and snaps back, and check the fork and pivot for cracks before you order a spring.
Why does a miter saw guard not return on its own?
A weak, broken, or unhooked return spring is the usual cause. Dirt, paint, or a bent pivot can also stop the guard from moving.
Clean the pivot area, check spring tension, and replace the spring or guard if movement stays stiff.
Is it safe to use a miter saw with a loose guard spring?
No, do not use the saw until the guard returns on its own. A slow guard can stay open over the blade and raise kickback and contact risk.
Unplug the saw and fix the spring or replace the guard before the next cut.
When should you replace the full guard instead of the spring?
Replace the full guard if the shell is cracked, the pivot is worn, the fork is bent, or the guard does not cover the blade at rest. A new spring will not fix damaged plastic or a loose pivot, and the saw should stay unplugged until the guard fits correctly.