
Can You Use A Miter Saw On A Table?
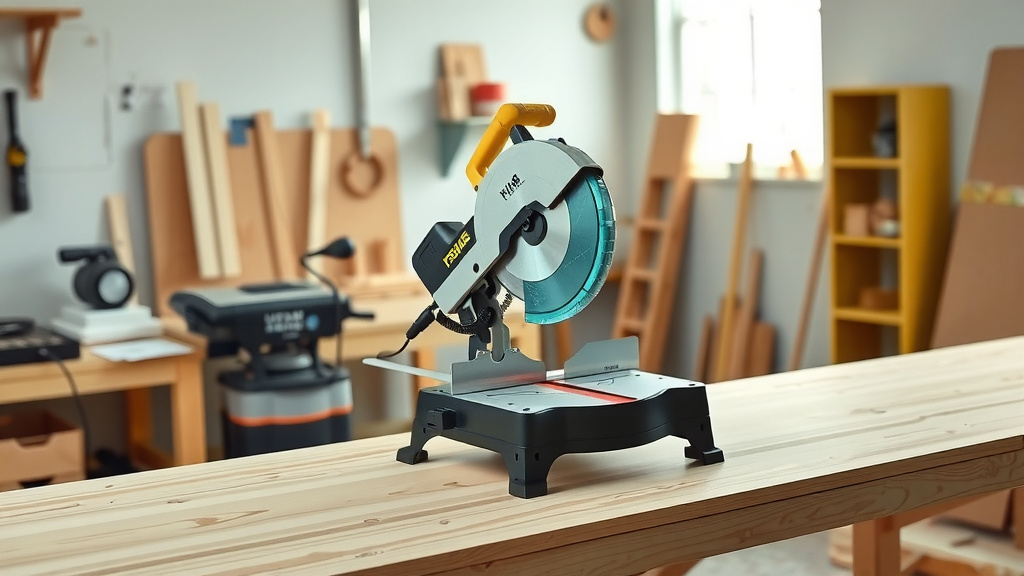
Yes, you can absolutely use a miter saw on a table, but only if that table provides a stable, level, and secure base to prevent dangerous movement during operation.
Ensuring your table can safely support the saw’s weight and the forces of cutting is paramount for your safety and the accuracy of your work.
- Using a miter saw on a standard table is possible but requires a stable and level surface.
- Securing the saw to the table with clamps or bolts is not just recommended, it’s essential for safety.
- Always consider the table’s weight capacity and ensure it can handle both the saw and your workpiece without wobbling.
- Proper outfeed support for longer materials is crucial to maintain control and prevent kickback.
- Safety gear and a clear workspace are fundamental, no matter your setup.
Can You Use A Miter Saw On A Table?
Yes, you can use a miter saw on a table. The real question is, “Is your table suitable for a miter saw?” You see, a miter saw is a powerful tool, and it demands a workspace that’s up to the task. Think of it like a race car; it needs a stable track, not a bumpy dirt road. Many experts say that stability is the single most important factor (National Safety Council).
Understanding the “Why” Behind a Proper Setup
Why all the fuss about a good setup? Imagine trying to draw a straight line on a piece of paper while someone jiggles your desk. Difficult, right? Now, picture that with a spinning blade moving at thousands of revolutions per minute. The consequences of an unstable setup go beyond just a bad cut; they can be quite serious for your safety.
The Risk of Instability
When your miter saw isn’t rock-solid, it can wobble or even slide during a cut. This can lead to the blade binding in the material, causing dangerous kickback. Kickback means your wood gets violently thrown, or worse, your hand gets pulled into the blade path. We found that most workshop accidents are linked to tool control issues.
Safety First, Always
Your safety is the top priority. A properly secured saw on a sturdy table drastically reduces the risk of accidents. It’s about creating a predictable environment where you can focus on the cut, not on keeping the saw from moving. Don’t compromise here; your fingers will thank you.
What Makes a Table “Miter Saw Ready”?
So, you want to use your miter saw on a table. What exactly should you look for in a table to ensure it’s “miter saw ready”? It’s more than just a flat surface. We found several key characteristics that separate a good work surface from a dangerous one.
Essential Table Characteristics
A good table for your miter saw needs to be stable, level, and at an appropriate height. It shouldn’t sway, rock, or bounce when you put pressure on it. The surface needs to be flat so your workpiece lies true, ensuring accurate angles every time. Many guidelines point to a table height that allows you to stand comfortably with a slight bend in your elbow (OSHA).
Weight Capacity Matters
Your miter saw, especially a compound sliding model, can be quite heavy. Add the weight of a long piece of lumber, and that’s a significant load. Your table must be able to support this combined weight without straining or collapsing. Research often connects table collapse with improper weight distribution (Consumer Product Safety Commission).
Surface Material and Grip
The table surface should ideally offer some grip, or at least be smooth enough not to snag your material. Plywood or MDF tops are common. Avoid slick surfaces like polished metal, as they can allow your saw or workpiece to slide unexpectedly, even when clamped down.
Securing Your Miter Saw: It’s Not Optional!
Once you have a suitable table, the next crucial step is securing your miter saw to it. This isn’t just a suggestion; it’s a fundamental safety requirement. Think of it as buckling your seatbelt before driving. You wouldn’t skip that, would you?
Methods to Keep Your Saw Still
There are a few reliable ways to secure your miter saw to a table. Each has its benefits depending on your specific needs, whether you’re looking for a temporary or a more permanent setup.
| Securing Method | Pros | Cons | Best Use Case |
|---|---|---|---|
| C-Clamps/Bar Clamps | Easy to attach/detach, good for temporary setups. | Requires clear table edges, can sometimes loosen. | Quick projects, portable setups. |
| Bolting Through | Most secure, permanent, no movement. | Requires drilling holes in table and saw base. | Dedicated workshop setups, high-volume use. |
| Quick-Release Mounts | Combines security with easy removal. | Requires specific mounting plates for saw and table. | Frequent setup/takedown, versatile use. |
Using Clamps Safely
If you’re using C-clamps or bar clamps, ensure they are heavy-duty and placed on sturdy parts of the saw’s base and the table. Tighten them firmly, checking them periodically, especially during longer cutting sessions. Make sure the clamps don’t interfere with the saw’s operation or your workpiece.
Bolting for Permanent Setups
For a dedicated workspace where your miter saw stays put, bolting it through the table is the gold standard. Most miter saws have pre-drilled holes in their base for this purpose. Use appropriate bolts, washers, and nuts to ensure a tight, immovable connection. This eliminates any possibility of the saw shifting.
Enhancing Your Workspace for Miter Saw Use
Securing your saw is a great start, but a truly effective and safe miter saw setup involves more than just the saw itself. Think about the entire flow of your work. What else do you need to make accurate, safe cuts?
Outfeed Support: Your Best Friend
When you’re cutting long boards, they need support on both sides of the blade, especially the “outfeed” side where the cut piece goes. Without it, the weight of the unsupported wood can cause it to dip, bind the blade, or even tip over. Many pros consider outfeed support a non-negotiable safety feature.
DIY vs. Purchased Solutions
You can create outfeed support using sawhorses with temporary supports, or even just another sturdy table at the same height as your saw’s bed. There are also excellent commercial miter saw stands that come with integrated extendable supports. Choose what fits your budget and workspace, but always ensure it’s level with your saw’s cutting surface.
Clearing the Area
A cluttered workspace is a dangerous workspace. Before you even plug in your saw, take a moment to clear away any scraps, tools, or anything that could get in the way of your movement or the path of the workpiece. You need a clear zone around your saw for comfort and safety. Think of it as a “no-fly zone” for debris.
A Quick Safety Checklist for Table Saw Use
Before you make that first cut, take a moment to go through this quick mental (or actual) checklist. It only takes a minute, but it can save you a lot of trouble.
- Is the miter saw firmly secured to the table?
- Is the table itself stable and level, with no wobble?
- Do you have adequate outfeed support for longer materials?
- Are your safety glasses and hearing protection in place?
- Is the blade guard functioning correctly and not removed?
- Is the power cord clear and positioned to avoid cutting?
- Is your work area free of clutter and tripping hazards?
Common Mistakes to Avoid
Even seasoned DIYers can sometimes make simple mistakes that compromise safety. Let’s look at a couple of common pitfalls when using a miter saw on a table.
Overlooking Table Stability
This is arguably the most common and dangerous mistake. Thinking “it’ll be fine” with a slightly wobbly table is a gamble you don’t want to take. Even a small tremor can throw off your cut and create a hazardous situation. Always err on the side of maximum stability.
Ignoring Blade Guard Protocol
The blade guard is there for a reason. Sometimes, for a “better view” or “easier setup,” people might try to wedge it open or even remove it. This bypasses a critical safety feature and exposes your hands to the spinning blade. Never bypass or remove your saw’s factory-installed safety mechanisms.
When is a Dedicated Stand a Better Option?
While a sturdy table can work, dedicated miter saw stands exist for good reasons. They offer advantages that a regular table might not, especially if your needs involve frequent movement or specialized work.
Portability Needs
If you’re often moving your miter saw from your garage to a job site, or even just around your yard, a dedicated stand with wheels and folding legs is a game-changer. They’re designed for quick setup and takedown, offering stability wherever you go. This mobility is a huge plus for contractors or mobile DIYers.
Integrated Features
Many miter saw stands come with built-in features like adjustable outfeed supports, material stops, and sometimes even storage. These integrations can streamline your workflow and ensure consistent accuracy without having to rig up separate supports every time. We found that these stands often enhance overall efficiency for repetitive tasks.
Conclusion
Using a miter saw on a table is perfectly acceptable, provided you prioritize safety and stability above all else. A sturdy, level table, securely fastened to your saw, is the foundation of safe and accurate cuts. Remember, proper outfeed support and a clear workspace aren’t optional extras; they’re essential components of a secure setup. While dedicated stands offer convenience, a well-prepared table can serve you just as effectively. Always take that extra minute to check your setup and ensure every cut you make is a safe one. Your projects, and your peace of mind, depend on it.
Can a miter saw cut plywood effectively?
Yes, a miter saw can cut plywood effectively, especially for cross-cutting pieces to length. However, for ripping long sheets of plywood, a table saw or circular saw with a guide rail is generally more suitable and safer due to the plywood’s size and weight.
Do I need to clamp the wood when using a miter saw?
Absolutely, clamping the wood to the saw’s fence or work surface is highly recommended. It prevents the workpiece from shifting during the cut, which can lead to inaccurate results or, more importantly, dangerous kickback. Many saws come with integrated clamps, or you can use external ones.
What is the ideal height for a miter saw table?
The ideal height for a miter saw table typically allows you to stand comfortably with your arms slightly bent when operating the saw. For most people, this means a working surface around 36 to 40 inches high. This reduces back strain and provides better control over the tool.
Can I use sawhorses instead of a table for my miter saw?
You can use sawhorses, but they need to be strong, stable, and used in pairs with a sturdy platform (like a thick piece of plywood) on top. The key is to create a secure, level surface that prevents any wobble or movement of the saw during operation, similar to a good table.
How do I prevent dust when using a miter saw on a table?
To prevent dust, connect your miter saw to a shop vacuum or a dedicated dust extractor if it has a dust port. Many saws also come with a small dust bag, though these are less effective. Working outdoors or in a well-ventilated area is also helpful, and always wear a dust mask.


