How to Choose a Belt Sander Guard
A belt sander with a good guard covers the top run of the belt, the tracking area and the dust port, while leaving the lower run open for work. Choose a guard that fits your exact model and belt size, bolts on tight, and lets you change belts without removing the whole frame. A guard that only covers the drive end will not do the same job.
On this page (11 sections)
- What does a belt sander guard need to cover?
- How does guard coverage change with sanding position?
- Why does guard fit matter more than guard size?
- What should you check on a belt sander with guard for belt changes?
- How does the dust port tie into the guard?
- What trade-offs come with a fully enclosed guard?
- How should you compare guards across sander types?
- How do pads and backing plates affect guard clearance?
- When should you choose a different sander instead?
- How should you inspect and maintain a belt sander guard?
- What is the best belt sander with guard for your next job?
A belt sander with guard coverage over the top run, the drive end and the dust port is the safe starting point for flat sanding work. The guard is not an extra screen.
It is the part that keeps the moving belt enclosed where your hands do not need to be.
This guide explains what coverage to look for, how fit works, and which trade-offs matter for different jobs. We compared specs and features across common belt sander designs and checked product details for the machines below.
What does a belt sander guard need to cover?
A good guard covers the top run of the belt and the drive end, with the lower run left open only where the belt meets the work. The top run is the part that returns to the drive roller and can grab loose items.
The front and rear ends also need cover. A belt can throw a small offcut or a hot spark, and your knuckles can drift near the belt edge during a long pass.
A guard that stops short of the ends leaves those risks open.
The dust port area matters too. Many guards form part of the dust path, so a gap there leaks dust and weakens collection.
Check that the guard and the port line up without a wide seam.
Our rule is simple. Buy a belt sander whose guard encloses every part of the belt except the short lower run that touches the work.
If you cannot see a clear cover over the top run, the design is not doing its main job.
How does guard coverage change with sanding position?
Guard needs change when you tilt the sander or sand an edge. A guard that covers well in flat position can leave a gap when you tip the machine.
Test the angle you use most before you commit to a model.
For flat work on a bench, the sander sits level and the lower run does the cutting. The guard above it should be close enough that fingers cannot slip in from the side.
A deep guard channel helps here.
For edge work, you may roll the sander onto its side. At that point the guard should still block the top run from your hand.
If the guard swings or its fasteners loosen at an angle, it is a poor fit for that task.
For flush work near a wall or a clamped edge, the exposed lower run is the point of the tool. The guard must not push you away from the edge.
A short guard nose or a shape you can rest near the work helps.
Choose the guard for the position you sand in most. Flat bench work first, edge work second, or the other way around.
For blade shaping, compare belt sanders for knife making.
That order should decide which gaps you will not accept.
Why does guard fit matter more than guard size?
A larger guard is not always safer. Fit matters more because a loose guard shifts, rattens and opens gaps.
A tight guard with the right shape protects better than a big guard on wrong bolt holes.
Check the fasteners first. A guard that uses two or more bolts, or a clamp that locks the guard to the frame, holds its shape under vibration.
A single loose clip is a warning sign.
Check the shape against the belt path. The guard should follow the belt line without pressing on the belt.
If it rubs, it will slow the belt, heat the edge and wear fast. If it sits far off the belt, it leaves a finger gap.
Check the model match. Belt sanders in the same brand line can share a belt size but use different frames.
The manual part number is the best guide, and you can cross-check it with belt sander parts advice for your model.
Rule: match the guard to the exact model number, not just the belt width. A guard for a close cousin model is still a guess, and guesses do not hold tight under vibration.
What should you check on a belt sander with guard for belt changes?
A safe guard should not force you to remove it fully for every belt change. Belt access is part of guard design, not an afterthought.
If changing a belt takes ten minutes and four tools, you will be tempted to skip it.
Look for a guard that lifts, hinges or slides aside on a track. The belt loop should drop in from the side or the front without you pulling the guard off the frame.
The guard should then lock back in the same spot each time.
Check how the tracking knob and the release lever sit relative to the guard. You need to reach both with the guard in place.
If the guard blocks the tracking knob, you cannot center a new belt without removing it.
Look at the dust port connection as well. Some guards tie into the dust bag or hose mount.
If you must break that seal for each belt change, dust will escape until you reseat it well.
Rule: pick a guard you can open, change the belt, and close again without tools you do not use. Fast belt changes mean you will swap grits often and keep the belt in good shape.
How does the dust port tie into the guard?
The dust port and the guard often share a housing. A guard that seals the dust port well keeps dust moving into the bag or hose instead of into the room.
An open seam at that joint defeats both parts.
Measure the port size before you buy hoses or bags. A standard hose size fits some models directly and needs an adapter on others.
The guard shape can change the port position, so check the port on the guard itself, not just on the motor housing.
Watch how the guard handles fine dust. Belt sanders make a lot of fine dust, and that dust settles on the guard edges and the belt path.
A guard with smooth inner walls is easier to wipe clean than one with deep ribs.
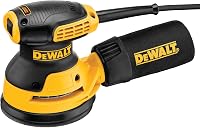
A replacement dust bag can also restore collection when the old bag leaks at the seams. {{product B009L32OGU | A genuine OEM dust bag for listed DeWalt models, which seals at the port when the guard and bag match.}}
Rule: the guard, the port and the bag must seal as one unit. If any one part is cracked or oversized, fix that part before you blame the sander for dust.
What trade-offs come with a fully enclosed guard?
Full coverage has a cost. A fully enclosed guard adds weight, bulk and heat near the belt.
That can help safety and hurt control on small parts.
Weight matters on a handheld sander. A heavy guard at the front shifts the balance forward and makes long passes tiring.
A lighter guard lets you steer with less effort but may flex if it is thin.
Bulk matters in tight spots. A deep guard may not reach into a cabinet or a corner.
A shallower guard reaches further but covers less of the top run. Neither choice is wrong in itself.
Heat matters too. An enclosed belt runs hotter because air flow drops.
That can shorten belt life on heavy cuts. A guard with vents keeps air moving but must not open a finger gap.
Rule: choose coverage for your work area, not for the biggest guard you can find. Bench work can take full coverage, while cabinet work may need a slimmer guard that still covers the top run.
How should you compare guards across sander types?
A belt sander guard does a different job from guards on other power tools. Do not copy guard ideas from a miter saw or a router.
Each tool moves its cutting part in a different path.
A miter saw guard covers a blade that spins in a plane and can be lowered into the cut. A belt guard covers a long loop that runs in two directions.
The belt needs cover along its whole return path, not just at one point.
That is why questions like Is It Safe to Use a Miter Saw without a Guard? do not transfer to belt sanders. The blade on a miter saw can be guarded by a cover that moves with the cut, while a belt needs a fixed channel along the top run.
Guard replacement also differs by tool. Advice such as How To Replace Guard On Ryobi Miter Saw? covers a blade cover, not a belt channel.
Use belt sander manuals and parts lists for belt guard swaps.
Rule: judge a belt guard by the belt path only. If a guard design makes sense for a blade, it may still leave the top run of a belt open.
How do pads and backing plates affect guard clearance?
Pads and backing plates change how the belt sits in the frame. A thicker pad can push the belt closer to the guard and change the gap.
Check clearance after any pad change.
Belt sanders use a flat backing plate or pad under the lower run. That plate sets the sanding line and helps the belt track flat.
If you swap plates, the belt may sit higher or lower than before.
That shift can make the guard rub the belt or open a gap at the side. Run the belt by hand for a full turn after a pad swap and watch the gap on both sides.
Pad choice also affects pressure. A hard pad cuts fast and needs a guard that stays clear under load.
A soft pad conforms to curves but can bulge toward the guard edge.
Our guide to belt sander pads helps you match pad thickness and shape to the job, and best makita belt sander pad replacement options show how model-specific pads fit. Pair that with best makita belt sander parts checks when you change a plate.
Rule: check guard clearance after every pad or plate change. A guard that cleared yesterday may rub today if the belt line moved even a small amount.
When should you choose a different sander instead?
Some jobs do not suit a belt sander at all, guard or no guard. Choose a different sander when the work needs a round pad, a small orbit or a flat sheet surface.
A belt guard cannot fix a wrong tool choice.
A belt sander removes wood fast on flat surfaces and edges. It can gouge if you tip it or press hard.
For finishing work, a finer sander gives you more control and less risk of digging in.
The SKIL model above shows the belt sander case well. It is a 6 amp, 3 in by 18 in corded belt sander with pressure control, auto track belt alignment, micro-filtration for fine dust, and flush edge sanding to the edge.
That mix suits stock removal and edge work where the guard must stay out of the way at the lower run. It does not suit fine finishing on a curved panel, where a pad sander would be safer.
If you are still deciding between tool types, different types of sanders lays out the main options, and belt sander vs planer helps when you need to flatten stock rather than just smooth it.
Rule: use a belt sander for fast flat removal, and switch tools for fine finishing. The right tool needs less guard compromise because the pad or disc does the work in the open.
How should you inspect and maintain a belt sander guard?
A guard only works when it is straight, tight and clean. Inspect the guard before each use and after any drop or hard knock.
Loose bolts and bent edges are common and easy to spot.
Check the fasteners with the motor off and unplugged. Tighten each bolt or clamp and try to move the guard by hand.
Any shift means the guard will move under vibration.
Check for cracks at the port and at bolt holes. A cracked guard can split further during a pass and open a gap.
Replace a cracked guard rather than taping it, because tape will not hold the shape.
Clean the inside of the guard to remove packed dust. Dust on the guard edges can push the belt off line and can also hide a crack.
A brush and a wipe keep the channel clear.
Lubricate moving parts only as the manual allows. Some guards hinge or slide, and they need a light touch to move freely.
Others must stay fixed, and oil on a fixed joint will only attract dust.
Rule: no loose, cracked or packed guard goes back on the sander. Fix the guard first, then sand.
That order keeps the safety part of the machine in charge.
What is the best belt sander with guard for your next job?
The best belt sander with guard for most flat work is one that covers the top run, seals the dust port and lets you change belts fast. Match the guard to your model, your work position and your dust setup.
Those three checks decide the choice.
If you sand flat boards on a bench, pick full top-run coverage and a dust port that seals to your bag or hose. If you sand edges in tight spots, pick a guard shape that still covers the top run but does not block your reach.
If you need fine finishing, switch to a pad sander instead of forcing a belt sander to do that work. The SKIL 3 in by 18 in belt sander suits fast flat removal and flush edge work, while the Ingersoll Rand 8 in orbital air sander suits round-pad surface prep where a belt guard is not the right answer.
Start with the manual part number for your model, check coverage over the top run and the drive end, then confirm belt access and dust sealing. Buy the guard that fits tight, covers the return path and stays clear of the belt.
That is the guard that will still be doing its job on the hundredth belt change.
Frequently asked questions
What does a belt sander guard actually cover?
A belt sander guard should cover the top run of the belt, the area around the drive roller, and the dust collection port where fitted. It keeps fingers, clothing and loose workpieces away from the moving belt.
It does not replace eye protection, hearing protection or a firm grip on the workpiece.
Can I use a belt sander without a guard if I am careful?
No. Care alone does not stop a belt from catching a glove, a sleeve or a small offcut and pulling it in.
Guards are there because a spinning belt moves faster than your reflexes.
If a guard is damaged or missing, park the machine and fit the correct guard for that model.
How do I know if a replacement guard fits my sander?
Match the guard to the maker, model number and belt size, and check the manual for the exact part number. Measure the bolt spacing and check that the guard clears the belt tracking knob.
If the maker lists a part number for your model, that is the safest match.