
How to Build a Miter Saw Workstation?
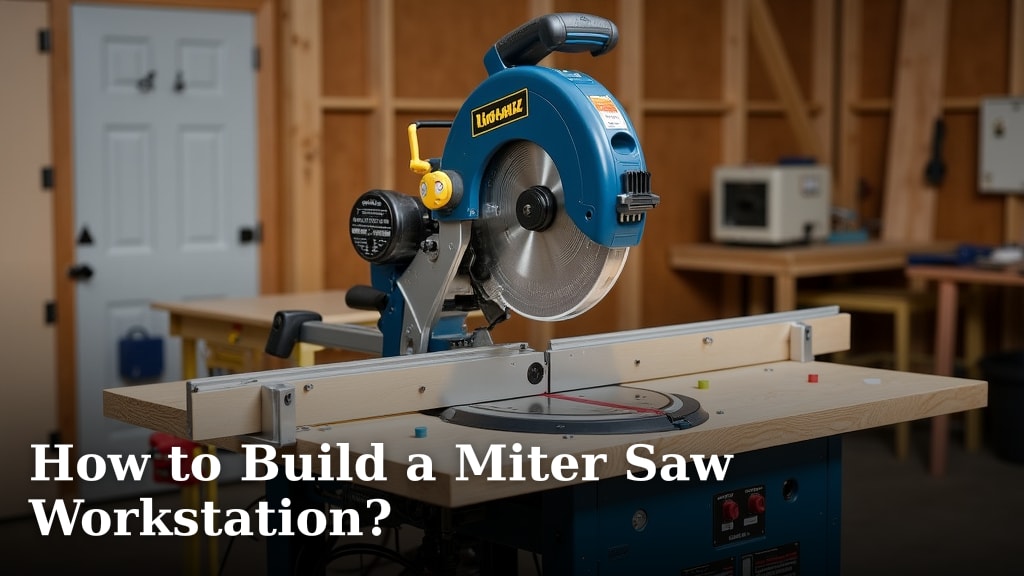
To build a miter saw workstation, you first need a sturdy workbench or table, then add support wings on each side to match your saw’s height. This setup creates a larger, safer workspace for various cuts and makes your miter saw much more versatile and accurate.
You know the struggle: trying to cut long boards with your miter saw perched precariously. A dedicated workstation solves this by providing stable, level support for your material. It’s about making your projects easier, safer, and giving you better results every time you grab your saw.
- Choose a sturdy base for your workstation.
- Build support wings level with your saw’s base.
- Add storage and dust collection for efficiency.
- Customize features like stops and fences.
Ready to upgrade your workshop? We’ll guide you through each step to build a miter saw workstation that fits your needs and makes your cutting tasks a breeze.
Setting Up Your Miter Saw Workstation
Transforming your miter saw setup doesn’t have to be complicated. The main goal is creating a stable, level surface where your workpiece is fully supported, resulting in safer and more accurate cuts.
Planning Your Workstation Layout
Before you start building, take a moment to plan. Think about where your workstation will sit in your shop. Will it be a permanent fixture, or do you need it to be mobile? This decision impacts your design choices significantly.
Consider the types of projects you typically tackle. Do you cut a lot of long boards for trim work, or do you mostly work with smaller pieces for crafts? Your needs will shape the size and features of your workstation. We found that a bit of planning upfront saves a lot of headaches later.
Choosing the Right Base for Stability
A solid foundation is key. Your miter saw workstation needs a base that won’t wobble or shift. Many woodworkers use an existing workbench, a heavy-duty cabinet, or even a pair of sturdy sawhorses as their starting point.
If you’re building from scratch, consider using 2x4s or 2x6s for the frame, with a plywood top. The heavier the base, the better for vibration dampening. We found that a stable base is probably the most important part of a good workstation.
Stationary vs. Mobile Design
Do you need to move your saw around? If so, adding locking casters to your base is a smart move. Heavy-duty casters will let you roll your workstation wherever you need it, then lock it firmly in place for cutting. If your workstation stays put, skip the casters and build directly on fixed legs.
Building the Support Wings
The support wings are the magic behind a useful miter saw workstation. These extensions ensure your material stays level with your saw’s fence. This is how you get straight, clean cuts every time, especially on longer pieces.
Measuring for Perfect Alignment
Getting the height just right is crucial. First, measure the distance from your miter saw’s base to its table surface. This measurement is the exact height your support wings need to be. A small difference can cause your material to bind or lift.
Next, decide how long you want your wings to be. For general use, 3 to 4 feet on each side is often enough. If you frequently cut 8-foot boards, longer wings might be more beneficial.
Constructing the Wing Frames
You can build the wing frames using simple lumber like 2x4s. Create a box-like structure that will sit securely on your base. Remember to account for the thickness of your top surface material in your height calculation.
Attach the frames to your main workstation base using strong screws or bolts. Ensure they are perfectly level with each other and with your saw’s table. We found that using a good spirit level throughout this process prevents major headaches later.
Adding the Top Surface Materials
For the top surface of your support wings, 3/4-inch plywood or MDF works well. These materials are flat, stable, and easy to work with. Attach them securely to your wing frames.
Once attached, double-check the height. Place a long straightedge across your saw’s table and onto the support wing. There should be no gap, no bump. It should be perfectly flush.
Enhancing Your Workstation with Features
A basic miter saw workstation gets the job done, but adding a few key features can really make it shine. Think about dust collection, storage, and specialized stops for repetitive cuts.
Integrating Dust Collection
Miter saws create a lot of sawdust. Seriously, a lot! Incorporating a dust collection system keeps your workspace cleaner and improves air quality. Many saws have a dust port you can connect to a shop vac or a larger dust collector.
Consider building a shroud or an enclosure around the back of your saw. This can greatly improve dust capture. We found that even a simple cardboard box behind the saw helps contain much of the flying debris.
Adding Smart Storage Solutions
Where do you keep your pencils, tape measure, and safety glasses? Built-in drawers or shelves under your workstation keep these essentials close at hand. This means less searching and more cutting.
You could also add hooks for push sticks or clamps. Every tool having its place makes your workflow smoother. Many experts say that an organized workshop leads to safer and more efficient work (Wood Magazine).
Implementing Flip Stops and Fences
For repetitive cuts, flip stops are a game-changer. These simple devices attach to your fence and can be flipped up or down. Once set, they ensure every piece is cut to the exact same length without constant re-measuring.
A sacrificial fence is another useful addition. This is a wooden fence attached to your miter saw’s existing fence. You can cut into it without damaging your saw. It’s often used for zero-clearance cutting, reducing tear-out on delicate wood.
- Measure your miter saw’s base-to-table height precisely.
- Build sturdy frames for your support wings.
- Ensure the wing surfaces are perfectly flush with your saw’s table.
- Integrate a dust collection solution for cleaner air.
- Add drawers, shelves, or hooks for tool storage.
- Consider flip stops or a sacrificial fence for accuracy.
- Test your workstation after every major addition for stability.
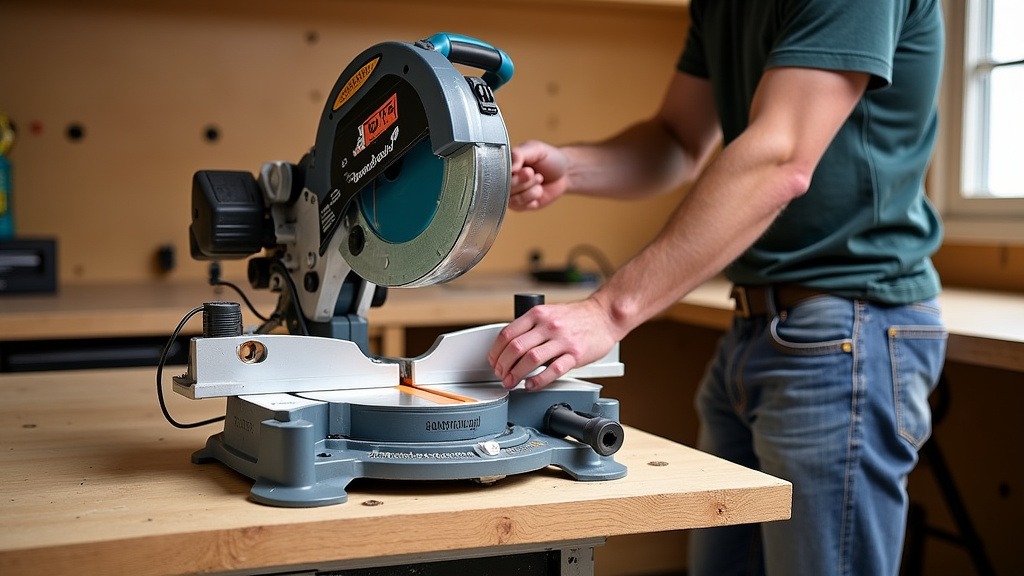
Choosing Materials for Durability and Performance
The materials you use will dictate how long your workstation lasts and how well it performs. You don’t need exotic woods, but choosing appropriate materials makes a difference.
Lumber and Plywood Options
For the frame, common construction lumber like 2x4s or 2x6s are excellent budget-friendly choices. They are strong and readily available. When picking them out, look for straight pieces with minimal knots.
For surfaces, 3/4-inch plywood (especially cabinet-grade Baltic birch or good quality hardwood plywood) provides stability and a smooth cutting surface. MDF is also a good option for surfaces, being very flat, but it’s heavier and susceptible to water damage.
Fasteners and Hardware
Use strong screws, ideally deck screws or construction screws, for assembling the frame. For attaching the top surfaces, finer-thread screws work well. Don’t forget wood glue at every joint for maximum strength.
If you’re adding casters, choose heavy-duty locking ones. A cheap caster can negate all your stability efforts. Spend a little more here; you won’t regret it.
| Component | Recommended Material | Key Benefit |
|---|---|---|
| Base Frame | 2×4 or 2×6 Lumber | Cost-effective, Strong |
| Work Surfaces | 3/4″ Plywood or MDF | Stable, Flat, Smooth |
| Fasteners | Construction Screws, Wood Glue | Secure, Durable Joints |
| Mobility (Optional) | Heavy-Duty Locking Casters | Portability, Stability when locked |
| Dust Collection | PVC pipes, Flexible Hose | Efficient chip extraction |
Testing and Adjusting Your New Setup
Once your workstation is built, it’s not quite ready for prime time. A few final checks and adjustments will ensure it performs its best. You want your cuts to be perfect, right?
Checking for Level and Stability
Do the “nudge test.” Push and pull on your workstation. Does it wobble? If so, identify the weak points and reinforce them. A wobbly workstation is a safety hazard and will lead to inaccurate cuts.
Use a long straightedge and a spirit level to check all surfaces again. Is everything perfectly level with your saw’s table? Any slight differences will affect your cuts on long material, possibly creating a “dip” or “hump” at the saw.
Making Test Cuts
Grab some scrap wood and make a few test cuts. Start with shorter pieces, then move to longer ones. Does the material slide smoothly across the support wings and through the saw? Are the cuts clean and accurate?
Listen to your saw. Does anything sound off? Watch how the sawdust is collected. Are there any areas where improvements could be made? We often find that small tweaks here lead to much better results.
Conclusion
You’ve now got the blueprint for a miter saw workstation that will revolutionize your cutting tasks. By focusing on stability, precise alignment, and smart enhancements, you’re not just building a table; you’re crafting a safer, more efficient workspace. These improvements lead to better results, less frustration, and more enjoyment from your projects.
Remember, a well-built workstation pays dividends in accuracy and safety. Take your time with measurements, build for durability, and customize it to fit your unique needs. Your next step is to gather your materials, clear some space, and start building the workstation you deserve.
Frequently Asked Questions
How important is dust collection for a miter saw workstation?
Dust collection is very important for both your health and keeping your workshop clean. Miter saws create a lot of fine dust, which can be harmful to breathe. A good system also keeps your lines of sight clear for safer, more accurate cuts.
Can I convert an existing workbench into a miter saw workstation?
Absolutely! Many woodworkers start by modifying an existing workbench. The key is to ensure the workbench is sturdy, and then build your support wings to be perfectly level with your miter saw’s cutting surface as described in the article.
What’s the ideal length for miter saw workstation support wings?
The ideal length depends on the material you typically cut. For most DIYers, 3 to 4 feet on each side provides ample support for common lumber. If you regularly cut long trim or decking, consider extending the wings even further to accommodate those lengths.
Is MDF or plywood better for the workstation’s top surfaces?
Both MDF and plywood are good choices. MDF offers a very flat, smooth surface often preferred for precision, but it’s heavier and vulnerable to moisture. Plywood is lighter, more moisture-resistant, and still provides a great work surface when using high-quality sheets.
How can I make my miter saw workstation mobile?
To make your workstation mobile, incorporate heavy-duty locking casters into its base design. Choose casters that can support the total weight of your saw and the workstation itself. The locking feature is crucial to prevent movement during cuts.
