
How to Cut a Compound Bevel for a Picture Frame?

Cutting a compound bevel for a picture frame is totally doable with the right technique. You’ll need to set your saw to specific angles and make sure your wood is positioned correctly. This allows your frame corners to join together tightly, giving your finished piece a professional and seamless look.
Many DIYers find compound bevels a little intimidating at first. But once you understand how the angles work, it becomes much simpler. We found that using a miter saw or a table saw with a miter gauge makes this job much easier. Getting the angles right is key to achieving strong and attractive frame joints.
- Set your saw to the correct compound angles.
- Ensure your wood is held securely.
- Practice on scrap wood first.
- Measure twice, cut once!
Ready to create a picture frame with perfectly angled corners? Let’s walk through exactly how to cut those compound bevels step by step.
Mastering the Compound Bevel Cut for Picture Frames
Cutting a compound bevel might sound tricky, but it’s your ticket to professional-looking picture frames. This technique allows your frame corners to meet snugly. We’ve found that understanding the angles is the biggest hurdle for many DIYers. Let’s get you comfortable with this essential woodworking skill.
Understanding the Compound Bevel
So, what exactly is a compound bevel? It’s a cut that has two angles at once. For picture frames, you’ll typically have one angle that cants the wood inward. The second angle is your standard miter cut. This creates a joint that is both strong and attractive. When done correctly, these joints look almost invisible. To understand the cuts, learn what a compound bevel is and how it differs from a simple miter.
Why Compound Bevels Are Great for Frames
When you make a simple miter cut on a picture frame, the joint is often weak. You’re essentially joining two end grains. A compound bevel, however, provides much more surface area for glue. This means a stronger, more durable frame. It also gives a cleaner, more professional appearance compared to a simple butt joint or single miter.
Think of it like building with LEGOs. A simple edge connection is okay, but interlocking pieces offer a much more stable structure. That’s what a compound bevel does for your frame corners. Many experienced woodworkers swear by this method for its reliability. We found that the extra effort is well worth the results.
Miter Saw vs. Table Saw for Compound Bevels
You can achieve compound bevels on either a miter saw or a table saw. A miter saw is often the easiest tool for this job. Most miter saws allow you to tilt the blade (the bevel angle) and rotate the base (the miter angle). This combination lets you set both angles simultaneously. We found that a good quality miter saw makes setting these angles quite straightforward.
Using a table saw requires a bit more setup. You’ll need a table saw with a tilting blade and a miter gauge or a crosscut sled. The process involves setting the blade to the bevel angle and then using the miter gauge to make the angled cut. Some woodworkers prefer this method for its precision, especially on larger pieces. However, for standard picture frame stock, a miter saw is usually more accessible and quicker to set up.
Setting Up Your Miter Saw for Compound Bevels
Let’s focus on using a miter saw, as it’s the most common tool for this task. You’ll need to adjust two key settings on your saw: the bevel angle and the miter angle.
Understanding the Angles: A Quick Guide
For a standard four-sided picture frame, you’ll be making cuts on each end of your wood pieces. Here’s a breakdown of the angles you’ll typically use:
- Miter Angle: This is the angle that turns your cut inward or outward from a square cut. For most frames, this is set to 45 degrees. This angle creates the classic 90-degree corner when two pieces meet.
- Bevel Angle: This is the angle at which the saw blade tilts. For a compound bevel, you’ll set this to a specific angle, often around 10 degrees. This is the angle that cants the wood.
Typical Compound Bevel Settings for Frames
Most picture frames require a 45-degree miter. The bevel angle can vary slightly depending on the look you’re going for or the thickness of your molding. A common starting point for the bevel angle is 10 degrees. So, you’ll often be setting your saw to 45 degrees (miter) and 10 degrees (bevel).
We found that the combination of a 45-degree miter and a 10-degree bevel creates a well-fitting joint for most frame moldings. Always remember that the angles on opposite sides of the frame need to be mirror images of each other. This means you’ll set your saw to the same angles but in opposite directions for opposing frame pieces.
Step-by-Step Saw Setup
Here’s how to set up your miter saw:
- Set the Miter Angle: Adjust the base of your saw to 45 degrees. Lock it securely.
- Set the Bevel Angle: Tilt the saw blade to 10 degrees. Lock it in place. Make sure you tilt it in the correct direction.
- Check the Direction: For opposite sides of your frame, you’ll need to mirror the bevel. If you cut one end with the bevel tilted to the left, you’ll need to tilt it to the right for the other end.
It’s crucial to ensure your saw’s angles are accurate. Many modern saws have detents (preset stops) for common angles like 45 and 90 degrees. Double-check these settings before you make your cut. We always recommend using a digital angle gauge for absolute certainty, especially if your saw is older or heavily used.
Preparing Your Wood for Cutting
Once your saw is set, it’s time to get your wood ready. This might seem straightforward, but proper preparation prevents frustration and wasted material.
Measuring and Marking Your Wood
Accurate measurements are **absolutely critical** for picture frames. A small error can mean the difference between a tight joint and a noticeable gap. For a frame, you’ll measure to the inside edge of your molding where the picture will sit. This is often called the “rabbet” measurement.
When you mark your wood, ensure your mark is precise. A sharp pencil or a marking knife works best. Remember the old adage: measure twice, cut once. This is especially true when dealing with compound angles.
Securing Your Molding
This is where many DIYers run into trouble. When cutting a compound bevel, the molding wants to shift. You need to hold it **firmly and securely** against the saw’s fence and the saw’s base. Many miter saws have clamps, and these are highly recommended. If your saw doesn’t have one, consider investing in a universal clamp.
The key is to ensure the molding doesn’t move AT ALL during the cut. Even a tiny shift can ruin the precision of your compound angle. We found that a good hold-down clamp makes a world of difference in achieving clean, repeatable cuts. Always position yourself so you can see your mark clearly and ensure the wood is stable before you power on the saw.
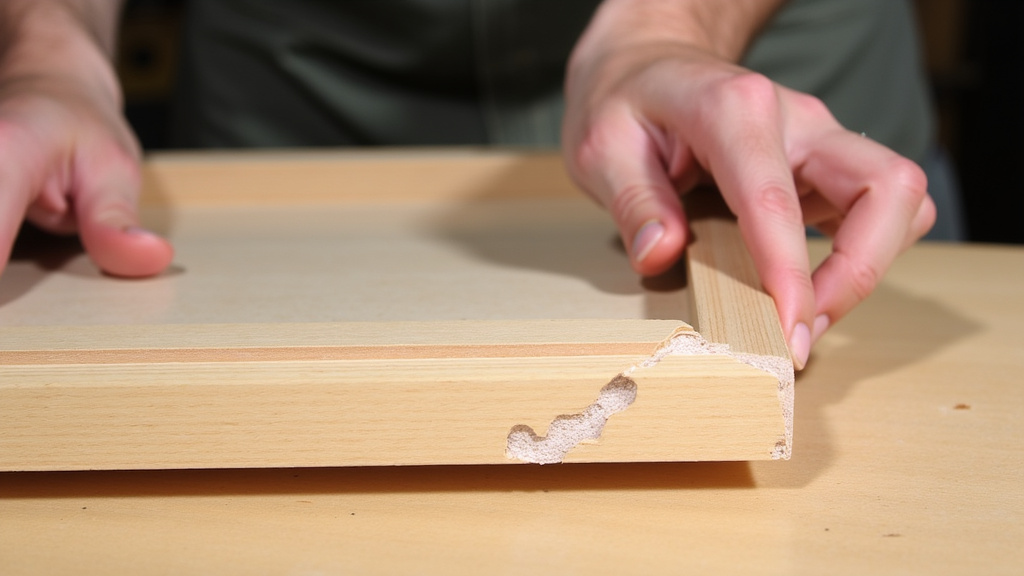
Making the Cut: The Moment of Truth
Now comes the part where you actually make the cut. Take your time and follow these steps carefully.
First Cut Practice on Scrap Wood
Before you cut into your good molding, **always practice on scrap wood**. This allows you to verify your saw settings and get a feel for the cut. Use a piece of scrap wood that is the same thickness and type as your frame molding. Make your cut, then check the angle with an angle gauge. Does it look right? Does it fit snugly against another piece cut at the opposing angle?
We found that making a few test cuts helps build your confidence and ensures your saw is dialed in perfectly. You can even assemble a small test frame corner to see how the joint comes together. This step is invaluable and prevents costly mistakes on your actual frame pieces.
Executing the Compound Bevel Cut
With your saw set, your wood marked, and your molding secured, it’s time to cut. Here’s how we recommend doing it:
- Position the Wood: Place your molding flat on the saw’s base and against the fence. Ensure the cutting line is just past your mark.
- Lower the Blade: Bring the saw blade down to the wood. Do NOT start the saw with the blade in the wood.
- Start the Saw: Turn on the saw and let the blade reach full speed.
- Make the Cut: Slowly and smoothly bring the blade down through the wood. Let the saw do the work; don’t force it.
- Raise the Blade: Once the cut is complete, raise the blade fully before removing the wood.
Remember, the bevel angle cants the wood. Ensure the wood is flat on the base and held firmly against the vertical fence. The miter angle turns the wood left or right relative to the blade. Keep your hands well away from the blade at all times. Safety first!
Assembling Your Frame with Compound Bevels
You’ve made your cuts – congratulations! Now it’s time to put your frame together. The precision of your compound bevel cuts will really shine here.
Checking the Fit of Your Corners
Before you apply any glue, dry-fit your corners. Place two cut pieces together to form a corner. Do they meet snugly? Are there any gaps? If you have small gaps, you might need to readjust your saw angles slightly. If the gaps are larger, it’s likely due to the wood shifting during the cut or inaccurate initial measurements.
We found that often, a tiny adjustment to the bevel or miter angle can correct minor fitting issues. If a piece is cut too short, you’ll unfortunately need to cut a new one. This is why practicing and measuring carefully is so important.
Gluing and Clamping Your Frame
Once you’re happy with the fit, it’s time for glue. Use a good quality wood glue. Apply a thin, even bead along the cut surfaces of both pieces that will meet at the corner. Then, bring the pieces together to form the joint.
This is where a **frame clamp or band clamp** is essential. These clamps apply even pressure around the entire frame, pulling the glued joints tightly together. Wipe away any excess glue that squeezes out with a damp cloth *before* it dries. Let the glue cure completely according to the manufacturer’s instructions, usually 24 hours. This ensures a strong, lasting bond for your beautiful new frame.
Your Picture Frame Checklist
- Gather Your Tools: Miter saw (or table saw with miter gauge), measuring tape, pencil, clamps, wood glue.
- Set Your Angles: Typically 45 degrees miter and 10 degrees bevel (adjust as needed).
- Measure and Mark: Measure to the inside edge of your molding. Mark precisely.
- Secure Your Wood: Use clamps to hold the molding firmly against the fence and base.
- Test Cuts: Always make test cuts on scrap wood to confirm angles.
- Dry-Fit Corners: Check the fit of your cut pieces before gluing.
Conclusion
You’ve learned how to confidently tackle compound bevel cuts for your picture frames. By understanding the miter and bevel angles, properly setting up your saw, and securing your wood, you’re well on your way to creating professional-looking frames. Remember, a little practice goes a long way in achieving those tight, attractive joints. Don’t be afraid to experiment with scrap wood first. Now, gather your materials and get ready to build a frame you’ll be proud to hang!
Frequently Asked Questions
What’s the difference between a miter cut and a compound bevel cut?
A miter cut is a single angled cut, typically used for basic frame corners. A compound bevel cut, on the other hand, involves two angles simultaneously: a miter angle for the corner and a bevel angle that cants the wood. This results in a stronger and more visually appealing joint.
Can I make compound bevel cuts without a miter saw?
Yes, you can. While a miter saw is generally the easiest tool, you can also achieve compound bevels with a table saw equipped with a tilting blade and a precise miter gauge or crosscut sled. It requires a bit more setup and careful measurement.
What happens if my compound bevel cuts don’t fit together perfectly?
Minor gaps can often be corrected with a slight adjustment to your saw’s miter or bevel angle. If the fit is significantly off, it may be due to wood movement during the cut or an initial measurement error. In such cases, it’s best to recut the piece of molding.
How do I ensure my wood doesn’t move during the cut?
Secure your molding firmly against both the saw’s fence and its base. Using clamps, especially those designed for miter saws, is highly recommended. A stable hold prevents shifting and ensures the precision of your compound bevel cuts.
Do I need to use special glue for frame assembly?
A good quality standard wood glue is perfectly suitable for assembling picture frames with compound bevels. The key is to apply an even bead to the cut surfaces and use a frame clamp or band clamp to hold the joints tightly while the glue cures.
