How To Make A Miter Saw Station?
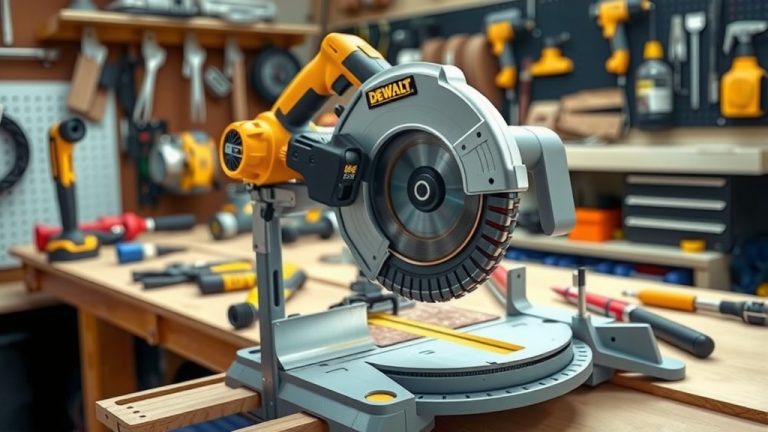
A miter saw station creates a stable, level, and extended support surface around your saw, making crosscuts and angled cuts far more accurate and safer. This dedicated setup helps organize your tools and materials efficiently.
You can build a functional miter saw station using readily available materials like plywood or MDF, customizing it to perfectly fit your miter saw model and the available space in your workshop.
- Building a miter saw station creates a dedicated, organized, and safer workspace.
- Key components include a stable base, outfeed supports, and often dust collection.
- Measure your saw carefully to ensure a perfect fit and consistent cutting height.
- Plywood or MDF are excellent, affordable materials for construction.
- Planning your design based on your space and needs prevents headaches later.
How To Make A Miter Saw Station?
To make a miter saw station, you primarily need a sturdy frame, a perfectly level platform for your saw, and extended wings for material support. This setup significantly improves cutting accuracy and shop organization.
Why Build a Miter Saw Station?
Do you ever struggle with long boards wobbling as you cut? A miter saw station solves this problem by providing consistent support. We found that proper material support is a key factor in achieving precise cuts every time (Woodworking Journal).
Beyond accuracy, a station brings order. It centralizes your saw, measuring tools, and often even your dust collection. Imagine finding everything you need right where you left it – less searching, more creating!
Planning Your Station’s Design
Before grabbing your tools, let’s sketch some ideas. Thinking about your needs now saves a lot of rework later. What kind of projects do you tackle most often? This helps you decide on features like storage and length of supports.
Consider Your Workspace
How much space do you have available? A small garage might benefit from a mobile miter saw station, perhaps even one that folds away. Larger shops can accommodate a more permanent, expansive setup with ample storage and long wings.
We found that many woodworkers benefit from measuring their available space before designing. This ensures your new station fits comfortably without becoming an obstacle in your busy workshop environment.
Essential Features to Include
A good station starts with a rock-solid base. You’ll also want outfeed wings that are perfectly level with your saw’s table. Consider adding a fence with a stop block for repeatable cuts. Don’t forget dust collection – your lungs will thank you!
For convenience, think about integrating storage. Drawers for blades, measuring tapes, and pencils are always a good idea. Some even include a power strip to keep cords tidy and tools powered easily.
Materials You Will Need
Selecting the right materials is important for durability and stability. Plywood and MDF are popular choices due to their affordability and ease of workability. But let’s look at some common options:
| Material | Pros | Cons |
|---|---|---|
| Plywood | Strong, stable, holds screws well, good for structure | Can be heavy, edges may chip, higher cost than MDF |
| MDF (Medium Density Fiberboard) | Smooth surface, affordable, easy to cut, uniform | Heavy, less structural strength, swells with moisture |
| 2×4 Lumber | Very strong, common, cost-effective for framing | Can warp, heavier, requires careful jointing |
| Laminated Particleboard | Smooth, often pre-finished, easy to clean | Weak, prone to moisture damage, chips easily |
Many experts say high-quality plywood is often the best choice for the main structural components. For tabletops and surfaces, MDF can offer a very smooth, flat work area that is easy to finish.
Step-by-Step Construction Guide
Let’s dive into the build! Remember, measure twice, cut once. This old adage is particularly true when building something that requires precision, like a miter saw station.
Building the Base Cabinet
Start by constructing a sturdy cabinet frame. This forms the foundation. Use 2x4s or thick plywood for the frame, ensuring it is square and level. This is where your miter saw will eventually sit, so stability is paramount.
Many guidelines point to connecting pieces with wood glue and screws for maximum strength (Fine Woodworking). Think of it like building a small house for your saw, where a strong foundation means a happy saw.
Creating the Saw Platform
This is perhaps the most critical part. Your saw needs to sit on a platform that is exactly flush with your extension wings. Measure your miter saw’s base height very carefully, then cut plywood or MDF to match.
You want your saw’s table to be perfectly level with the surrounding supports. Many DIYers use shims or adjustable feet to get this height absolutely perfect. It’s like setting a precious jewel – precision is key.
Adding Outfeed Supports
These are your saw’s helping hands. The extension wings provide critical support for long workpieces, preventing them from tipping. Ensure these are built to the same exact height as your saw’s platform for seamless material flow.
Consider the length of your typical cuts. If you often work with 8-foot boards, make sure your wings can support that length adequately. We found that longer wings prevent sag and improve safety significantly.
Integrating Dust Collection
Miter saws generate a lot of dust. Don’t let it become a health hazard or a huge mess! Build a dust hood or enclosure around the back of your saw. Connect it to your shop vac or dust collector for efficient particle capture.
Research often connects good dust collection with improved air quality in the workshop (NIOSH). A clean shop is a happy, healthier shop, wouldn’t you agree?
Installing Storage Solutions
Now for the fun part: making it truly yours! Add drawers, shelves, or cubbies under your station. These are ideal for storing blades, safety glasses, pencils, and measurement tools. Think about what you reach for most often and put it within easy reach.
A well-organized station means you spend less time searching and more time making. It’s like having a personal assistant for your tools, always knowing where everything belongs.
Precision Matters: Calibration Tips
Once built, it’s vital to calibrate your station. Use a reliable straightedge and a level to check that all surfaces are perfectly flat and flush. A misaligned station can introduce errors into your cuts, making your beautiful work look a bit wonky. Remember, small adjustments make a big difference.
Safety First in Your Workshop
Your miter saw station improves safety by supporting workpieces. But always wear your safety glasses and hearing protection. Keep hands clear of the blade and use push sticks when needed. We found that most workshop accidents are preventable with a bit of mindfulness and protective gear.
Common Mistakes to Avoid
We all make mistakes, but we can learn from them! A common error is not making the saw platform exactly flush with the wings. This causes uneven cuts. Another is rushing the build, leading to a flimsy station. Take your time, focus on precision, and double-check your measurements.
Here’s a quick checklist to help you avoid common pitfalls:
- Check your saw’s exact height: Don’t guess, measure it precisely.
- Ensure all surfaces are level: Use a good spirit level throughout the build.
- Verify squareness: Use a framing square often to keep everything true.
- Test material flow: Roll a board across the station to check for snags.
- Secure components firmly: Use enough screws and glue for strength.
- Plan dust collection early: Integrate it rather than adding it as an afterthought.
Conclusion
Building a miter saw station is a rewarding project that transforms your workshop and your woodworking accuracy. It’s an investment in efficiency, precision, and safety. By carefully planning your design and paying attention to detail during construction, you’ll create a dedicated workspace that serves you well for many years. Get ready to enjoy smoother cuts and a much more organized shop!
What is the ideal height for a miter saw station?
The ideal height for a miter saw station typically matches your comfortable working height, often around 34 to 36 inches. However, the critical aspect is ensuring the saw’s table itself is flush with the extension wings for seamless material support.
Can I add wheels to my miter saw station?
Absolutely! Adding heavy-duty locking casters is an excellent idea for mobility. This allows you to easily move your station around the workshop or even out of the way when not in use. Just ensure the casters are robust enough to support the station’s weight and any materials on it.
How long should the outfeed supports be on a miter saw station?
The length of your outfeed supports depends on the typical length of the material you cut. Many woodworkers aim for supports that can handle at least half the length of their most common boards. For example, if you often cut 8-foot boards, having 4-foot supports on each side is a good starting point.
What are some advanced features I can add to a miter saw station?
Beyond the basics, you might consider adding integrated tape measures embedded in the fence, T-track for hold-downs, or even a system for repeatable stop blocks. Some designs also include built-in power outlets, lighting, or even a small air compressor hookup for blow guns.
Is MDF or plywood better for the tabletop of a miter saw station?
MDF offers a very smooth and flat surface, which is excellent for accuracy, but it’s heavier and less moisture-resistant. Plywood is more durable, lighter, and better in humid environments. Many choose MDF for the top surface due to its inherent flatness, especially if it’s protected from moisture.