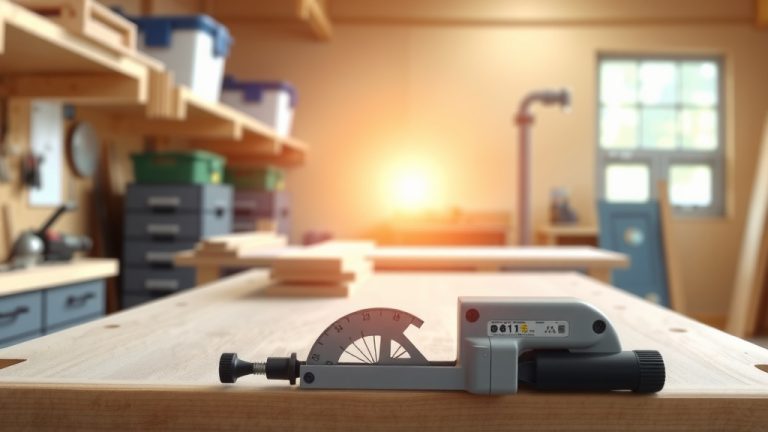
What Can I Put My Miter Saw On?

You can put your miter saw on a variety of stable surfaces, including dedicated miter saw stands, sturdy workbenches, or a well-supported combination of sawhorses and plywood.
The key is to always ensure the surface is level, robust, and capable of securely holding both the miter saw and the material you are cutting for safe and accurate results.
- A dedicated miter saw stand offers the best stability, portability, and integrated support for accurate cuts.
- Workbenches and sawhorses combined with a strong platform are excellent, flexible DIY options for securing your saw.
- Always prioritize a level, secure, and vibration-free setup to ensure safety and precision with every cut.
- Extendable outfeed support is vital for handling longer workpieces, preventing dangerous wobbles or drops.
- The right surface prevents accidents, improves cut quality, and makes your woodworking projects much more enjoyable.
What Can I Put My Miter Saw On?
Choosing the right surface for your miter saw is more important than you might think. We found that a proper setup directly impacts both your safety and the precision of your cuts. Don’t just plop it down anywhere; give your miter saw the solid footing it needs!
Why a Stable Surface Matters
Imagine trying to draw a straight line on a wobbly table. Not easy, right? Your miter saw works the same way. A stable base prevents your saw from shifting or vibrating during operation, which can cause inaccurate cuts and, more importantly, put you at risk of injury. Many experts say that stability is the foundation of safe power tool use (OSHA).
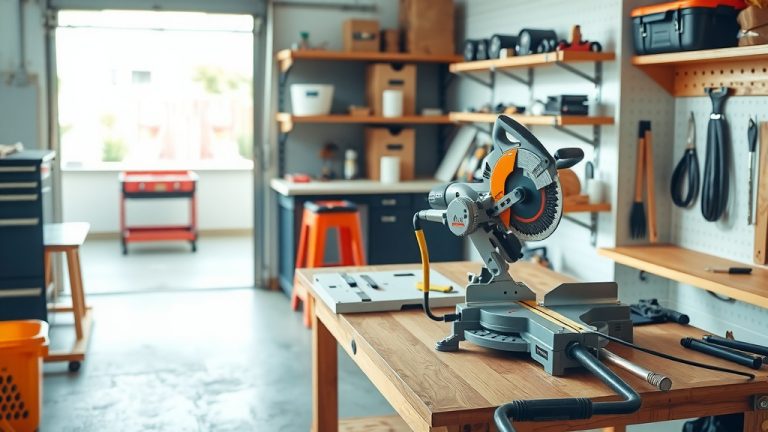
Dedicated Miter Saw Stands: The Professional Choice
If you’re serious about your miter saw work, a dedicated stand is often the best solution. These stands are designed specifically to mount your saw, providing a secure and level platform. They usually include integrated material supports on either side, which are incredibly helpful for longer boards.
Portable Miter Saw Stands
Portable stands are fantastic if you need to move your saw around your shop or to different job sites. They are typically lightweight and fold up for easy transport. We found that many models feature quick-release mounting brackets, letting you attach and detach your saw in seconds. Think of them as your mobile workshop.
Rolling Miter Saw Stands
For those who need mobility within a larger workspace, rolling miter saw stands are a game-changer. These stands have wheels, letting you effortlessly move your saw across the floor. They offer the stability of a stationary stand with the added benefit of easy repositioning. Some even convert into a hand truck (Woodworking Network).
DIY Solutions: Building Your Own Base
No dedicated stand? No problem! Many woodworkers create their own stable bases. These DIY options can be just as effective, often saving you money while customizing your workspace exactly how you like it. You just need a bit of creativity and some sturdy materials.
Using Workbenches for Your Miter Saw
A solid workbench can serve as an excellent base for your miter saw. Ensure your workbench is heavy and stable; a lightweight, rickety bench won’t cut it. You might want to bolt your saw down for added security, especially if you’re making many cuts. We often suggest adding a sacrificial fence if your workbench doesn’t offer adequate outfeed support.
Sawhorses with Plywood: A Simple Setup
This is a classic solution for a temporary or portable setup. Two sturdy sawhorses, spaced appropriately, with a thick piece of plywood or MDF spanning between them, can create a surprisingly stable platform. Make sure the plywood is secured to the sawhorses, perhaps with clamps, to prevent any movement. This setup offers decent portability when needed.
Making Your Own Miter Saw Station
For a more permanent setup, consider building a dedicated miter saw station. This often involves a sturdy cabinet or bench with wings on either side for material support. We’ve seen designs that incorporate dust collection, storage drawers, and even integrated stops for repetitive cuts. It’s like building a custom home for your saw.
Ensuring Stability and Levelness
Regardless of what you choose to put your miter saw on, stability is absolutely non-negotiable. The surface must be perfectly level to ensure accurate cuts, especially when dealing with angles. Use a spirit level to double-check your setup. Any wobbling or rocking will compromise your work and could be dangerous.
Outfeed Support: Don’t Forget It!
Cutting long pieces of lumber requires more than just a stable saw base. You need outfeed support. This means having extensions or additional stands to support the material as it passes through the saw blade. Without it, the unsupported end of a long board can sag, causing binding, kickback, or an uneven cut (Fine Woodworking Magazine).
Safety First: Essential Considerations
Your miter saw is a powerful tool, so safety should always be at the forefront. No matter your chosen setup, always secure your saw to its base. Clamp your workpiece firmly to the saw fence when cutting. Wear appropriate safety gear, including eye protection and hearing protection. A few seconds of caution can prevent a lifetime of regret.
What to Avoid
Never place your miter saw on unstable surfaces like flimsy tables, milk crates, or uneven ground. Avoid anything that might tip over, shift, or collapse under the saw’s weight or the force of a cut. We found that these unstable setups are often the cause of many workshop accidents.
Choosing the Right Surface: A Quick Guide
Here’s a quick overview to help you pick the best option for your needs:
| Surface Type | Stability | Portability | Cost | Best For |
|---|---|---|---|---|
| Dedicated Stand | Excellent | Good to Excellent | Medium to High | Frequent use, job sites, integrated support. |
| Workbench | Good to Excellent | Low | Varies (if you already own one) | Permanent shop setup, sturdy base. |
| Sawhorses + Plywood | Good | Good | Low to Medium | Temporary setups, occasional use, DIY budget. |
| Custom Station | Excellent | Low | Varies (DIY cost) | Permanent shop, custom storage, specific needs. |
Setting Up Your Miter Saw Checklist
Before you make that first cut, quickly run through this checklist to ensure everything is perfect:
- Is your miter saw securely mounted or clamped to its base?
- Is the entire setup level, checked with a spirit level?
- Are there adequate outfeed supports for longer materials?
- Is your workspace clear of obstructions and trip hazards?
- Are you wearing your safety glasses and hearing protection?
Conclusion
Selecting the right foundation for your miter saw is a crucial step for both safety and precision in your woodworking projects. Whether you opt for a dedicated stand, a robust workbench, or a sturdy DIY solution, the principles remain the same: **stability, levelness, and proper material support** are key. Invest time in setting up your saw correctly, and you’ll enjoy safer operations and much more accurate results. You’ll thank yourself for taking that extra moment to ensure everything is perfectly secure.
What’s the most stable surface for a miter saw?
The most stable surfaces are typically heavy, well-built workbenches or dedicated miter saw stands that are designed to securely mount the saw. Bolting or clamping your saw to these surfaces further enhances stability.
Can I use a folding table for my miter saw?
Generally, it’s not recommended to use a lightweight folding table. They often lack the necessary stability and rigidity, which can lead to inaccurate cuts and create a significant safety hazard due to wobbling or potential collapse.
How do I ensure my miter saw is level on any surface?
Always use a spirit level to check your setup. If the surface isn’t perfectly level, you can use shims under the feet of your stand or workbench to correct any unevenness. Some dedicated stands have adjustable feet for this purpose.
Do I really need outfeed support for short cuts?
For very short cuts, outfeed support might not be as critical, but it’s still good practice. For any material that extends beyond the saw’s base, even slightly, outfeed support prevents the workpiece from sagging or tipping, which can cause binding or an imprecise cut.
Is it better to bolt down or clamp my miter saw?
Bolting down your miter saw offers the most permanent and secure attachment, ideal for a stationary workbench or custom station. Clamping is better for temporary setups or when you need to move the saw frequently, but always ensure the clamps are heavy-duty and tight.