What Is a Parallel Clamp and How Do You Use It?
A parallel clamp has wide jaws designed to stay parallel as you tighten them, helping hold boards flat and square during glue-ups. Set the pieces on a level surface, add pads if needed, and tighten the clamps gradually.
On this page (7 sections)
- What is a parallel clamp used for?
- How do you use parallel clamps for a glue-up?
- Why do parallel clamps help keep an assembly square?
- What is the difference between parallel clamps and bar clamps?
- Which parallel clamp features matter for your project?
- What mistakes should you avoid when using parallel clamps?
- What is a parallel clamp, and should you use one?
A parallel clamp has jaws designed to stay parallel to each other as they tighten, helping hold boards in alignment during glue-ups and assembly. Place the work on a flat surface, position clamps across it, and tighten them gradually while checking that the pieces stay square.
Parallel clamps are especially useful for panels, frames, and cabinet parts where even pressure across a broad jaw can help limit gaps and misalignment. They are one option among several woodworking clamps, and the right choice depends on the size and shape of your work.
What is a parallel clamp used for?
A parallel clamp holds workpieces together with opposing jaws that remain parallel during tightening. That broad contact can help keep joined edges aligned while glue sets.
Woodworkers commonly use them for edge-gluing boards into panels, assembling boxes, and holding cabinet parts together. They can also spread parts apart when the clamp supports a spreading setup, but check the tool's instructions before reversing or changing its configuration.
A parallel clamp is not a guarantee that an assembly will be square. Work surfaces, board edges, clamp placement, and tightening pressure all affect the result.
How do you use parallel clamps for a glue-up?
To use parallel clamps, set the boards flat, place the clamps across the assembly, and tighten them in small steps. Check alignment and square as you go instead of applying full pressure to one clamp first.
- Dry-fit the boards and mark their order before adding glue.
- Set the clamps on a flat, protected surface, spaced along the assembly.
- Apply glue as needed and bring the pieces together.
- Place the jaws across the assembly, with the clamp bars clear of the surface.
- Tighten each clamp a little at a time, alternating between clamps.
- Check that edges line up and the assembly remains square.
- Wipe away excess glue and leave the clamps in place as directed by the glue maker.
Use enough pressure to close the joints, but don't keep tightening once the boards begin to bow or shift. Excess pressure can squeeze out too much glue or pull an assembly out of alignment.
How should you position the clamps?
Position the clamps across the assembly at regular intervals, with their jaws contacting the work near the joint. For a panel glue-up, placing clamps on alternating sides can help balance pressure above and below the boards.
Keep the clamp bars from pressing against a tabletop or other surface. If you need to protect the wood from marks, use suitable pads or cauls between the jaws and the workpiece.
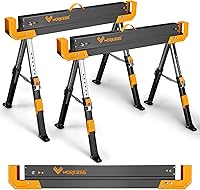
For a stable way to support the work, see how to use sawhorses.
For a more even setup, parallel clamp blocks can help keep bars level and make space between a clamp and the work. Check the blocks' fit and intended use before relying on them.
How tight should a parallel clamp be?
Tighten until the joints close and the boards stay aligned, then stop and check for bowing or movement. A clamp's rated force is not a target for every glue-up.
If a joint opens at one end, loosen the clamps and correct the alignment rather than forcing the gap closed with extra pressure. Follow the adhesive maker's instructions for clamping time and cleanup.
Why do parallel clamps help keep an assembly square?
Parallel jaws provide broad contact that can help hold a workpiece flat and aligned. They are useful when narrow clamp faces might press unevenly on a wider panel or cabinet part.
But jaw shape alone cannot square a project. Check corners with a square, compare diagonal measurements on frames or boxes, and adjust the parts before the glue sets.
If your project is too long for the clamps you have, compare best long clamps for woodworking and choose a span that reaches across the assembly. A clamp that is too short cannot safely make up the distance by pressing on an unstable setup.
What is the difference between parallel clamps and bar clamps?
Parallel clamps have jaws designed to stay parallel, while “bar clamp” is a broader term for clamps that use a bar or rail to bring two jaws together. Some bar clamps are parallel clamps, so the names can overlap.
Other bar clamps may have narrower jaws or a different jaw profile. They can suit general holding tasks, while parallel clamps are often chosen when broad, aligned pressure is useful for a glue-up.
For setup steps, see how to use bar clamps.
For a wider comparison of clamp styles, see best bar clamps for woodworking. Match the clamp to the workpiece's length, shape, and pressure needs.
Which parallel clamp features matter for your project?
Choose a clamp based on opening capacity, jaw width, reach, and how you'll position it. These details affect whether the clamp can reach the work and contact it where needed.
Measure the width of the assembly before buying. Leave room to place and tighten the clamps, and check that their bars won't interfere with your workbench or cauls.
A broad padded jaw may help distribute contact over more of the workpiece. A sliding jaw that stays in position can also make setup easier, especially when you are arranging several clamps.
Who might choose the Bora Parallel Clamps 4 Pack?
The Bora set suits a woodworker who wants two 24 in and two 31 in parallel clamps for projects of different widths. Its 3.5 in reversible padded jaws provide a broad contact area.
Bora specifies 1,100 lb of clamping pressure and a passive-lock lower jaw. Consider the set if those lengths and features suit your planned assemblies; measure your work before choosing.
When do quick-grip clamps make more sense?
Quick-grip clamps can be handy for small, quick holds where one-handed positioning is useful. They are not a direct substitute for a long parallel clamp on a wide cabinet glue-up.
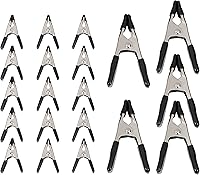
The IRWIN set includes two 12 in mini one-handed bar clamps, two 6 in mini clamps, two 2 in handi-clamps, and two 2 in resin spring clamps. Its varied sizes can suit light setup tasks and small assemblies.
For ideas on keeping a set organized, see bar clamp storage ideas.
When is a light-duty clamp useful?
A light-duty clamp can help with smaller pieces and tasks that don't need a long opening capacity. Check its reach and load limit against the work instead of treating it like a full-size parallel clamp.
The JORGENSEN E-Z Hold set has a 6 in maximum opening capacity and a 2-3/8 in throat depth. Its design allows the clamps to be used as spreaders or joined to increase opening capacity, according to the product description.
What mistakes should you avoid when using parallel clamps?
Avoid tightening one clamp fully before the others, placing jaws unevenly, or forcing a crooked joint closed with pressure. These choices can move the boards or leave the assembly out of square.
Dry-fit first so you know where each clamp will go. Use pads where needed, keep clamp bars clear of the bench, and check alignment at each tightening step.
Don't assume more pressure produces a better glue joint. Use the amount needed to close the joint, and follow the glue maker's directions.
What is a parallel clamp, and should you use one?
A parallel clamp is a good fit when you need broad jaws to hold aligned parts together, especially for panels, boxes, and cabinet assemblies. Choose one with enough opening capacity and jaw reach for your work.
For wide glue-ups, compare sizes and jaw features in best parallel clamps for woodworking. For smaller, quick holds, a compact bar clamp or one-handed clamp may be easier to position.
If your work involves securing stock to a saw, use a clamp made for that setup and follow the saw's instructions. See Best Miter Saw Clamp and How To Use Miter Saw Clamp? for that separate task.
What is the main benefit of a parallel clamp?
The main benefit is that its jaws are designed to stay parallel as they close, giving broad contact across the work. This can help hold boards flat during glue-ups, but you still need to check alignment and squareness as you tighten.
Can you use parallel clamps as spreaders?
Some clamps can be reversed or configured to spread work apart, but that feature varies by model. Check the clamp's instructions before changing the jaw setup, and confirm the tool is stable before applying pressure.
How many parallel clamps do you need for a panel glue-up?
Use enough clamps to support the panel across its length, with spacing that keeps the boards aligned without bowing them. The right number depends on panel size, board thickness, and clamp capacity; dry-fit the setup before applying glue.
Do parallel clamps guarantee a square cabinet?
No. Parallel jaws can help hold parts in alignment, but they do not guarantee a square cabinet.
Check corners with a square or compare diagonal measurements, then adjust the assembly before the glue sets.