Clamps and Workbenches: A Complete Buying Guide
Choose woodworking clamps by the work they must hold: parallel and pipe clamps suit glue-ups, while C-clamps, spring clamps and quick-release clamps handle smaller or faster tasks. Match the workbench, vise and supports to your project size and shop space.
On this page (12 sections)
- Which woodworking clamps should you buy first?
- What are the main types of woodworking clamps?
- How do you choose clamp size and pressure?
- How many clamps do you need for a glue-up?
- Which workbench fits your shop and projects?
- What types of woodworking bench vises should you consider?
- What size casters should you use for a workbench?
- How should a workbench support a miter saw?
- When do sawhorses make more sense than a bench?
- How do you protect wood while clamping?
- Explore clamps and workbenches by topic
- Which woodworking clamp setup should you choose?
Woodworking clamps should match the shape, size and force needs of your projects. Use parallel or pipe clamps for broad glue-ups, C-clamps for compact jobs, and spring or quick-release clamps for light, fast holds.
A workbench supports the job, while a vise or sawhorse can make certain tasks easier. Start with the joints and workpieces you handle most, then add tools that solve a clear holding or space problem.
Which woodworking clamps should you buy first?
Start with a small mix of long-reach clamps and small, quick clamps if you make varied projects. The best clamps for woodworking projects are the ones that reach across your work without blocking the joint or marking the surface.
For panel glue-ups, parallel clamps or pipe clamps provide long reach and broad jaws. C-clamps can hold a jig or secure one edge, while spring clamps are handy for light pressure on thin parts.
For securing the saw itself, see C-clamping a miter saw.
If you are building your first set, compare the best clamps for woodworking projects and choose by the largest assembly you expect to make. A best woodworking clamp set can cover more than one job, but check the included sizes before buying.
Keep a few small clamps for narrow stock, cauls and trim. Our guide to best small clamps for woodworking focuses on those close-up tasks.
What are the main types of woodworking clamps?
Each clamp type solves a different holding problem. Choose by opening capacity, throat depth, pressure control and workpiece shape, rather than by the clamp's name alone.
| Clamp type | Useful for | Check before buying |
|---|---|---|
| Bar or F-clamp | General assembly and edge glue-ups | Reach, opening capacity and bar stiffness |
| Parallel clamp | Flat panel and casework glue-ups | Jaw depth, alignment and pressure needs |
| Pipe clamp | Long glue-ups with flexible length | Pipe diameter, length and support feet |
| C-clamp | Jigs, fixtures and compact holding | Throat depth and jaw opening |
| Spring clamp | Light, quick holds | Jaw opening and pad contact |
| Quick-release clamp | One-handed setup and small assemblies | Opening range and whether it converts to a spreader |
| Corner clamp | Holding parts square at a corner | Supported material thickness and angle |
| Band clamp | Frames, boxes and irregular shapes | Strap length, corner blocks and tightening mechanism |
| Bench vise | Holding stock against a bench | Jaw width, opening, mounting and bench fit |
Are bar clamps and parallel clamps different?
Bar clamps and parallel clamps both span a workpiece, but parallel jaws are designed to stay aligned as they close. A standard bar or F-clamp is a flexible general-purpose option, while parallel clamps are useful when a broad, square jaw face helps keep a panel or case assembly aligned.
For a closer look at formats, see our best bar clamps for woodworking and best quick release wood clamps. A small set of best C-clamps for woodworking can complement longer clamps for jigs and fixtures.
What types of band clamps are there?
Band clamps use a flexible strap to pull around a frame, box or other multi-sided assembly. Common styles use a ratchet mechanism or a hand-cranked tightening unit, often with corner blocks to keep the strap from digging into edges.
Look for enough strap length to go around the largest piece you plan to assemble. Removable or adjustable corners can help with square frames; for non-square shapes, confirm the blocks can sit securely at the required angles.
Band clamps are useful when regular straight jaws cannot reach every side evenly. They are not a substitute for checking the assembly diagonally and correcting it before the glue sets.
What types of clamps work for pipes?
Pipe clamps use clamp heads mounted on a length of pipe, so the pipe length helps set the clamp's capacity. Common woodworking versions fit 1/2 in or 3/4 in pipe, but confirm the head's required diameter before buying pipe.
An H-style foot can raise the work and help steady the clamp. For example, the Bessey BPC-H34 uses a 3/4 in pipe and has an H-shaped base, soft protective pads and a clutch plate for positioning the sliding jaw.
See how other options compare in our best pipe clamps for woodworking guide. If you work with metal instead of wood, the pressure and jaw protection you need may differ; our best bar clamps for metalworking covers that use.
How do you choose clamp size and pressure?
Choose clamp size by the largest opening and reach your work requires, then use enough clamps to hold the joint evenly. A clamp that opens wide enough can still be unsuitable if its throat is too shallow to reach the part you need to hold.
Measure the workpiece and any caul or spacer that will sit between the jaws. Leave room for pads, glue cleanup and the handle, while keeping the jaws clear of the work area.
More force is not always better. Too much pressure can bow thin boards or squeeze too much glue from a joint, so tighten until the pieces meet and remain aligned.
| Project | Clamp features to prioritize |
|---|---|
| Narrow repair or small frame | Small opening range, manageable weight and padded jaws |
| Edge-glued panel | Long reach, multiple clamps and jaws that keep the panel aligned |
| Cabinet or box assembly | Adequate reach, square setup and clear access to joints |
| Jig or fixture holding | C-clamp throat depth and a secure mounting point |
| Thin or delicate stock | Protective pads and controlled pressure |
For short jobs, a quick-release clamp may save setup time. For another option, see Irwin Quick-Grip clamps.
A spring clamp can hold a light piece while you position another part, but its clamping force may not suit a large glue-up.
The WORKPRO 16-piece nylon spring clamp set includes three clamp lengths and protective pads. Its different sizes can help with light positioning tasks around a project.
The JORGENSEN E-Z Hold 4-Pack has a 6 in maximum opening and can be used as clamps or spreaders. Its stated normal load limit is 200 lb, so reserve it for work within that limit.
How many clamps do you need for a glue-up?
Use enough clamps to keep the joint closed along its length, with spacing that suits the panel and clamp jaws. Dry-fit the assembly before applying glue so you can confirm the clamps reach and the work stays aligned.
For a panel glue-up, alternate clamps above and below the panel when the setup allows. This can help balance pressure and reduce the tendency for the boards to bow, but proper alignment and even tightening still matter.
Set out every clamp before spreading glue. Check that the pads contact the work evenly and that you can reach each handle without moving the assembly.
The Bora Parallel Clamps 4 Pack includes two 24 in clamps and two 31 in clamps, with wide padded jaws. That range can suit small frames through larger case assemblies, depending on the project dimensions.
Do a dry run on a complex assembly and mark where each clamp will sit. For larger panels, compare the reach and jaw arrangement in our best bar clamps for woodworking guide.
Which workbench fits your shop and projects?
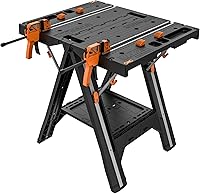
Choose a workbench by work surface size, stability, working height and storage footprint. A larger bench gives you room to assemble projects, while a folding model can make more sense when the shop shares space with other uses.
A wall-mounted option can save floor space; see wall-mounted folding workbenches.
Measure the bench area with the workpiece on top, not just the bench itself. Leave room to walk around the assembly and operate clamps without hitting a wall or another tool.
For a fixed shop, consider how the bench will support heavier work and whether its top accepts a vise. For a mobile setup, check the folded dimensions, weight and locking features before choosing.
For mobile options with a vise, compare portable workbenches with a vise.
Compare best portable folding workbenches if you need a bench that stores away, or see best folding workbenches for a garage for garage-oriented options. If standing and seated tasks call for different heights, an adjustable height workbench may suit your routine.
What types of woodworking bench vises should you consider?
A woodworking vise holds stock against the bench so you can work with both hands. Choose the vise style around the operations you do most, such as holding boards along an edge or securing a part on the bench face.
Common choices include front vises, end vises and leg vises. A front vise often holds work near the bench edge; an end vise can work with bench dogs to support a longer board; a leg vise uses the bench leg as part of its support.
Check the vise's jaw width, opening capacity, mounting method and compatibility with your bench. A vise also needs a solid bench attachment, so confirm the top and frame can take the mounting hardware.
See our best woodworking bench vises guide for options. If your projects are mostly glue-ups on a portable surface, clamps may be more useful than a permanent vise.
What size casters should you use for a workbench?
Choose casters based on the bench's loaded weight, floor condition and required working height. The caster's load capacity should cover the bench, tools and materials, with an appropriate margin for the way the bench is moved.
Larger wheels can roll over small cracks and debris more easily, but they raise the work surface and may affect stability. For wheeled options with height adjustment, compare adjustable-height workbenches on wheels.
Measure the wheel diameter, mounting plate and swivel clearance, then recalculate the finished bench height.
Locking casters help keep a mobile bench in place during work, but the bench must still feel stable under pressure. Check whether the locks stop wheel rolling, swiveling or both.
Our best caster wheels for workbenches guide compares options. If the bench also supports a miter saw, account for the saw's footprint and material support before adding wheels.
How should a workbench support a miter saw?
A miter saw bench needs a stable base and enough support for long boards on both sides of the saw. For one setup example, see Keter bench saw mounting.
Set the bench height and outfeed supports so stock stays level with the saw table and can move without catching.
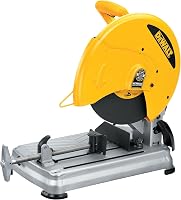
Check the saw's base dimensions and mounting method before choosing a bench. A sliding saw also needs room for the rails to travel, so confirm rear clearance and the depth of the work surface.
Our best miter saw bench guide covers bench options, while what size miter saw do I need? can help you match saw capacity to your projects. For a sliding model, review the sliding miter saw table setup before finalizing the bench footprint.
When do sawhorses make more sense than a bench?
Sawhorses can support long stock or a temporary work surface when you do not have room for a fixed bench. They work best when the setup is stable, level and matched to the load, with the work secured against movement.
Use a pair with a suitable top or sacrificial sheet when you need a larger temporary surface. Keep the support points far enough apart to resist tipping, and avoid placing a heavy load near an unsupported edge.
Folding brackets let you build or replace a sawhorse around your own lumber. Compare best folding sawhorse brackets if storage space is tight.
How do you protect wood while clamping?
Use pads or cauls between the jaws and soft or finished wood. Check that the pads sit flat and cannot slide out as you tighten the clamp.
Wipe away squeeze-out at the right stage for the glue you use, and keep clamp bars clear of wet glue where possible. On delicate surfaces, test the pad contact on scrap first.
Avoid twisting a clamp to force a misaligned joint into place. Release pressure, correct the setup and tighten again gradually.
Explore clamps and workbenches by topic
- Best Spring Clamps for Woodworking
- Best Corner Clamps for Woodworking
- Best Picture Frame Clamps
- Best Cabinet Face Frame Clamps
Which woodworking clamp setup should you choose?
Choose parallel or pipe clamps for broad glue-ups, small clamps for close work, and a vise when you regularly hold stock for hand-tool tasks. Pick a workbench that supports those jobs and fits the space you have.
If you mostly build panels, prioritize long reach and an even jaw arrangement. If you make small frames or repairs, a few compact clamps and spring clamps may cover more of your routine.
For a flexible starter setup, compare the clamp types first, then add a vise, casters or folding bench only when a specific task calls for it. A small, well-matched collection is easier to store and set up than a pile of clamps that do not reach your work.
Frequently asked questions
What woodworking clamps should I buy first?
Start with clamps that match the joints you make most: several bar or parallel clamps for panel glue-ups, a few small clamps for narrow parts, and spring clamps for light, quick holds. Add C-clamps or corner clamps when a specific shape or setup calls for them.
How many clamps do I need for woodworking?
Buy enough clamps to apply pressure at several points along the work, with spacing that keeps the joint closed and aligned. Panel width, joint length and clamp reach all matter, so plan around your usual projects and add clamps as larger glue-ups require.
Are pipe clamps good for woodworking?
Pipe clamps can work well for edge-gluing boards and other wide assemblies because the clamp heads fit different pipe lengths. Check the pipe diameter, jaw reach and support feet, and use enough clamps to distribute pressure without bowing the work.
What size casters should I use for a workbench?
Choose casters by the total loaded weight of the bench and tools, then confirm the wheel diameter clears floor cracks and shop debris. The right caster size depends on the bench's weight, floor and mounting height, so check its capacity and the finished bench height before buying.
Do I need a vise on my woodworking bench?
A bench vise is useful when you often hold boards for planing, sawing or detail work. Choose jaw width, opening capacity, mounting style and bench compatibility around your workpieces; clamps may be enough if you mainly assemble parts or work on a portable surface.
Can I use woodworking clamps as spreaders?
Some clamps reverse or convert to spreaders, but many are designed only to squeeze. Check the clamp's specific mechanism and capacity before using it to push parts apart, especially when the work could shift or release suddenly.